For correct idle position, the motor should run smoothly
in the idling mixture without driving the cut off wheel.
The carburetor is preset perfectly at the factory.
Depending on site of deployment, the idle settings may
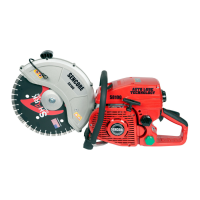
have to be adjusted via the idle stop screw “T” (22).
The carburetor adjustment screws “L” (idle mix control)
and “H” (full load mix control) (23) must only be set by
specialist workshops authorized by us.
Idle stop screw “T”
The idle stop screw “T” can be adjusted with the small screwdriver from the delivery.
Theairltermustbecleanforcorrectadjustment.Airltermaintenance: Chap. 8.4, page 29
Let the engine warm up before performing adjustments.
To set the idle speed indicated in the technical data (chap. 4.6, page 15), proceed as follows – preferably using a speed
meter:
• Idle speed too high (in particular if the cut off wheel is already driven without throttle):
Open the idle stop screw “T” counter-clockwise a little.
• Idle speed too low (i.e. the engine goes out with the idling mixture):
Close the idle stop screw “T” clockwise a little until the engine runs smoothly with the idling mixture without going out.
If a perfect carburetor setting cannot be achieved by turning the idle stop screw “T”, have the carburetor set by a
specialist workshop authorized by us.
8.4 Air Filter Maintenance
Acontaminatedairlterwillreduceoutput.Fuelconsumptionandhazardoussubstancequantityintheexhaustincrease.
Startingismademoredifcultaswell.
Turnvibrationdial(29)toperformroughinterimemptyingoftheairlterduringwork.Theairlterboxandair
lterareshakensothatloosedustfallsoff.Slightlytiltthepowertoolbackandletdustfalloutoftheintake
openings. Turn the vibration dial repeatedly if required.
Interimemptyingoftheairlter
Cleaningtheairlter
Atweeklyintervalsorwhentheengineoutputisclearlyreduced,theairltermustberemovedandcleanedthoroughly.
Dangerofcontaminationforthelterinside!
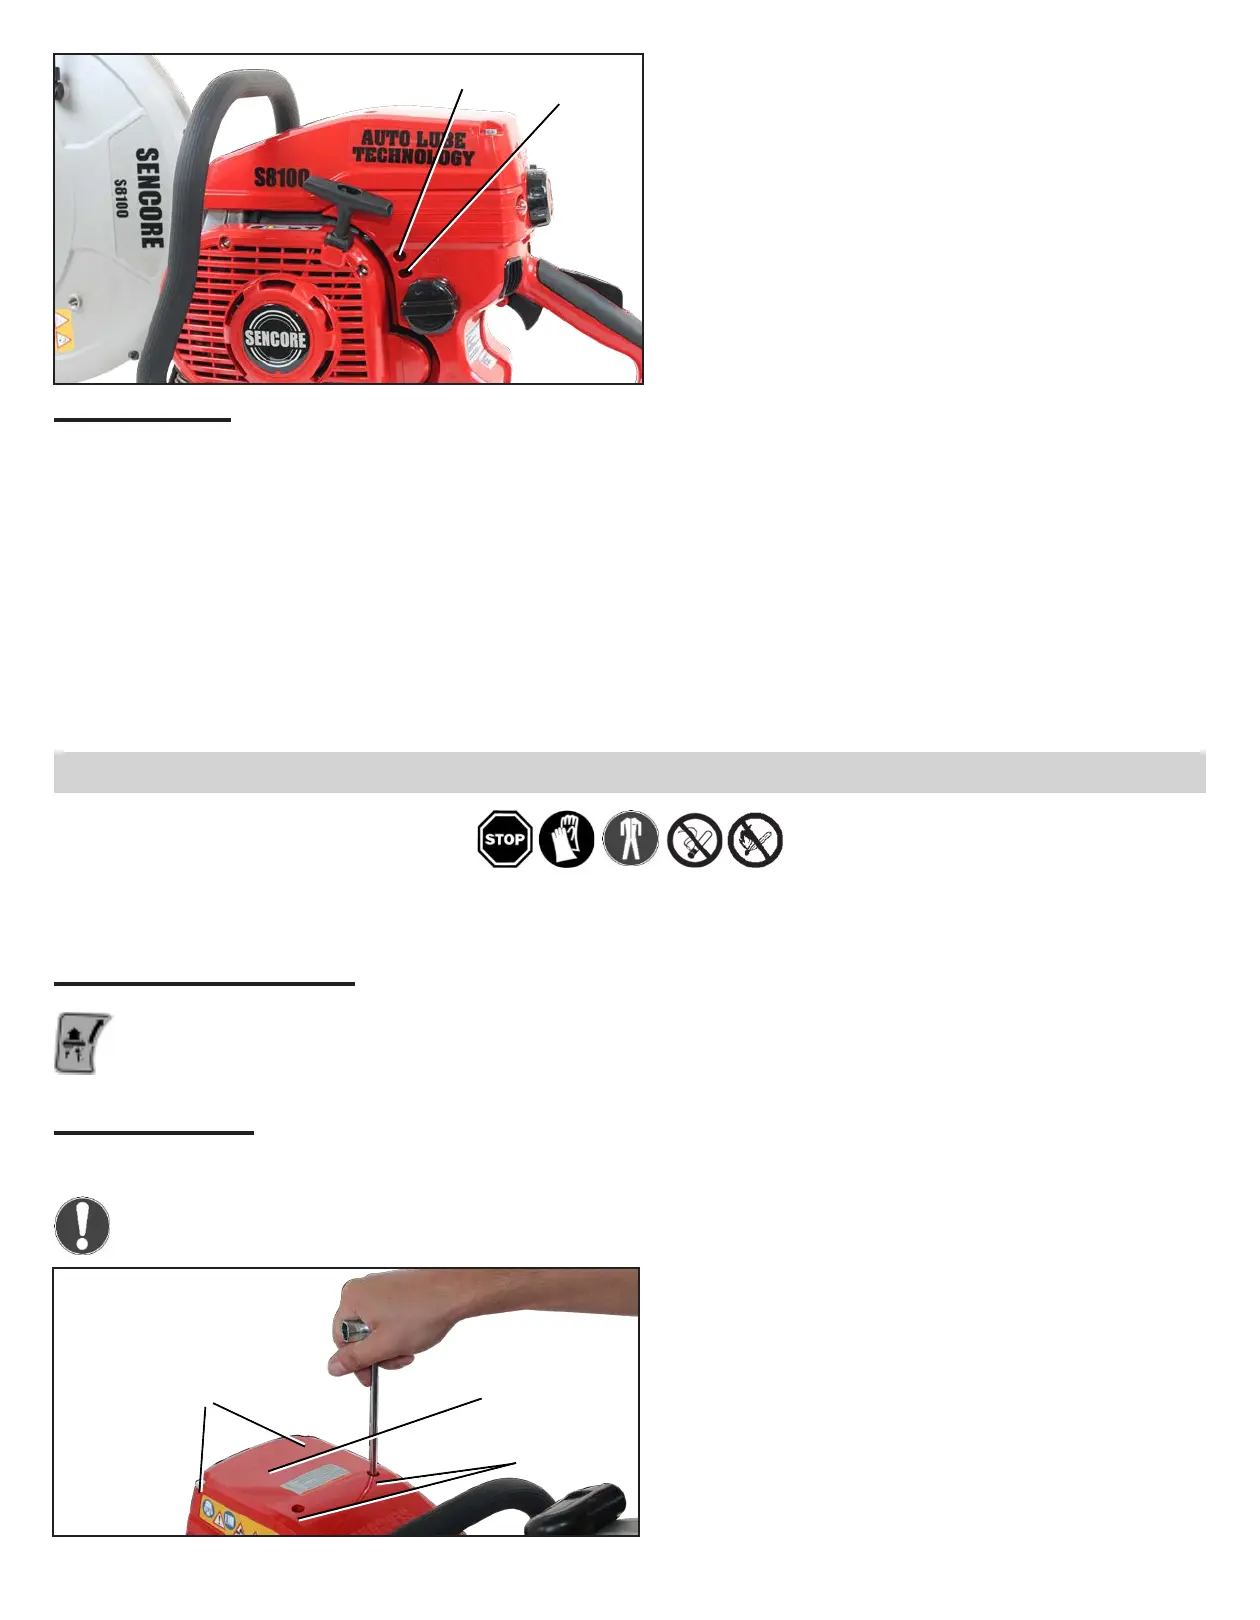
Only open the guard in a clean environment.
• Switch off the engine and turn the stop dial to “0”.
Switching off the engine: Chap. 6.4, page 23
• Loosen all four attachment screws (a) and (b) of the
guard (5). Remove guard.
22
23
a
b
5
SENCORE S8100 CUT-OFF SAW MANUAL 29