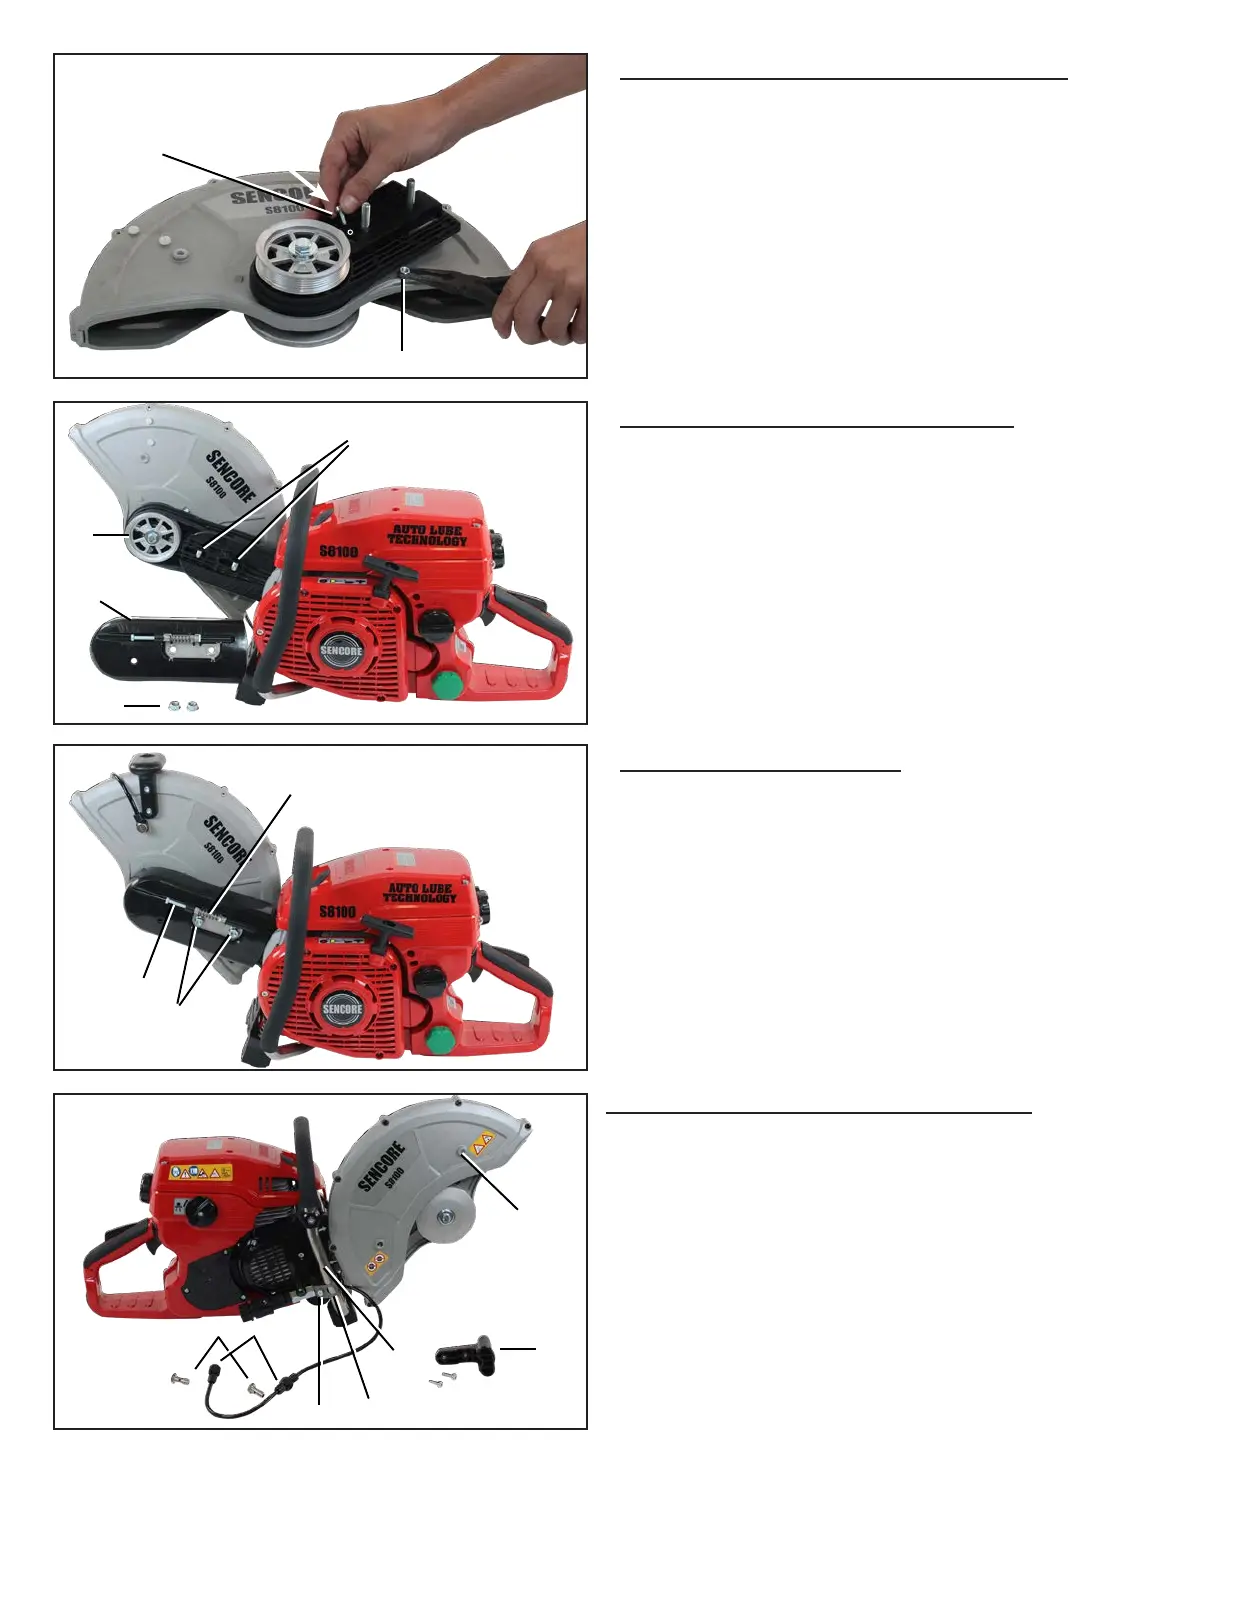
Limit wheel guard rotating angle with screw (k)
• Turn in screw (k) again.
Forthis,guidethenut(n)belowtheassemblyangewithat
pliers and hold it when turning in the screw.
Turning of the wheel guard is limited by the stops on the
wheel guard between which the nut can be moved.
Install cutting device in the outer position
• Put the cutting device on the cutting device carrier in
the outer position. For this, guide both screws (g) of the
assemblyangethroughtheoblongholesandputtheribbed
belt support (i) into the ribbed belt.
• Check that the ribbed belt is running freely.
- Correct placement of the ribbed belt if required.
• Put on the ribbed belt cover (14) again.
Adjust the ribbed belt tension
• Screw both attachment nuts (d) of the ribbed belt cover
onto the assembly ange screws. Only tighten the nuts
manually so that the ribbed belt tension can still be set.
• Turn ribbed belt tension screw (13) towards the right, e.g.
clockwise, to increase the ribbed belt tension). The correct
tension is reached when the square nut (e) is on the center
mark,i.e.between“+”and“−”.
• Tightenbothattachmentnuts(d)rmly.
Move water supply line attachment upwards
The water supply line must be placed so that contact between
water supply line and cut off wheel in operation is excluded in
all positions of the wheel guard.
• Place the water supply line so that it runs on the outside
of the wheel guard and not between the wheel guard and the
assemblyange.
• Push the attachment screws (a) of the water supply line
into the adapter pieces (b).
• Place the adapter pieces on the right and left sides of the
wheel guard above the associated threaded holes (p) and
screw in the water supply line attachment screws.
• Loosen the screw (q) of the clamp (r) until the clamp can be moved upwards at the blank spar of the top handle (s).
• Push the clamp upwards so far that the water supply line can never be in contact with the cut off wheel.
• Check placement of the water supply line when the wheel guard is rotated all the way to the front and correct if required.
k
n
d
i
g
14
d
e
13
p
3
s
r
q
a
b
SENCORE S8100 CUT-OFF SAW MANUAL 21