PRODUCT INSTRUCTION MANUAL
Page 2 of 29
Wrong wiring will lead to breakdown or electrical shock of thetransmitter, please read this operation man-
ual clearly before installation.
• Make sure to remove AC power from the transmitter before wiring input and output connections and
before opening the transmitter housing.
• Install the transmitter in a well ventilated area. Avoid installing in areas receiving direct sunshine.
• The material of signal cable should be special coaxial cable. Strongly recommend using our coaxial
cable. Do not use normal wires instead.
• Avoid electrical surge when using power, especially when using three-phase power, use ground wire
correctly.
• The internal relay contact of the transmitter is for alarm or control function. You must connect to an
external relay which can withstand enough current to ensure safe operation of the transmitter. Please
refer to chapter 4.2“Terminal Functions”
Part 2 Installation Precautions
Part 3 Assembly and Installation
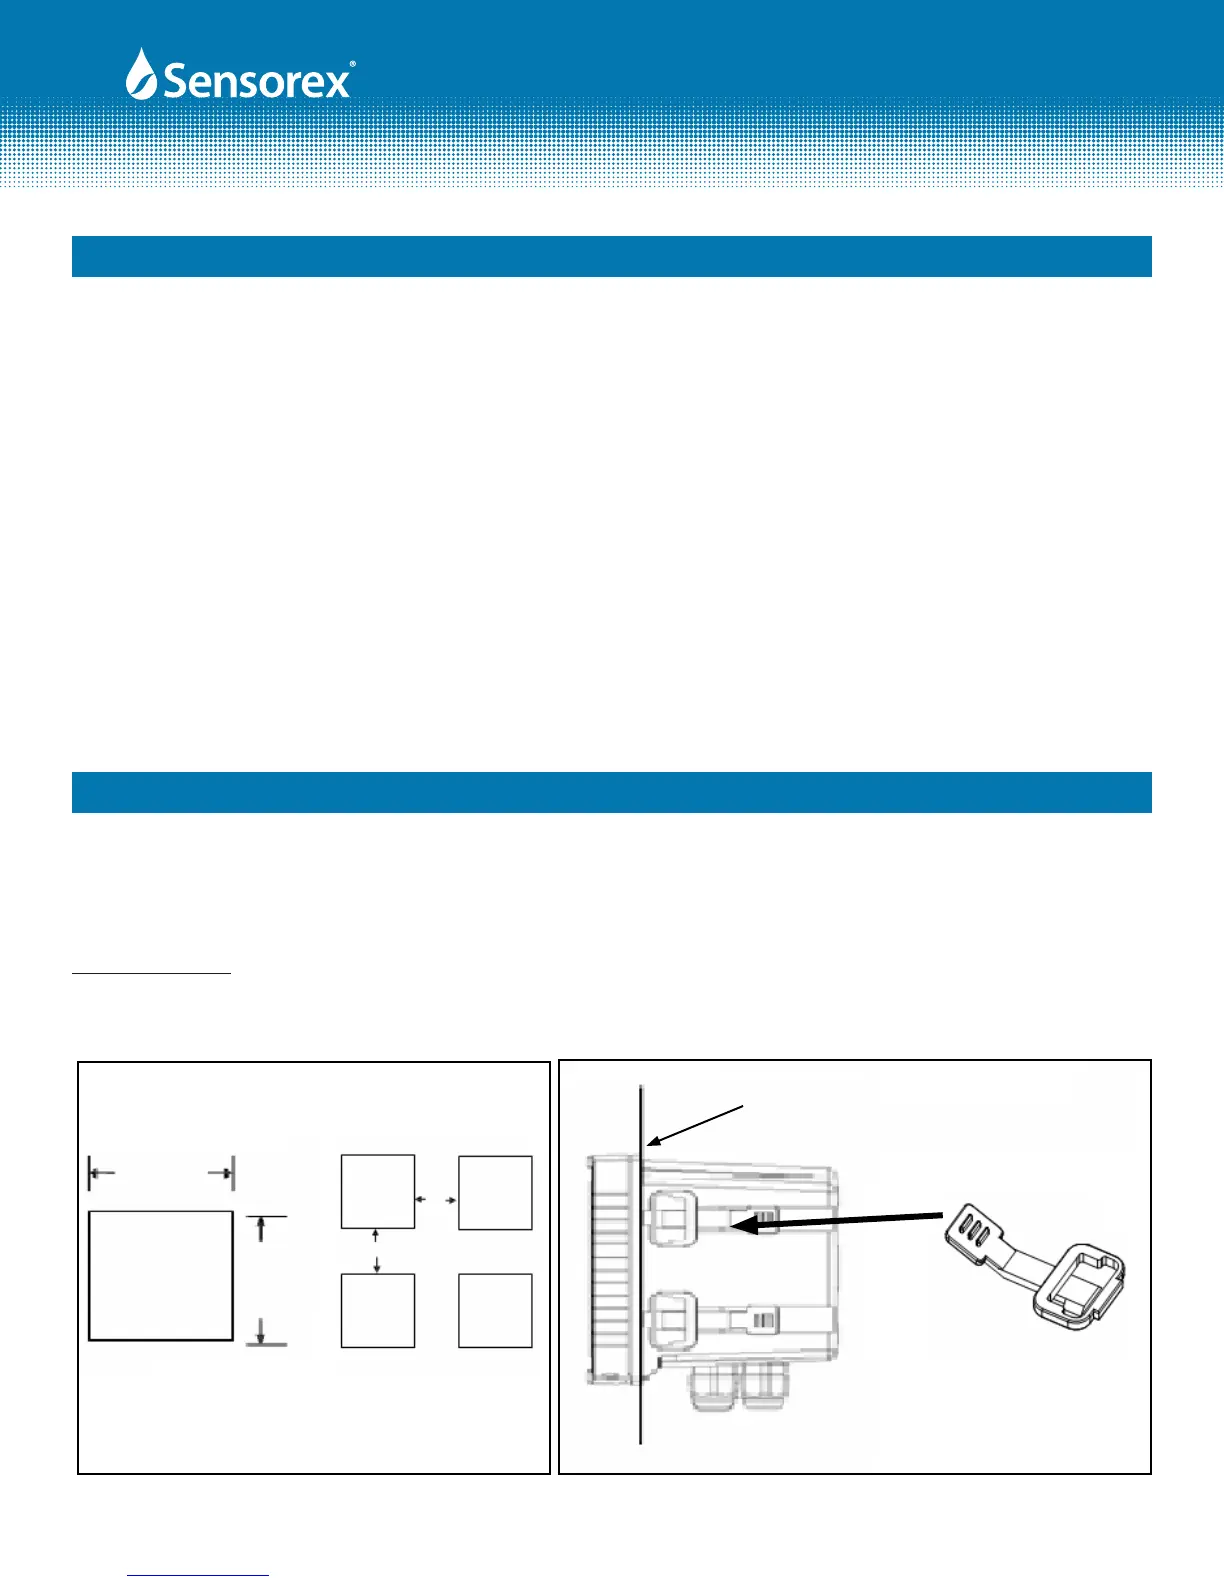
3.1 Transmitter installation: This transmitter can be installed by panel mounting, wall mounting and pipe
mounting.
Panel Mounting: Cut a square hole of 5.4"(138mm) x 5.4"(138mm) on the panel, and then insert the trans-
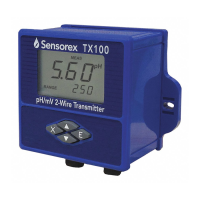
mitter directly into the panel. Attach the mounting bracket from the rear, so that it attaches to groove.
FIG 3-1
Form: INSTRTX3000-Rev A
Side View with
mounting brackets
Mounting
Bracket
4x
Panel
Panel Cutout
5.4"(138mm)
5.4"(138mm)
minimum distance between
TX3000 panel cutouts = 1.7"(42mm)