+49 33631 59 650
info@sensys.de
www.sensys.de
Manual
SBL10
41 / 69
Version 1.27
Project Settings7.4.1
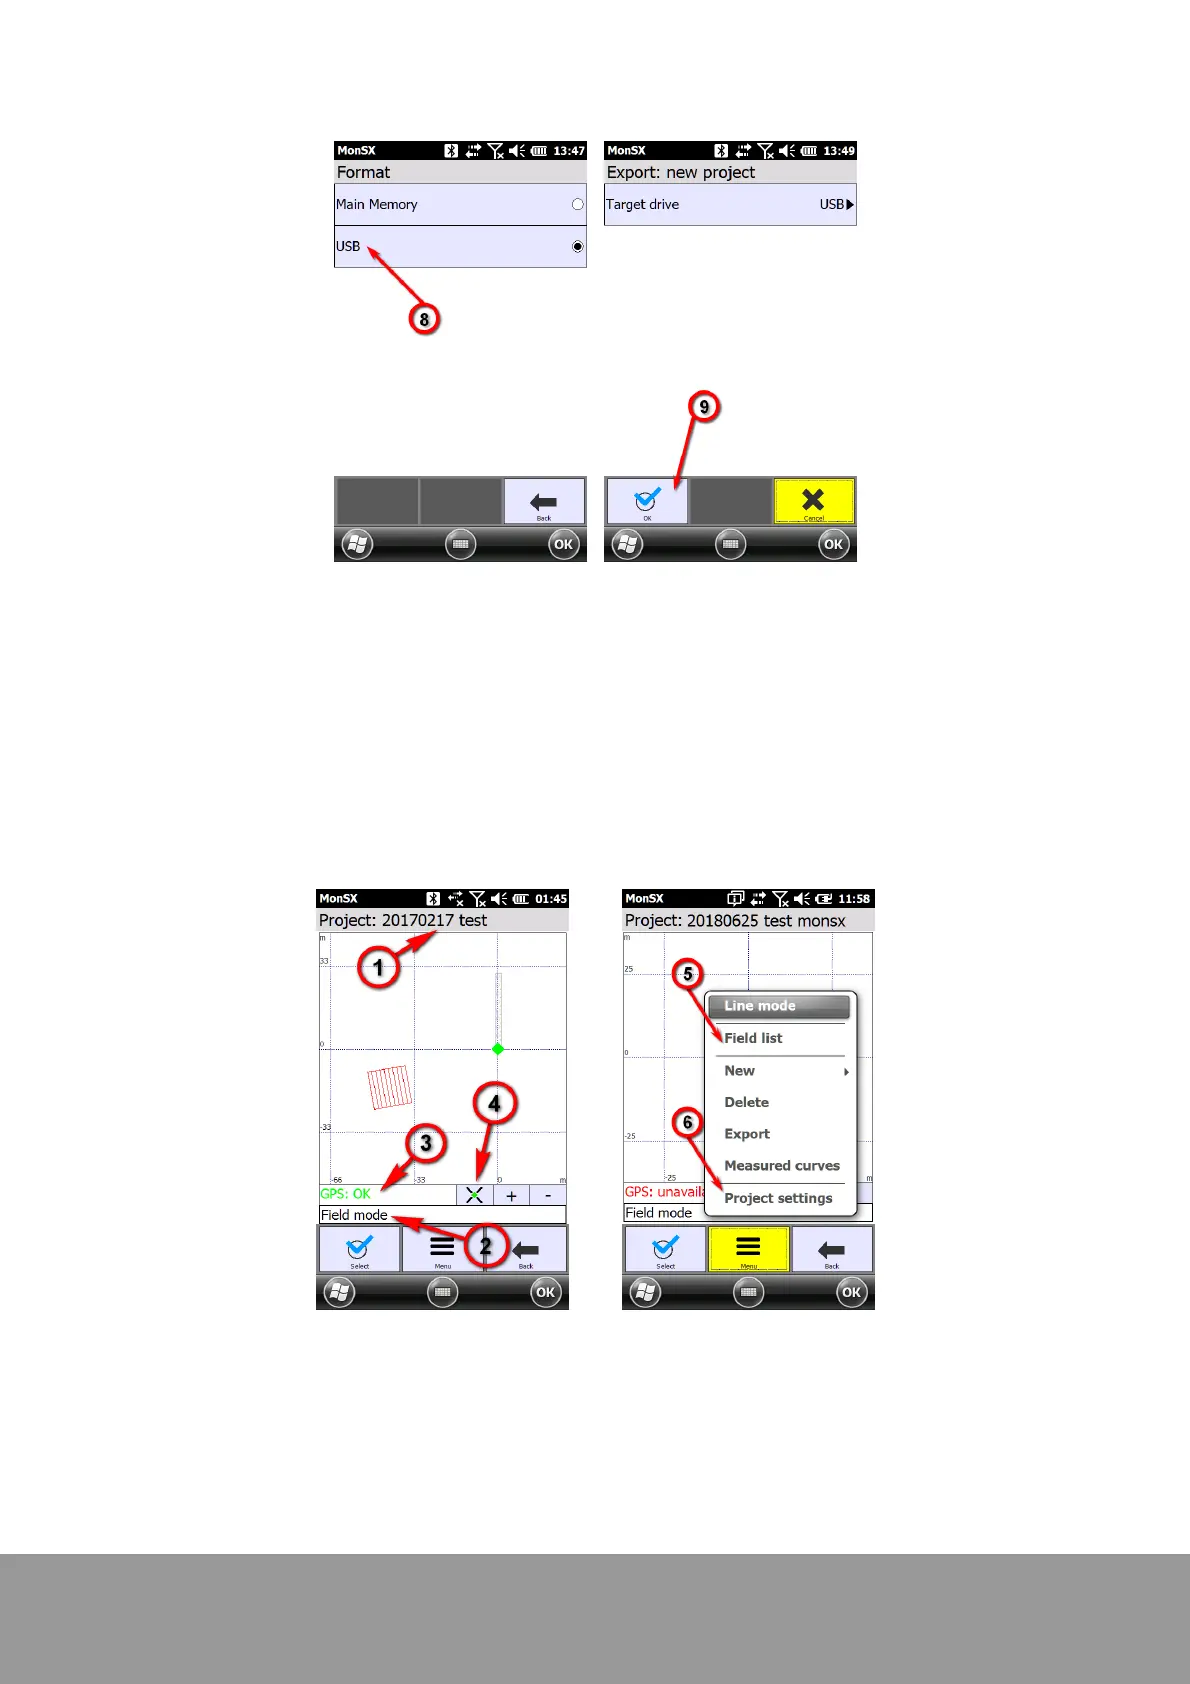
First make sure that a project was created. If this is the case, the a project dialog can be opened by
activating a project or by tapping on "Measurement" in the welcome screen. The project view
contains all relevant project information such as project title (1), current measurement mode (2)
which appears alternately along with the operator, and the GPS status (3) as well as the fields
which have been created or measured before. The green dot indicates the current GPS position in
the field map. The "+" and "-" buttons at the lower edge of the field map allow for zooming. The
center button (4) allows for centering to the current GPS position (or to the GPS position which was
measured last if no current data is available).
Measurement modes
There are two modes available - field mode and line mode. The currently set mode is displayed in
the project view (2). It can be modified by tapping on the menu. Field mode is suitable for field and
borehole measurements which can be eventually georeferenced. Line mode is suitable for single
tracks for which a GPS start and stop point is available.