EasyManuals Logo

Sharp MX-M264N Installation Manual

Sharp MX-M264N
65 pages
To Next Page IconTo Next Page
To Previous Page IconTo Previous Page
Page #19 background imageLoading...
Page #19 background image
MX-M264U MX-DS16/DS17 (LOW STAND/HIGH STAND) 6 – 2
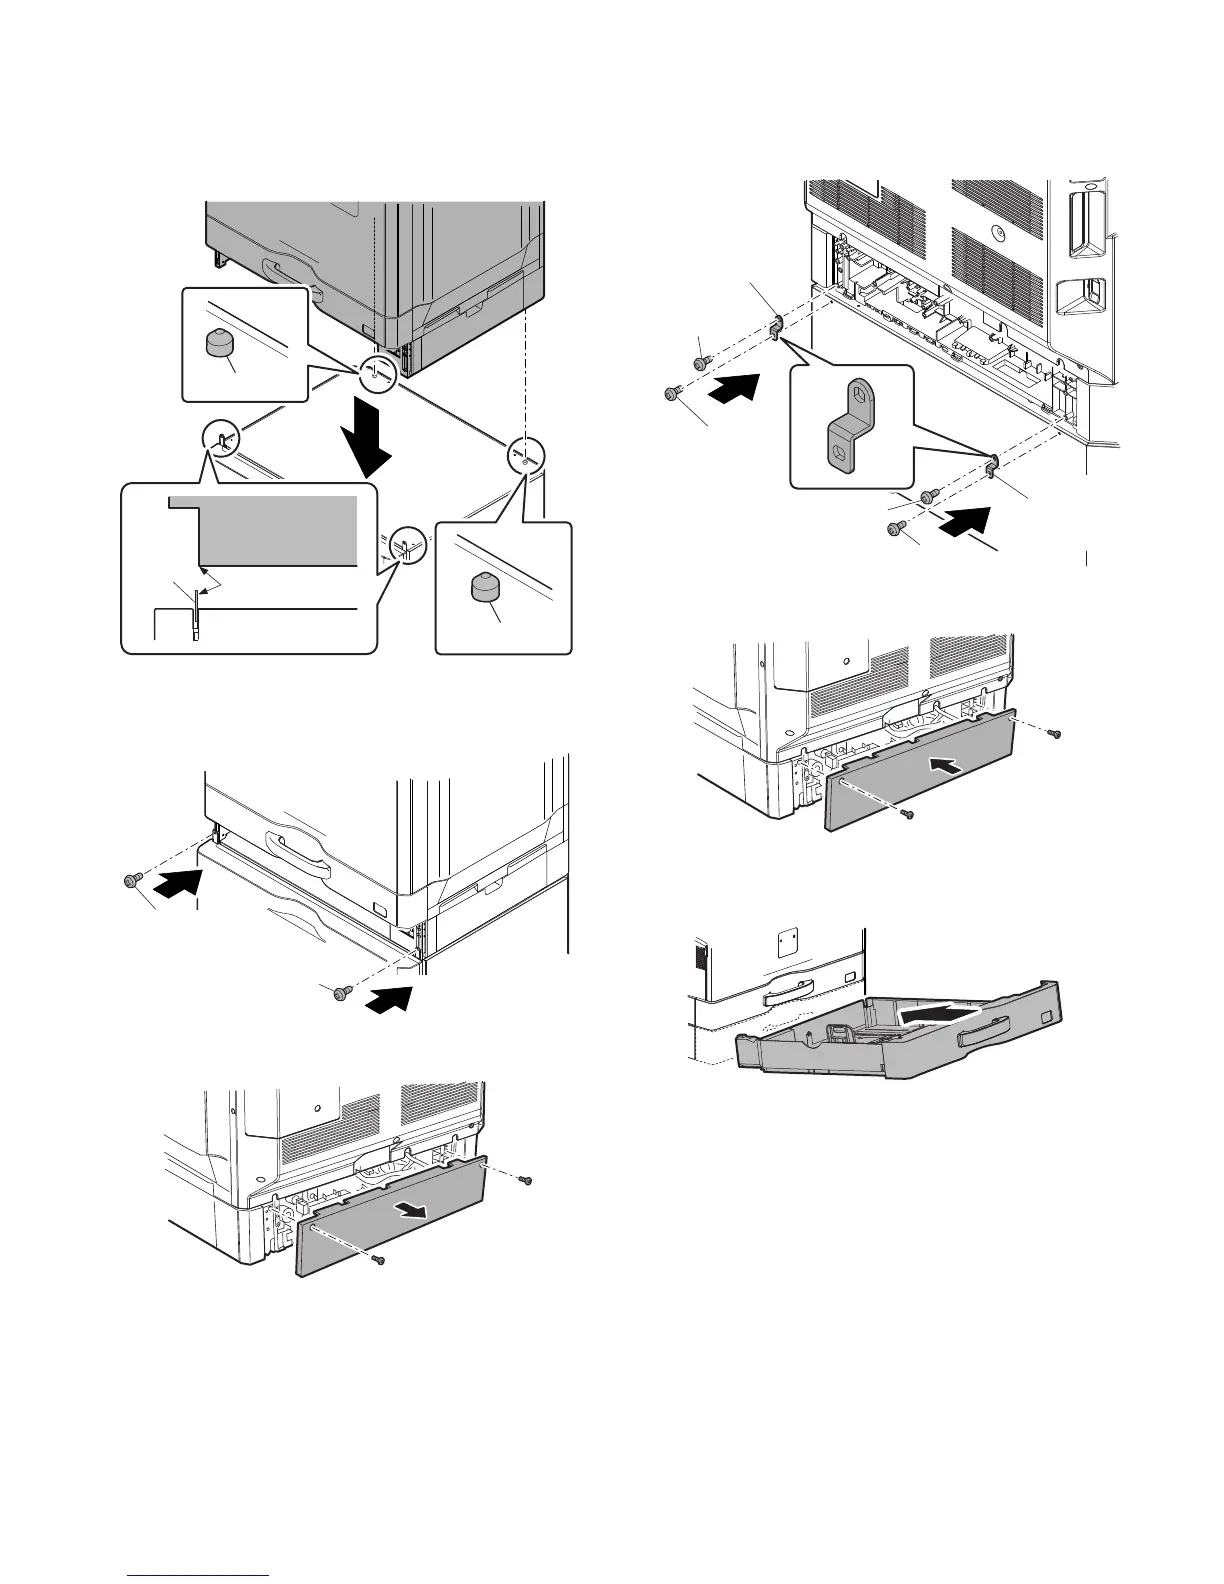
4) Put the copier (or the paper feed unit) on the desk.
Insert the positioning pins (2 pcs.) of the desk into the position-
ing holes of the copier (or the paper feed unit).
At that time, be careful not to break the fixtures on the desk
side.
5) Connect the copier with the desk.
Connect the copier with the desk with two screws (P tight,
packed together with the copier) and the fixture.
6) Remove the two screws, and remove the rear cover.
7) Connect the copier (or the paper feed unit) and the desk with
two screws (P tight) and two screws (S tight) packed together
with the copier. When connecting, be careful of the direction of
the connecting fixture of the copier.
8) Attach the rear cover, and fix it with the two screws.
9) Install the paper tray.
Install the paper tray to the original position.
ུఘ
Positioning pin
Copier
Be careful not to hit.
Machine stand
Fixture
Positioning pin
Front side
Screws (P tight)
Screws (P tight)
Back side
Copier
connecting
fixture
Screws (P tight)
Screws (P tight)
Screws (S tight)
Copier
connecting
fixture
Screws (S tight)

Table of Contents

Other manuals for Sharp MX-M264N

Questions and Answers:

Question and Answer IconNeed help?

Do you have a question about the Sharp MX-M264N and is the answer not in the manual?

Sharp MX-M264N Specifications

General IconGeneral
Print TechnologyLaser
FunctionsPrint, Copy, Scan, Fax
Print Speed26 ppm
Max Print Resolution600 x 600 dpi
Standard Paper Capacity1100 sheets
Max Paper Capacity2100 sheets
Automatic DuplexingYes
ADF Capacity100 sheets
Scan Resolution600 x 600 dpi
Copy Speed26 cpm
Copy Resolution600 x 600 dpi
ConnectivityEthernet, USB

Related product manuals