EasyManuals Logo

Sharp MX-M264N Installation Manual

Sharp MX-M264N
65 pages
To Next Page IconTo Next Page
To Previous Page IconTo Previous Page
Page #25 background imageLoading...
Page #25 background image
MX-M264U MX-TE10 (EXIT TRAY UNIT) 8 – 1
MX-M264U
Service Manual
[8] MX-TE10 (EXIT TRAY UNIT)
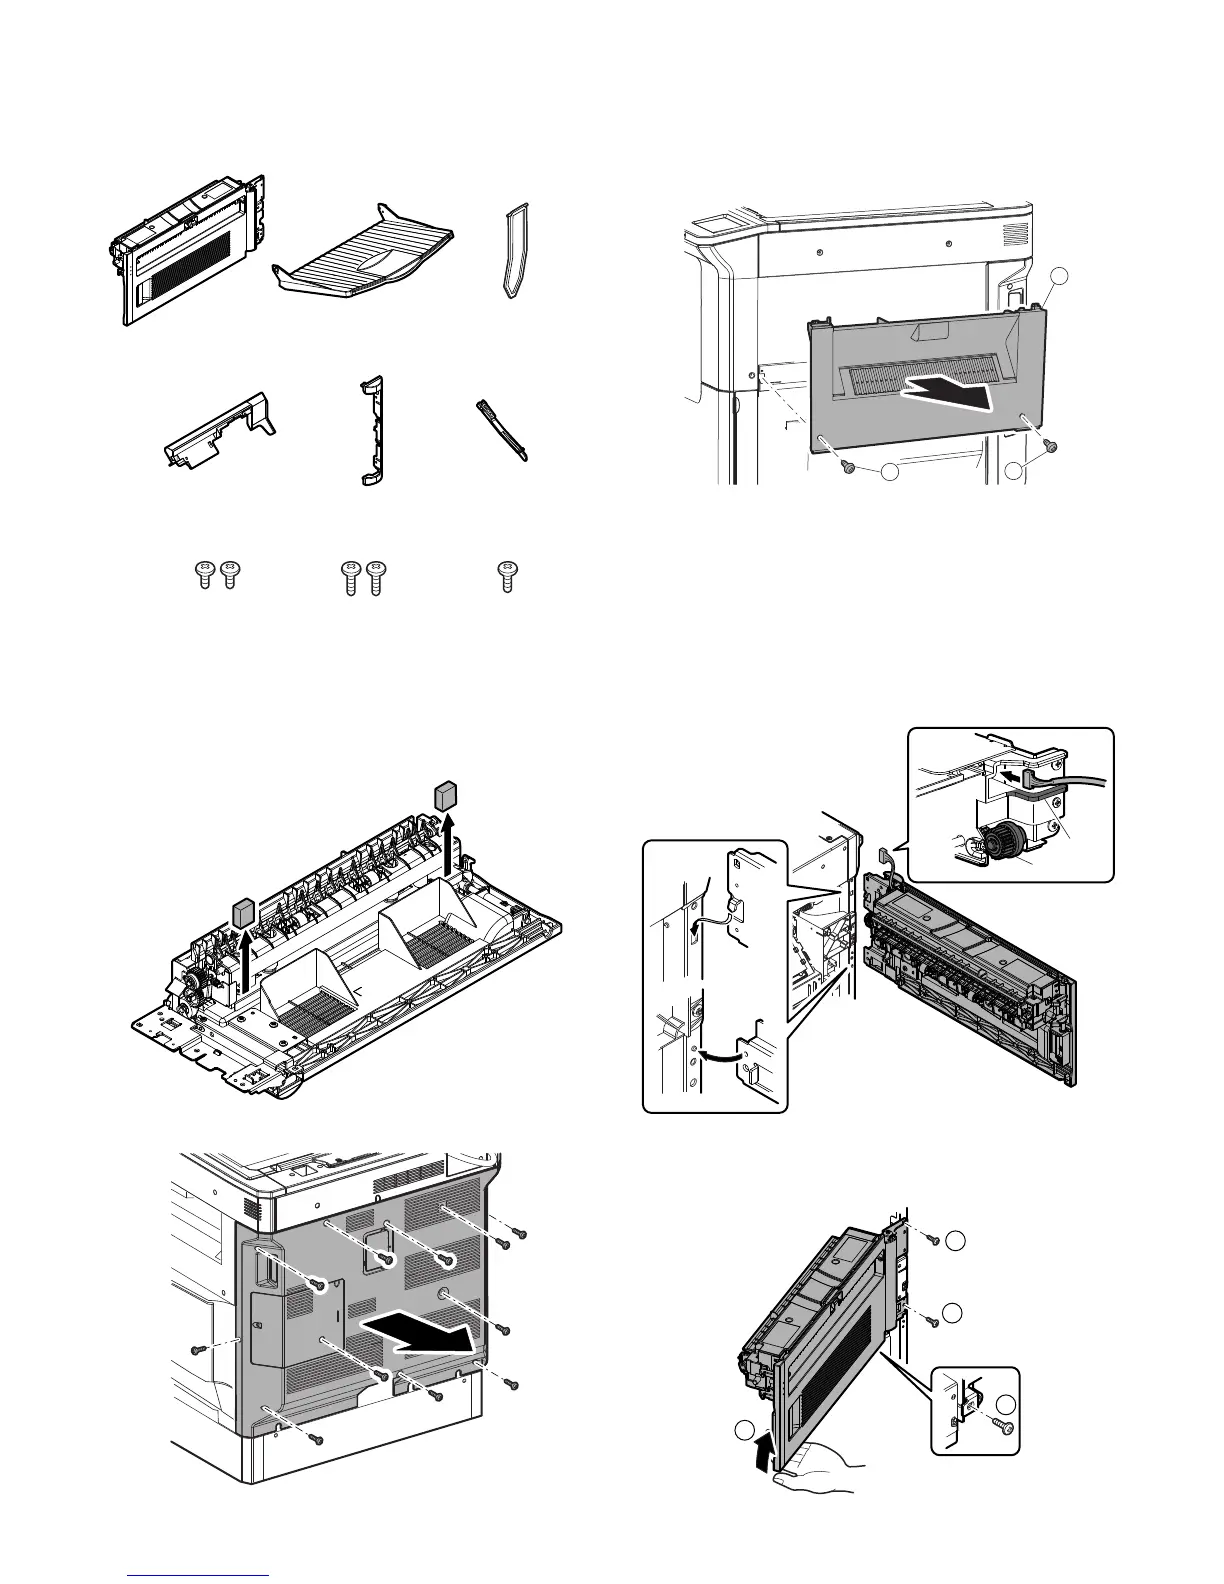
1. Parts included
2. Installation
NOTE: Turn off the main switch of the machine and then remove
the power plug of the machine from the outlet.
1) Remove two EPE cushions.
2) Remove five screws and remove the rear cabinet.
3) Remove two screws and remove the right cabinet unit.
NOTE: One of the removed screws is used in the step 6).
4) Insert the harness of the right paper exit unit to the hole of the
second paper exit.
NOTE: Wire the harness to the upper of the rib.
If wiring it to the under of the rib, the harness may
come into contact with the gear.
5) Insert the pawl of the right paper exit unit to the oval hole of the
frame of the main unit.
Insert the positioning boss of the main unit to the round hole in
lower side.
6) When tightening the screw, tighten in the sequence of (1), (2),
(3) and (4).
Paper exit unit Paper exit tray Paper holding arm
Harness cover OP
Screw (M3 x 4)
Paper exit
right cover
Right paper
exit actuator
Screw (M4 x 10) Screw (M3 x 8)
2
1
11
Rib
Gear
3
2
1
4

Table of Contents

Other manuals for Sharp MX-M264N

Questions and Answers:

Question and Answer IconNeed help?

Do you have a question about the Sharp MX-M264N and is the answer not in the manual?

Sharp MX-M264N Specifications

General IconGeneral
Print TechnologyLaser
FunctionsPrint, Copy, Scan, Fax
Print Speed26 ppm
Max Print Resolution600 x 600 dpi
Standard Paper Capacity1100 sheets
Max Paper Capacity2100 sheets
Automatic DuplexingYes
ADF Capacity100 sheets
Scan Resolution600 x 600 dpi
Copy Speed26 cpm
Copy Resolution600 x 600 dpi
ConnectivityEthernet, USB

Related product manuals