EasyManuals Logo

Sharp MX-M264N Installation Manual

Sharp MX-M264N
65 pages
To Next Page IconTo Next Page
To Previous Page IconTo Previous Page
Page #28 background imageLoading...
Page #28 background image
MX-M264U MX-TR11 (JOB SEPARATOR) 9 – 2
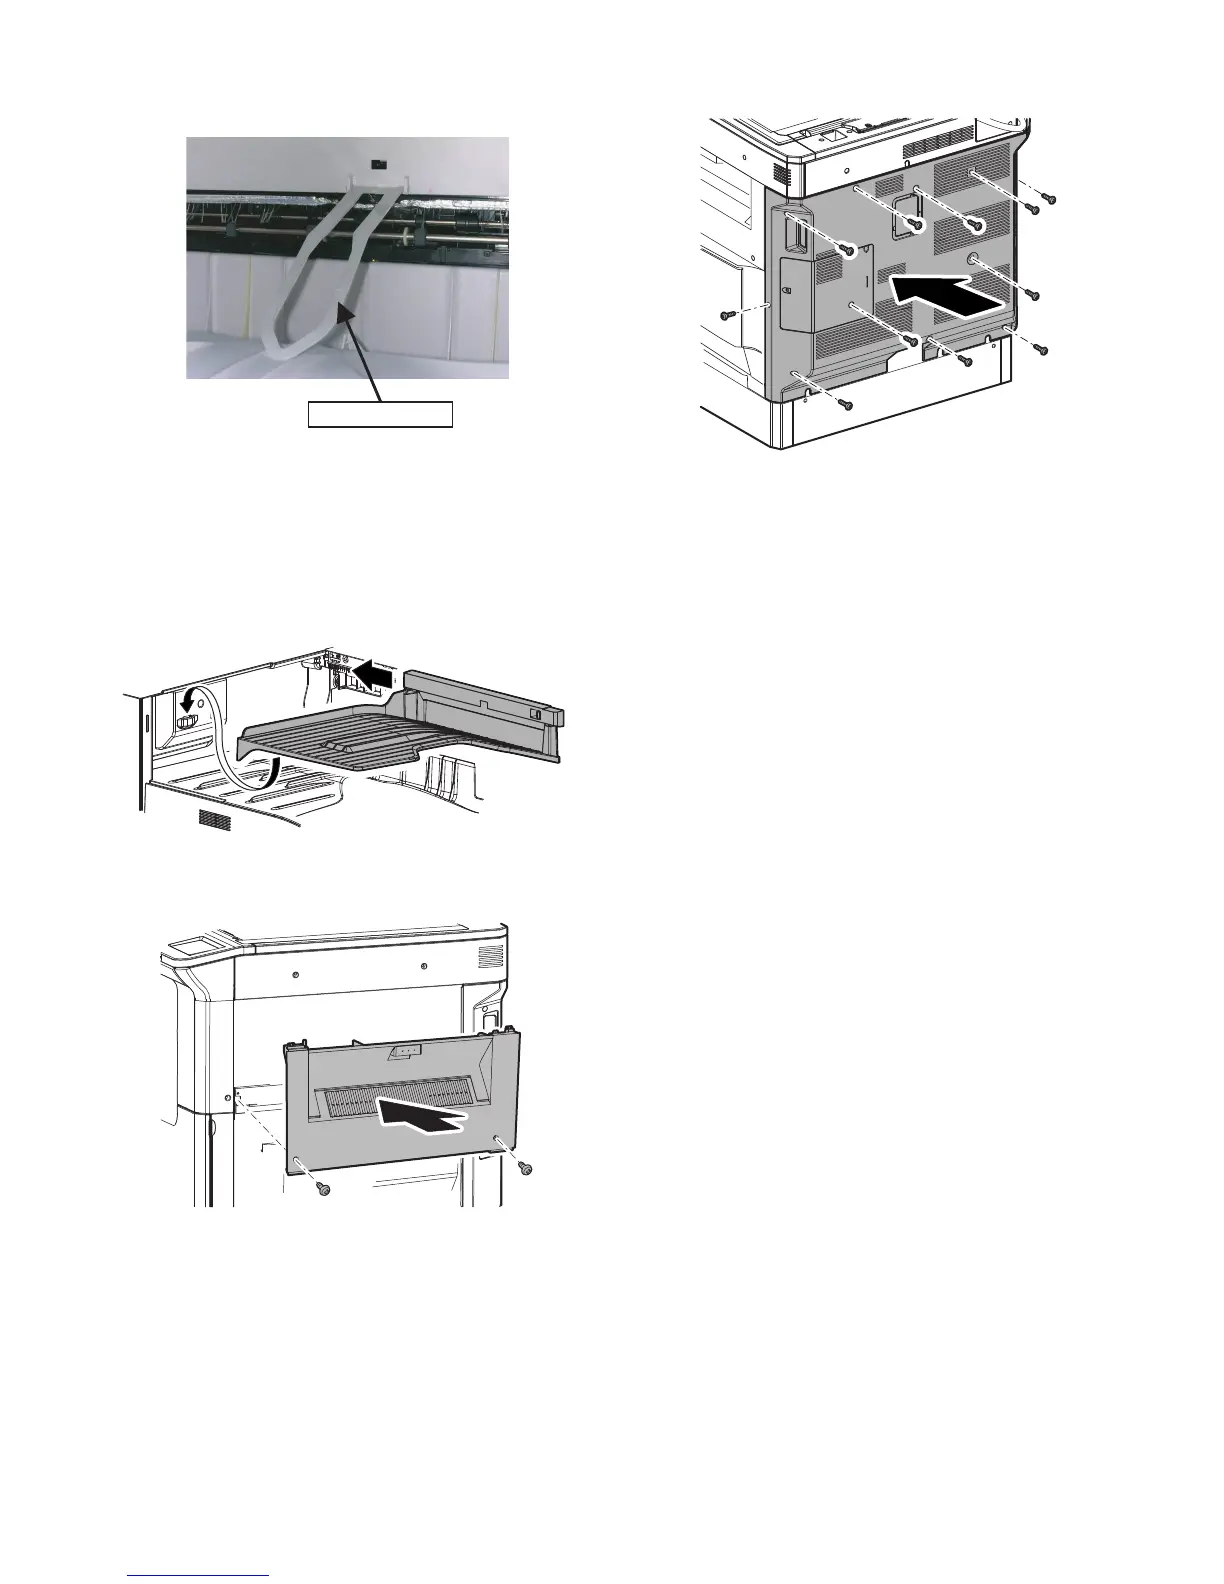
7) Remove the paper holding arm, install it to job separator AS.
(Same as the current state)
8) Install the second paper exit tray holder. (New part)
M4 P tight tightening
9) Install the job separator tray AS.
10) Install the rail dummy cover part to the guide rail so that slide
the over part from front side to rear side.
After that, insert the rib of tray part to the location of insertion of
the second paper exit tray holder.
Check that it is caught while being pushing up the tray.
11) Install the right cabinet AS.
M4 x 10 P tight (2pcs)
12) Install the rear cabinet.
13) Job separator setting in simulation 26-1.
Paper holding arm

Table of Contents

Other manuals for Sharp MX-M264N

Questions and Answers:

Question and Answer IconNeed help?

Do you have a question about the Sharp MX-M264N and is the answer not in the manual?

Sharp MX-M264N Specifications

General IconGeneral
Print TechnologyLaser
FunctionsPrint, Copy, Scan, Fax
Print Speed26 ppm
Max Print Resolution600 x 600 dpi
Standard Paper Capacity1100 sheets
Max Paper Capacity2100 sheets
Automatic DuplexingYes
ADF Capacity100 sheets
Scan Resolution600 x 600 dpi
Copy Speed26 cpm
Copy Resolution600 x 600 dpi
ConnectivityEthernet, USB

Related product manuals