EasyManuals Logo

Sharp MX-M264N Installation Manual

Sharp MX-M264N
65 pages
To Next Page IconTo Next Page
To Previous Page IconTo Previous Page
Page #37 background imageLoading...
Page #37 background image
MX-M264U AR-SU1 (STAMP UNIT) 16 – 2
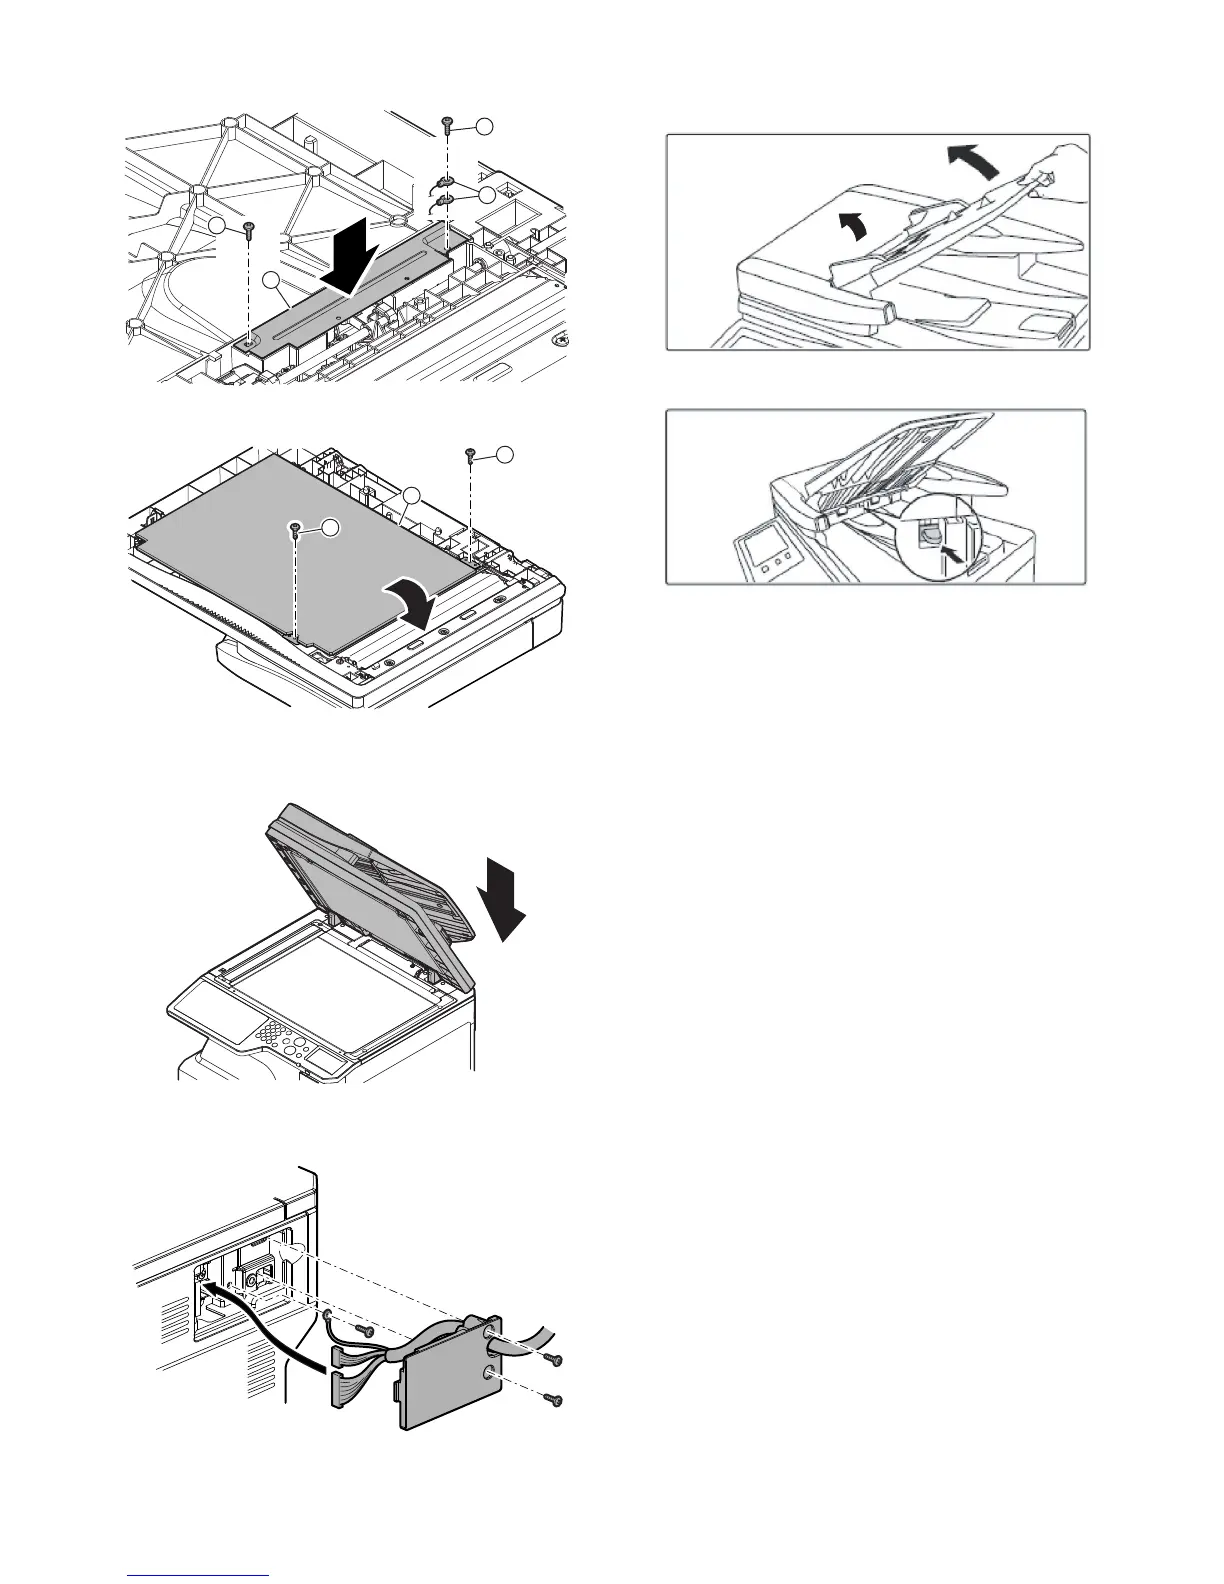
4) Install the sensor cover.
5) Close the OC mat.
C. RSPF unit attachment
1) Attach the RSPF unit to the main unit.
2) Connect the connector, and attach the earth wire. Attach the
rear upper cabinet cover.
D. Finish stamp cartridge attachment
1) Open the left cover, and open the document tray.
2) Attach the finish stamp cartridge.
E. Turn ON the power of the main unit
1) Connect the power plug of the machine to the power outlet,
and turn ON the main power switch and the operation panel
power switch.
F. Installation check
1) Use SIM22-10 to check to confirm that the finish stamp (AR-
SU1) is recognized.
1
3
3
2
2
2
1

Table of Contents

Other manuals for Sharp MX-M264N

Questions and Answers:

Question and Answer IconNeed help?

Do you have a question about the Sharp MX-M264N and is the answer not in the manual?

Sharp MX-M264N Specifications

General IconGeneral
Print TechnologyLaser
FunctionsPrint, Copy, Scan, Fax
Print Speed26 ppm
Max Print Resolution600 x 600 dpi
Standard Paper Capacity1100 sheets
Max Paper Capacity2100 sheets
Automatic DuplexingYes
ADF Capacity100 sheets
Scan Resolution600 x 600 dpi
Copy Speed26 cpm
Copy Resolution600 x 600 dpi
ConnectivityEthernet, USB

Related product manuals