MX-M264U MX-KB14 (KEYBOARD) 22 – 2
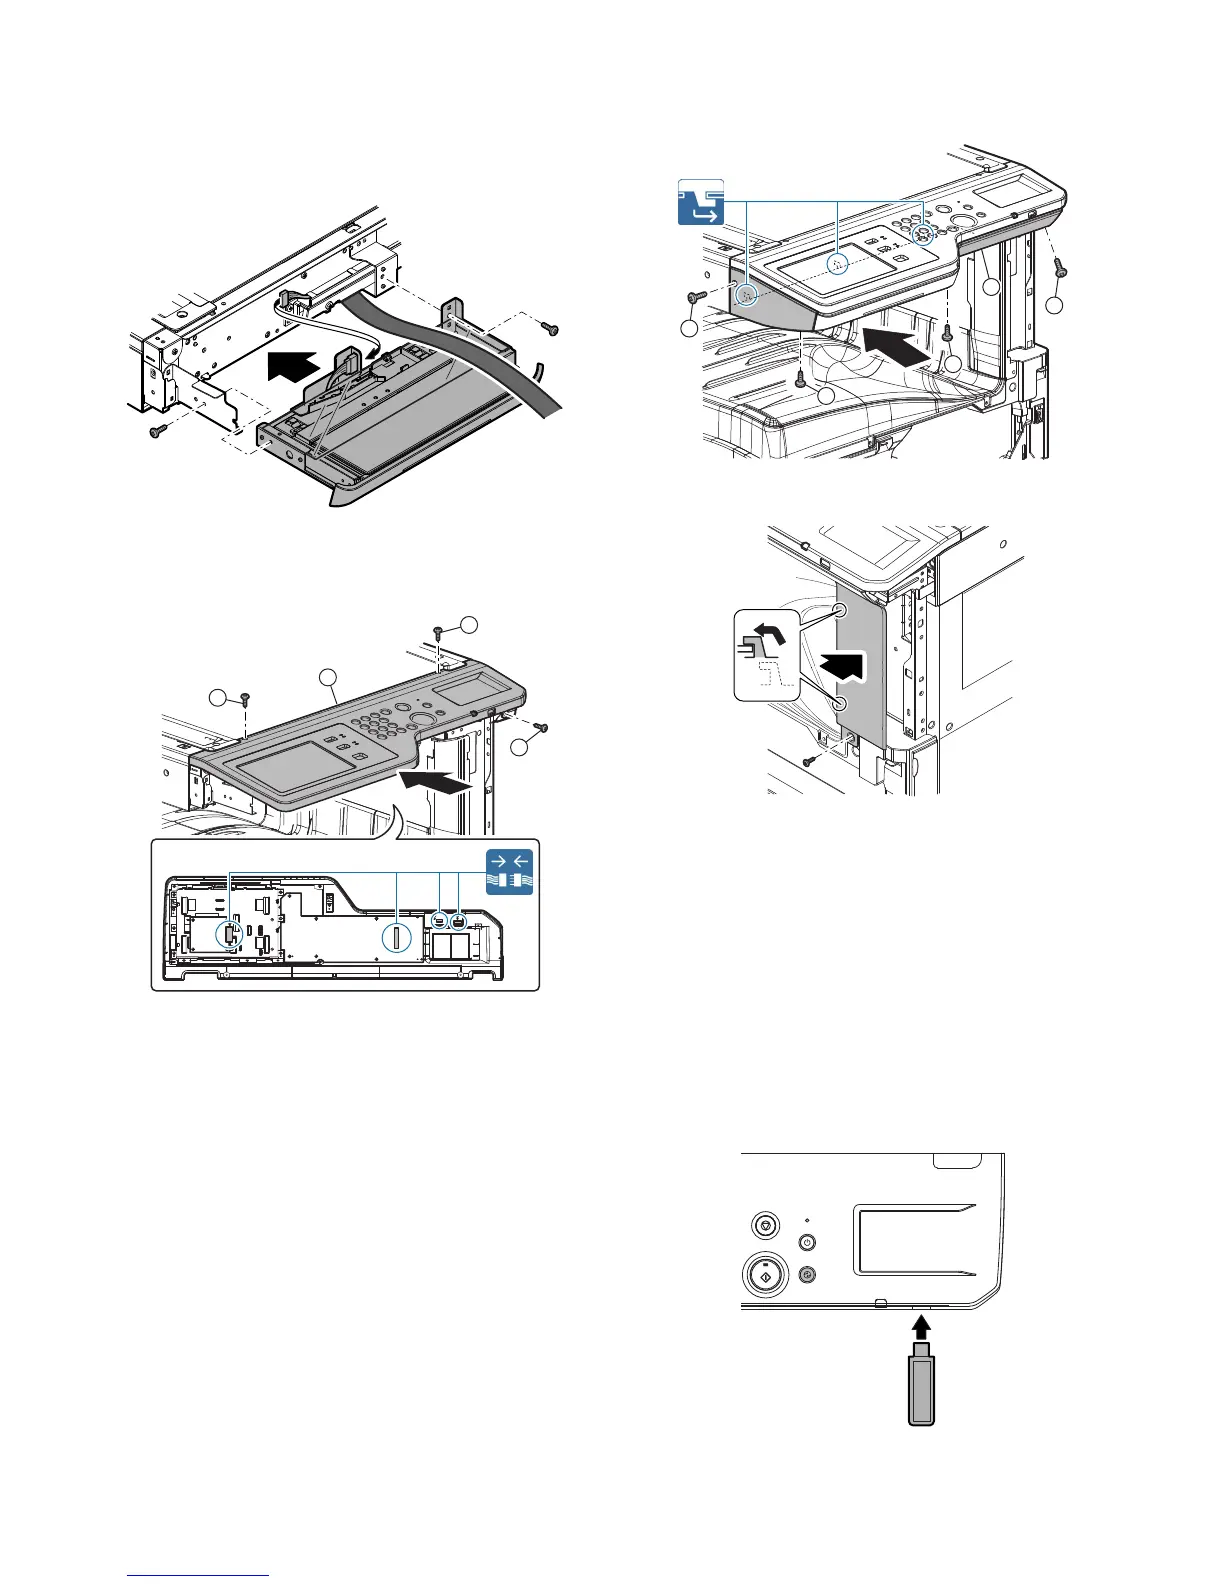
2) Attach the keyboard unit and fix it with the fixing screw (M4 x 8
S-tight, M3 x 8 S-tight).
Connect the connector.
NOTE: Attach the keyboard unit so that the flat cable is above
the keyboard unit.
D. Operation panel attachment
1) Connect the connector, and attach the operation panel unit.
E. External fixture attachment
1) Attach the operation panel base plate.
2) Attach the front cabinet upper.
F. Turn ON the power of the main unit
1) Connect the power plug of the machine to the power outlet,
and turn ON the main power switch and the operation panel
power switch.
G. Keyboard input check
1) Touch [Image send] on the touch panel.
2) Touch [File name] on the touch panel.
3) Push the keyboard, and check the input display on the touch
panel.
H. USB operation check
1) Insert a USB memory into the USB connector of the operation
panel.
2) Check to confirm that the recognition memory of the USB
memory is displayed on the operation panel.