4
6
MENU
MENU 1
I
DATE/T I ME
l DISPLAY
:
%FT
*SUMR TIME
bSETT
I NG
OFF
DATEtTIME
ll:SYDNEY
OFF
iI
38*hIg5
v
A
SET
IPAGE
[.
1
A
ISET
1
1.
I
A
ISET
1
MENU
MENU 1
DATE/T I ME
q;;;gy
OFF
DATEtTIME
MENU 1
DATE/T I ME
l
DI
SPLAY
ON
WSEL ECT
DATEtTlME
MENU
1
DATE/T I ME
0
01 SPLAY
ON
bDATE+T
I
ME+DATE’
10: 30 AM
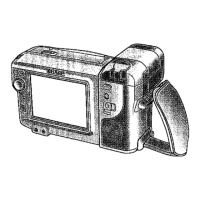
RECORDING THE DATE AND
TIME
Follow the procedure shown below to record the
date and time, or the date only,ialong with the
subject.
Set the Operate switch to CAMERA.
Press the MENU button to display MENU
1.
If MENU 2 is displayed, press the PAGE button
(0)
to get MENU 1 on the monitor.
Press the
V
or A button to move the
)
pointer
to “DISPLAY”.
Press the SET button to select “AUTO”, “ON”, or
“OFF”.
When “ON” is selected,
the date/time is
continuously displayed and recorded along with
the subject.
When “AUTO” is selected,
the date/time is
displayed and recorded for
IO
seconds at the
beginning of the first recording that day.
When “OFF” is selected,
the date/time is
neither displayed nor recorded.
Note:
Select “AUTO” if continuous date/time display annoys you
during recording.
5
Press the
V
or
A
button to move the b pointer
to “SELECT”.
6
Press the SET button to select
“DATE+TIME”
or
“DATE”.
Both the date and the time are displayed and
recorded when
“DATE+TIME”
is selected; only
the date is displayed and recorded when “DATE”
is selected.
7
Press the MENU button to turn off the menu
display, and then press the REC START/STOP
button to start recording.
Notes:
l If you want to record the date and time again for
10
seconds after the date and time display disappears,
select “AUTO” again following the procedure 2 to 4
above.
l After 10 seconds of recording and display, even if the
date has changed, the date and time will not be
displayed or recorded. Select AUTO or ON again, as in
step 4 above.
28