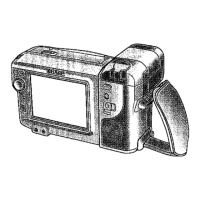
VIDEO jack
RF DC OUT jack
AUDIO L (MONO)
jack
AUDIO
R
jack
AV PACK EJECT button
2
MONIT
.OR
IN jack
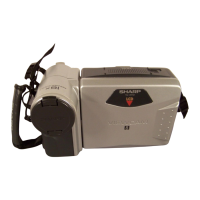
USING THE AV PACK
(OPTIONAL ACCESSORY)
To connect the
VIEWCAM
to a TV which does not
have audio/video jacks, you must use the AV pack
as well as the RF converter
a&
75ohm
coaxtal
cable, available as optional accessories The AV
pack can also be used to connect the
VIEWCAM
to
a VCR for editing or to a TV with audio/video jacks,
Attaching the AV Pack
1
Slide the AV pack terminal cover in the direction
of the arrow and open.
2
Push the AV pack firmly against the AV pack
mounting section until it clicks into place.
Caution:
Do not use the AV pack as a handle, as this will cause
malfunctions.
Detaching the AV Pack
Pull out the AV pack vertically, pressing on the AV
PACK EJECT button on the AV pack.
MONITOR IN JACK
The MONITOR IN jack on the ViewCamport unit is
used to input video pictures from an external source
When you connect the
VIEWCAM
to other video
equipment (for example, a video printer for prints of
screen images, etc.), you can check the video
image on the
VIEWCAM’s
LCD monitor. There is no
need to connect a TV or other external monitor.
Caution:
Do not leave a cable plugged into the MONITOR IN jack
when you watch played-back tapes on a TV or other
monitor connected to the
VIEWCAM.
Notes:
l
It
is not possible to record video images from an external
source by
ustng
the MONITOR IN jack.
l The video input through the MONITOR IN jack takes
priority over played-back video and images from the lens.
Therefore, unplug the cable from the MONITOR IN jack
when it is not being used.
47