17
XV-Z12000
4-1
4-2
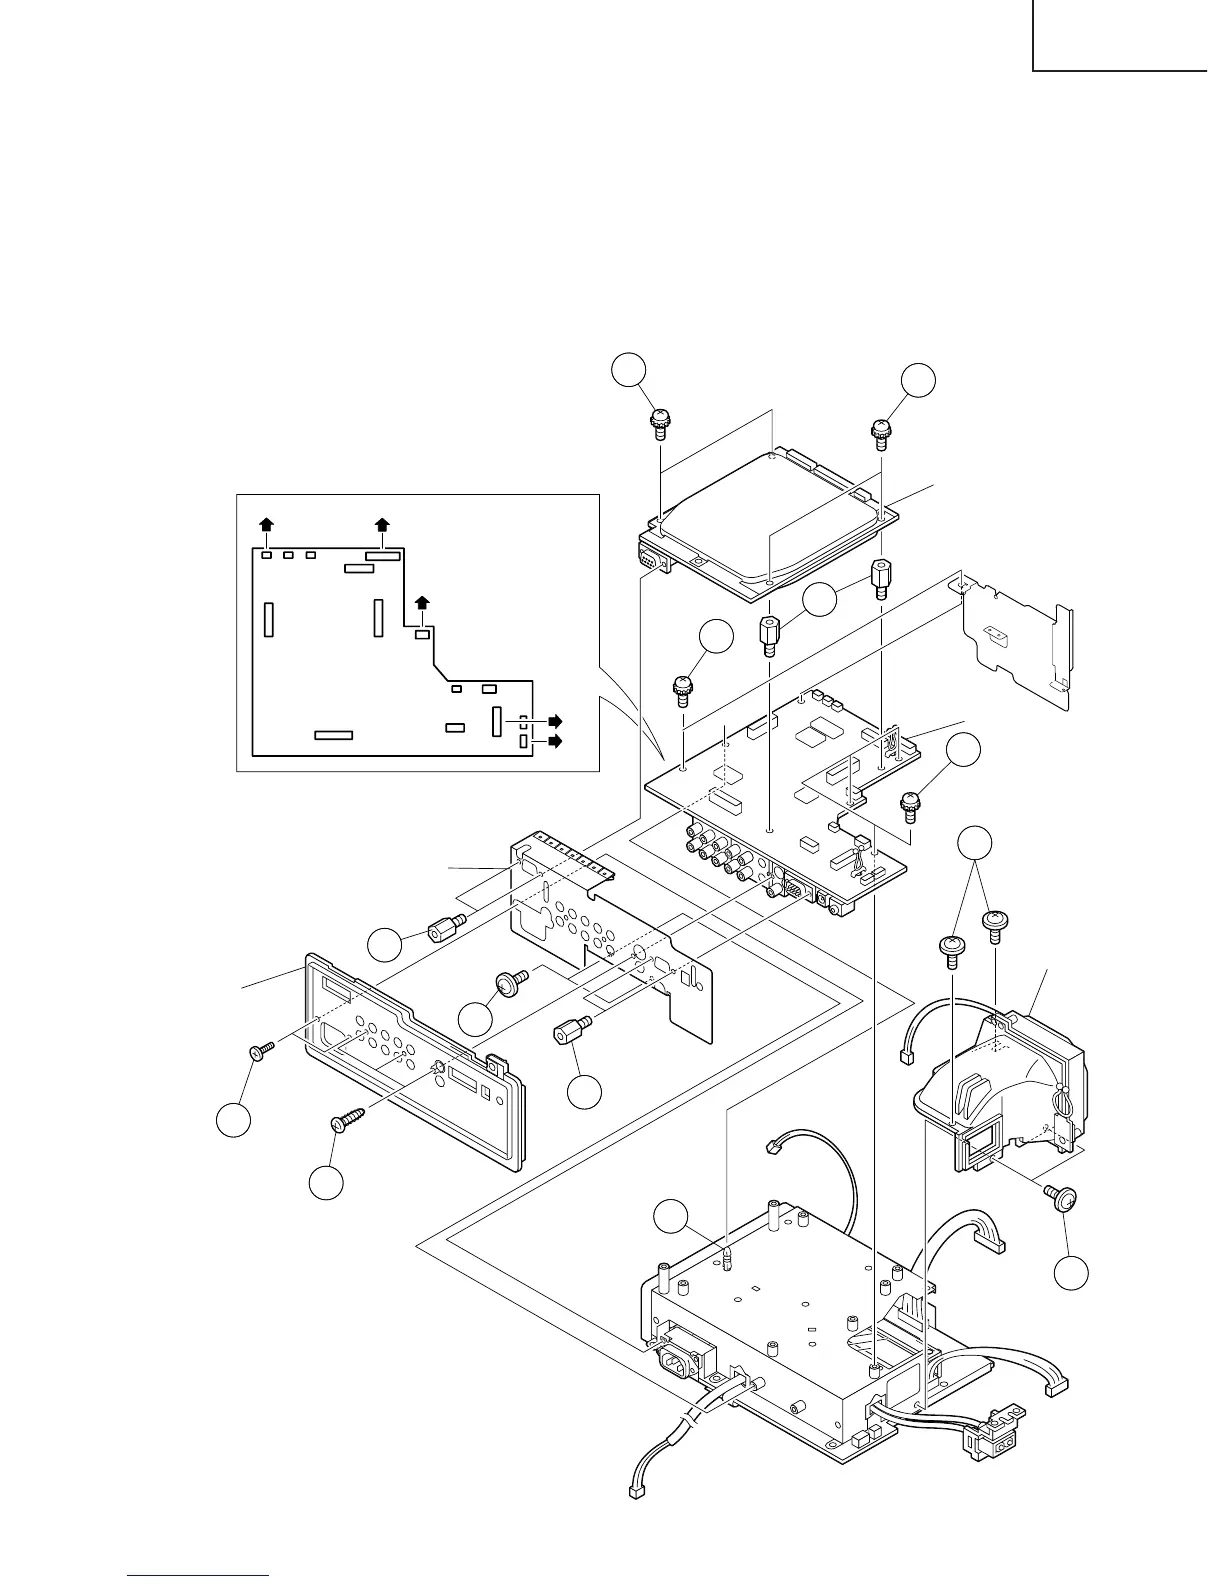
Rear panel
Shield plate
5-1
5-2
5-2
7-1
7-1
8-2
8-2
6-1
PC I/F unit
Main PWB unit
Cooling duct
6-1
(TB) (EA)
(FC)
(EB)
(CA)
8-3
8-1
3. Removing the rear panel, PC unit, cooling duct and main PWB unit.
4-1. Remove the two screws.
4-2. Remove the three screws and detach the rear panel.
5-1. Remove the two screws.
5-2. Remove the four hexagonal supports and detach the shield plate.
6-1. Remove the four screws and detach the PC I/F unit.
7-1. Remove the four screws and detach the cooling duct.
8-1. Remove the two hexagonal supports.
8-2. Remove the five screws and detach the main PWB unit.
8-3. Remove the lock of the holder.
 Loading...