Mark VII Restored Manual - V1.02 – Donated without cost to the world-wide Shopsmith Community - Everett L. Davis 2016 10
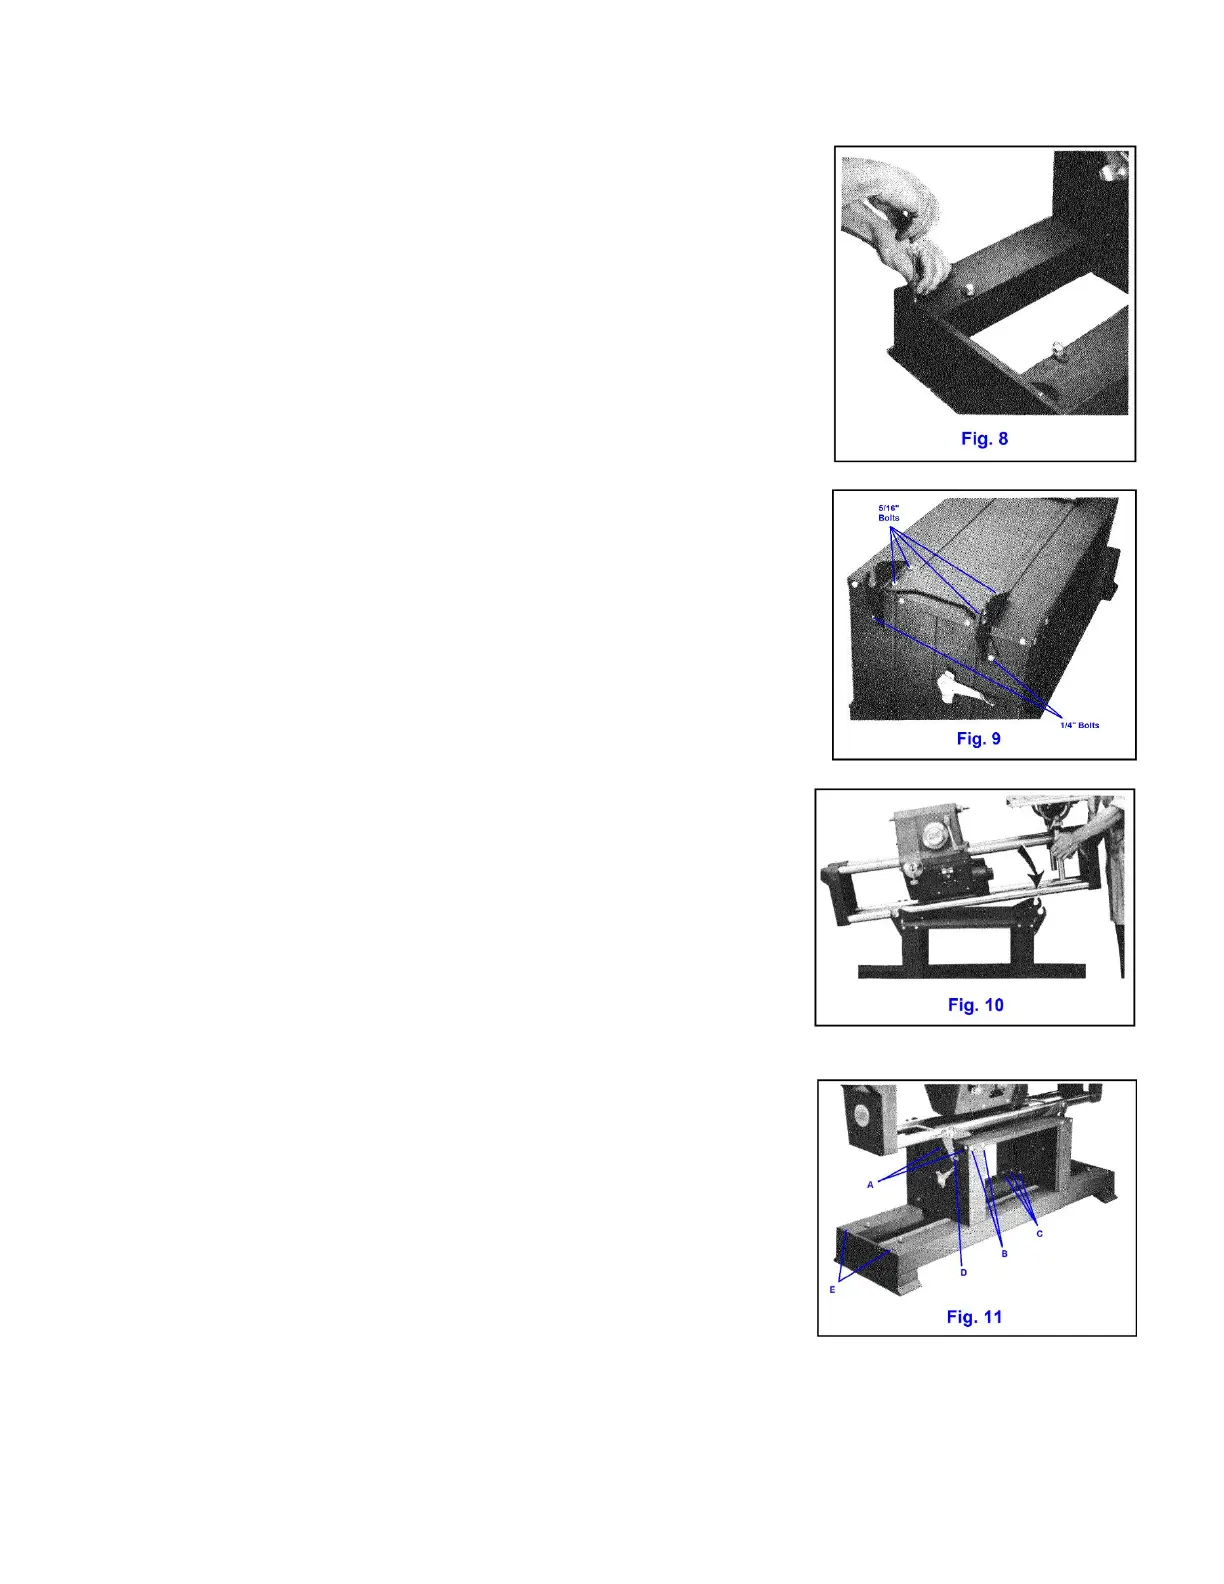
Turn stand right side up and install #6x3/8 sheet metal screw through top
lip of foot into each rail (Fig. 8). Leave them slightly loose until step 7.
4. Mount trunnion brackets on each end of stand (Fig. 9), using four 5 16
-18 x 5/8 hex head bolts with 11/32 x 11/16 plain washers and 5/16 lock-
washers and nuts on the underside to attach each bracket to deck. Leave
these bolts finger tight.
Use two 1/4 -20 x 1/2 hex head bolts, lock washers and nuts on each end
to attach to end frames. Leave these bolts quite loose.
5. Mount tubular bed and power head assembly. Determine front of
stand: Safety latches (No. 10, Fig. 2) are nearer front side. Position
trunnion handles (No. 9, Fig. 2) at 45° so that keys of trunnion are vertical
and set power head and bed assembly in the brackets (Fig. 10). Jockey
brackets until trunnion keys at both ends seat properly and then lock in
place by turning handles down to horizontal position.
6. Tighten trunnion brackets. With trunnions locked, center brackets on
stand both sideways and endways. Then tighten to eight 5/16" bolts
through the deck.
7. "Levelize" the stand. The stand is designed to adapt to small variations
of floor flatness. To adjust stand to your floor, locate the unit where it is
intended to be used and, with headstock centrally positioned on the
ways, grasp headstock and jostle it forward and backward several times.
Refer to Fig. 11 and start by tightening the four truss head screws "A" on
each end of deck (Total 8). Next tighten the eight truss head screws "B"
on front and back of deck. Then tighten the twelve hex bolts "C" holding
end frames to rails and the four 1/4" bolts "D" holding trunnion brackets
to end frames. Last, tighten sheet metal screws "E" at end of rails.