Shure Incorporated
28/59
2.
3.
4.
5.
6.
7.
1.
2.
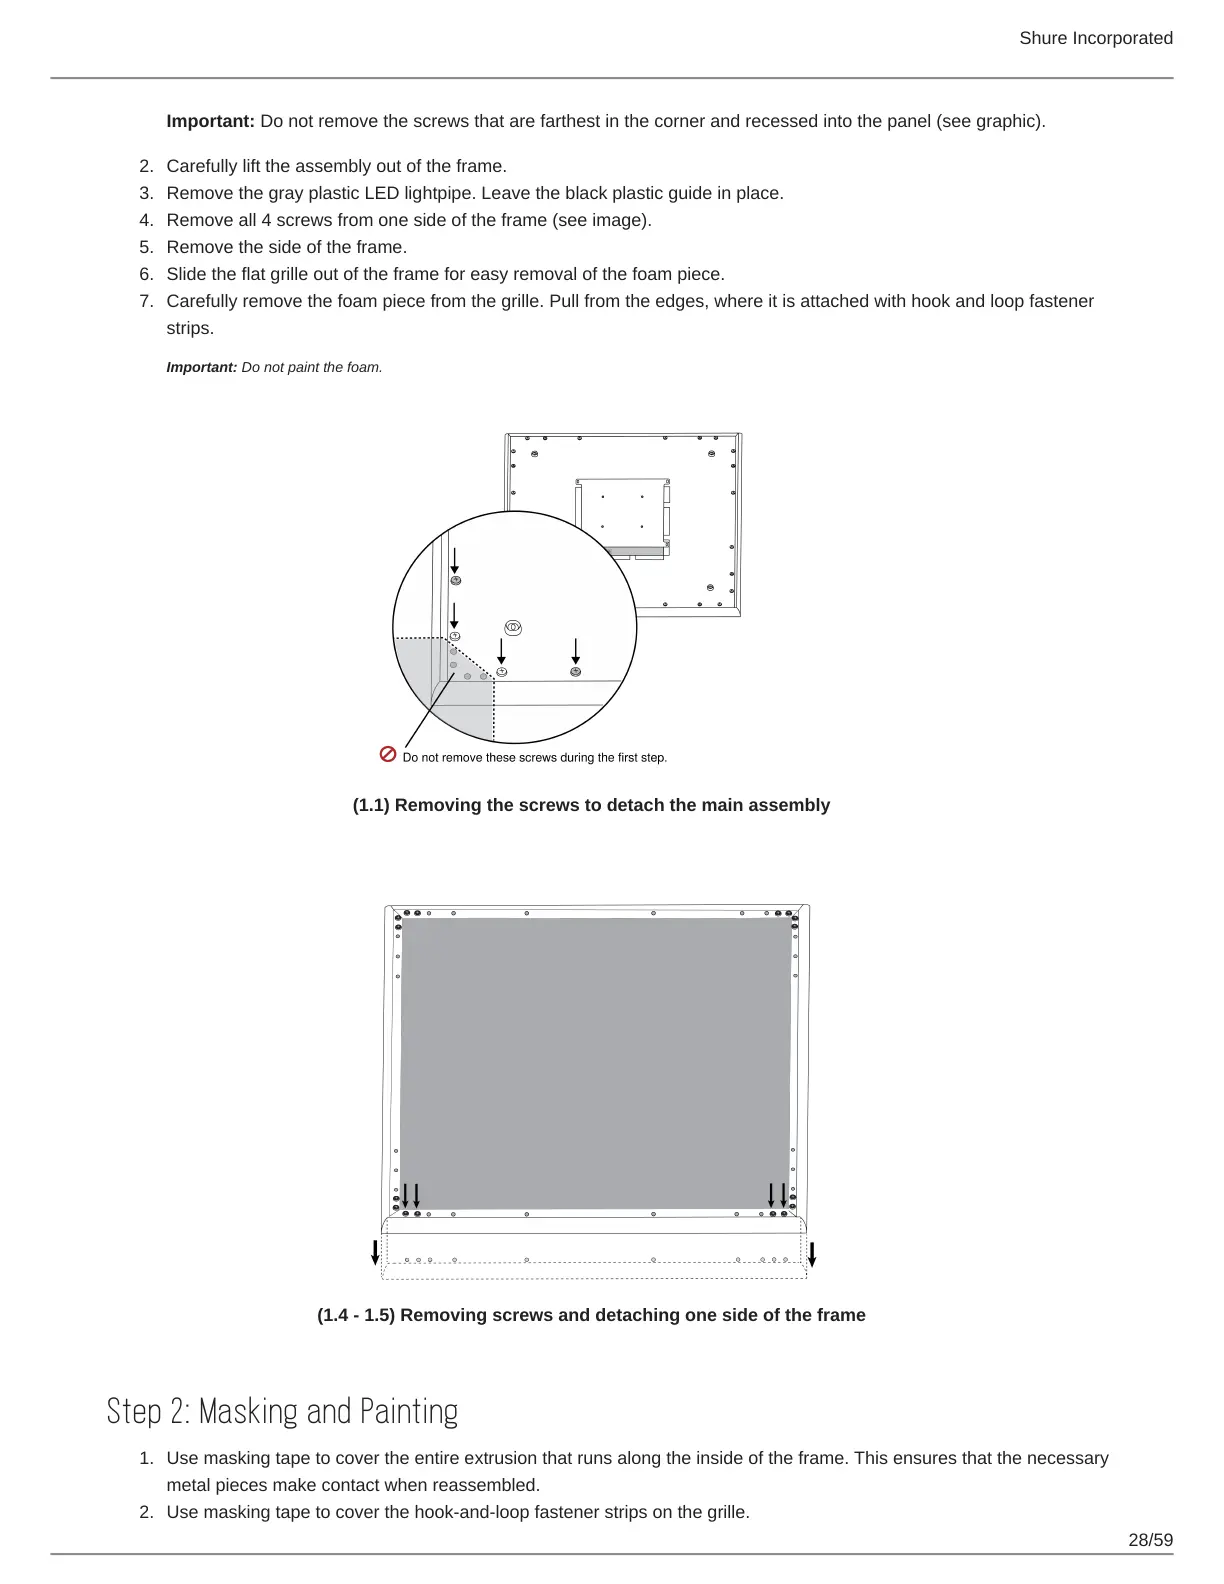
Important: Do not remove the screws that are farthest in the corner and recessed into the panel (see graphic).
Carefully lift the assembly out of the frame.
Remove the gray plastic LED lightpipe. Leave the black plastic guide in place.
Remove all 4 screws from one side of the frame (see image).
Remove the side of the frame.
Slide the flat grille out of the frame for easy removal of the foam piece.
Carefully remove the foam piece from the grille. Pull from the edges, where it is attached with hook and loop fastener
strips.
Important: Do not paint the foam.
(1.1) Removing the screws to detach the main assembly
(1.4 - 1.5) Removing screws and detaching one side of the frame
Step 2: Masking and Painting
Use masking tape to cover the entire extrusion that runs along the inside of the frame. This ensures that the necessary
metal pieces make contact when reassembled.
Use masking tape to cover the hook-and-loop fastener strips on the grille.



 To Next Page