Shure Incorporated
27/59
•
•
1.
Suspension Mounting
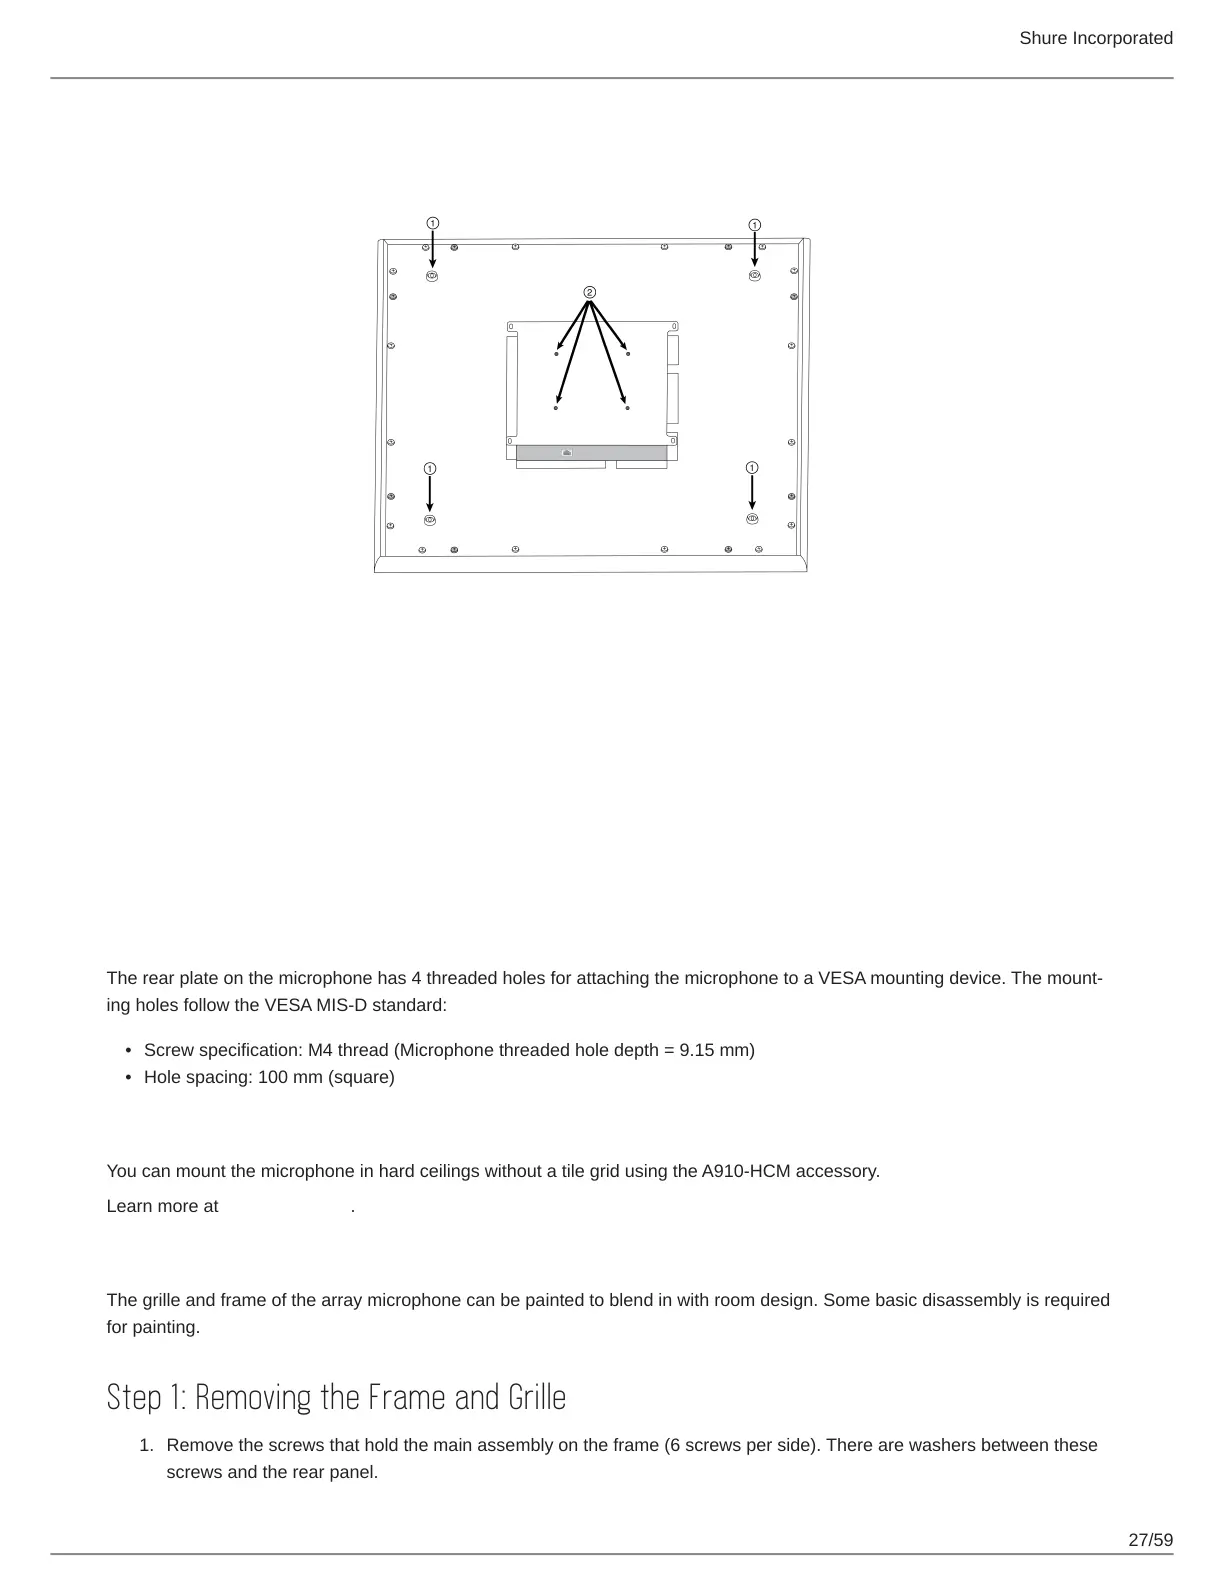
① Wire Suspension Hanging Points (4 mm hole size)
② VESA Mounting Holes
4-Point Wire Suspension
Secure the microphone to the ceiling using braided metal cable or other high-strength
wire. Use the 4 integrated hanging points on the back of the microphone to securely at-
tach the cable. The hole size in the hanging points is 4 mm (0.15 in).
VESA Standardized Mounting
The rear plate on the microphone has 4 threaded holes for attaching the microphone to a VESA mounting device. The mount
ing holes follow the VESA MIS-D standard:
Screw specification: M4 thread (Microphone threaded hole depth = 9.15 mm)
Hole spacing: 100 mm (square)
Hard Ceiling Mounting
You can mount the microphone in hard ceilings without a tile grid using the A910-HCM accessory.
Learn more at www.shure.com.
Painting Components
The grille and frame of the array microphone can be painted to blend in with room design. Some basic disassembly is required
for painting.
Step 1: Removing the Frame and Grille
Remove the screws that hold the main assembly on the frame (6 screws per side). There are washers between these
screws and the rear panel.



 To Next Page