4 Getting started
The purpose of this chapter is to quickly and easily connect the camera and capture
initial images.
NOTE
Before using the product in a production environment, the complete operating instruc‐
tions must have been read and understood.
For a complete guide to the software, see the Nova 2D operating instructions.
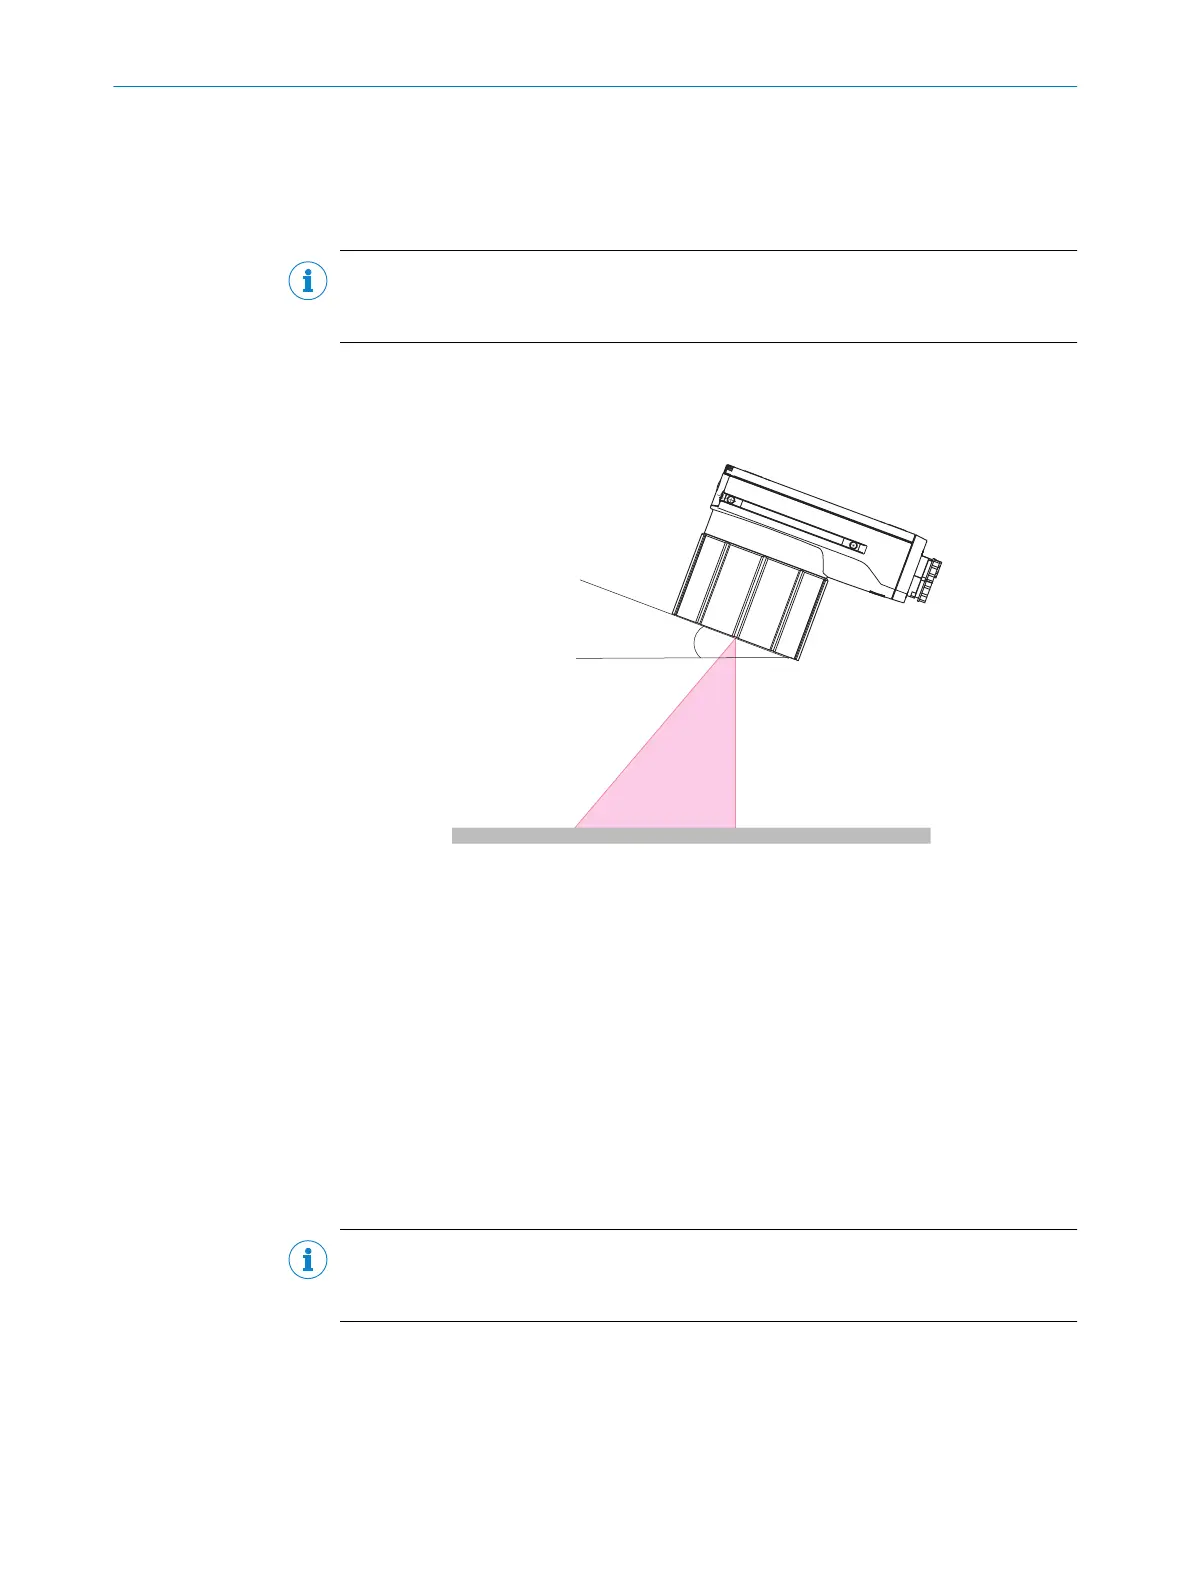
4.1 Mounting the product
Figure 4: Mounting angle to use, depending on the application
1
Typical angle 10° ... 20°
•
Mount the product so that it is tilted from the perpendicular to the surface.
•
Make sure the product has a clear view of the objects to be scanned.
Further topics
•
Mounting
4.2 Connecting the product
For an overview of the electrical connections for the installation, see "Electrical installa‐
tion", page 32. The photoelectric sensor, external illumination, and connection module
are optional accessories.
NOTE
The USB interface is recommended for easy setup and used for test, demo, and
commissioning. The Gigabit Ethernet must be used for any permanent installation.
GETTING STARTED 4
8029044/1MYO/2024-04 | SICK O P E R A T I N G I N S T R U C T I O N S | Inspector83x
21
Subject to change without notice