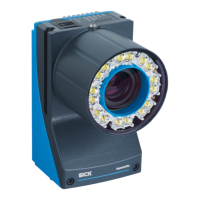
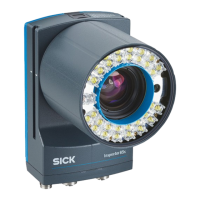
Inspector83x
Sensor format V2D8305x–xxxxxxxxxx: 1/1.8"
1)
Not yet available in pre-installed Nova 2D SensorApp.
2)
The pre-activated license depends on device variant and configuration.
3)
Depends on lens used.
4)
L
B
= H
azard from blue light.
5)
L
R
= H
azard to the retina of the eye due to heating.
12.2 Mechanics and electronics
Inspector83x
Connection type
• 1 male connector, M12, 17-pin, A-coded (Power, serial interface, I/O)
1)
• 1 female connector, M8, 4-pin, (External illumination)
1)
• 1 female connector, M12, 8-pin, X-coded (GB Ethernet)
• 2 female connectors, M12, 4-pin, D-coded (Fieldbus Ethernet)
Supply voltage V
S
DC 24V ±20%
Voltage source in accordance with ES1 (EN62368-1) or SELV (EN60950-1)
Power consump‐
tion
Operation: 21W
2)
Current con‐
sumption
Max. 2.0A
Output current Output current per output: max. 200 mA
Sum of output currents: max. 400 mA
3)
Housingmaterial Aluminum die cast
Housing color Anthracite gray (RAL7016)
Viewing window
material
Plastic (PMMA), with scratch-proof coating
Cover (top of
device)
Material: Rubber
Function: For temporary access to the microSD memory card slot and the
USB connection
Hinged
4)
Enclosure rating IP 65 (IEC60529:2013 +C1:2013 +C2:2015 +AMD2 C1:2019,
EN60529:1991 +A1:2010 +A2:2013 +AC:2019-02)
5)
Electrical safety EN 61010-1:2010
EN 61010-1:2010/A1:2019
EN 61010-1:2010/A1:2019/AC:2019-04
Dimensions (L x
W x H)
108mm x 63.1mm x 55.4mm
6)
1)
Maximum length of cable: 10 m
2)
Without load on digital outputs and power out.
3)
Ensure that the sum of power out current for external illumination and the output currents do not exceed
1050mA
.
4)
When the cover is open, the device no longer conforms with the specified enclosure rating.
5)
Comply with the requirements to maintain the specified enclosure rating.
Prerequisites:
•
The optics protection hood must be screwed tightly onto the device.
•
The cover on the top of the device at the rear must be inserted and flush with the device.
•
The cables plugged into the electrical connections must be screwed tight. Electrical connections
that are not being used are sealed off with a tightly-fastened protective cap.
6)
Housing only, without lens and optics protection hood.
TECHNICAL DATA 12
8029044/1MYO/2024-04 | SICK O P E R A T I N G I N S T R U C T I O N S | Inspector83x
51
Subject to change without notice