Commissioning and configuration
56 © SICK AG · Germany · All rights reserved · Subject to change without notice
8013889/ZML0/2017-06-
09
Operating Instructions
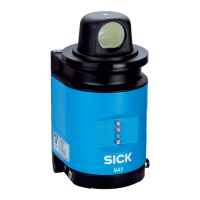
NAV350 Laser positioning sensor
Chapter 6
6.4.1 Configuring the NAV350
You can configure the NAV350 in two ways:
• interactively using SOPAS ET
This section describes the interactive configuration.
• using configuration telegrams
On this subject please read section 3.9.2 “Data communication using telegrams” on
page 32.
Interactive configuration using SOPAS ET
All parameters that can be configured for the NAV350 are combined into a corresponding
device description (sdd file) for SOPAS ET. You can open this file using the device descrip-
tion project tree.
The function of each parameter is explained in a context-sensitive online help ([F1] key). The
valid range of values and the default are listed in the P
ARAMETER INFO window (right mouse
button when the pointer is positioned over the parameter).
Important Software access to the NAV350 is password protected. using screws of the are sealed.
Claims under the warranty against SICK AG will be rendered void if the seals are damaged
Use the project tree in SOPAS ET to configure the parameters necessary for your applica-
tion.
Do not switch off the voltage supply during configuration!
Switching off the voltage supply during configuration causes all parameters already config-
ured to be lost.
1. From the OPTIONS menu select the LOGIN DEVICE command and log in to the system using
the password “client” as A
UTHORISED CLIENT.
2. Configure the NAV350 for the required application with the aid of the parameters in
SOPAS ET.
Help for the program user interface as well as for the different options can be found in
SOPAS ET.
6.5 Connection and test measurement
Use the graphic scan view in SOPAS ET to verify the generated measured values and to ver-
ify the measurement area online.
1. Select NAV350, M
ONITOR, SCAN DISPLAY in the project tree.
2. To start the measurement, click the P
LAY button.
3. Compare the measurement line with the required result.
User level Password
Authorised client client
Tab. 15: Password NAV350
 Loading...


