6.6 Installation steps
6.6.1 Wiring the device for quick start
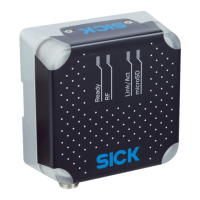
RFU62x-101xx (Ethernet variant)
RFU62x-
101xx
Connection
module
SOPAS ETSOPAS ET
"Power/Serial Data/CAN/I/O"
(Aux 1, Host 1)
...
...
1
2
V
S
GND
PC
"Ethernet" (Aux 2)
EthernetEthernet
Cable 6 Cable 5
4
11 10 12
Trigger
sensor
SGND
Sens 1
V
S
1
Out
GND
V
S
2
3
Configuration
Reading result
display
Transponder
access
Reading
diagnostics
Figure 26: Commissioning: Electrical connection block diagram of the RFU62 x-101 xx together
with the optional connection module
1
Read cycle trigger sensor
2
Supply voltage V
S
(V
S
= U
V
)
3
Connection module CDB620, CDB650-204 or CDM420
4
Configuration using SOPAS ET, processed read result display, transponder access, or
reading diagnostics
5
Adapter cable (male connector, M12, 4-pin, D-coded/male connector, RJ-45, 8-pin)
6
For CDB620 and CDM420: Adapter cable (female connector, M12, 17-pin, A-
coded / male connector, D-Sub-HD, 15-pin)
For CDB650-204: Connection cable 1:1 (female connector, M12, 17-pin, A-coded/male
connector, M12, 17-pin, A-coded)
Procedure:
1.
Connect the communication interface (e.g. Ethernet) of the device directly 5to the
PC using a suitable cable.
2. Connect the “Power/Serial Data/CAN/I/0” connection (male connector, M12, 17-
pin, A-coded) to the corresponding female connector on the connection module
using a suitable cable 6.
RFU62x-104xx (serial variant)
Configuration
Reading result
display
Transponder
access
Reading
diagnostics
Connection
module
SerialSerial
SOPAS ETSOPAS ET
"Power/Serial Data/Aux/CAN/I/O"
(Aux 1, Host 1)
...
...
1
2
V
S
GND
PC
RFU62x-
104xx
"Serial RS-232" (Aux 1)
Cable 4
5
11 10 12
Trigger
sensor
SGND
Sens 1
V
S
1
Out
GND
V
S
SerialSerial
2
3
Figure 27: Commissioning: Electrical connection block diagram of the RFU62x-104xx with
optional connection module
1
Read cycle trigger sensor
ELECTRICAL INSTALLATION 6
8015930/ZTM0/2018-11-06 | SICK O P E R A T I N G I N S T R U C T I O N S | RFU62x
51
Subject to change without notice
 Loading...