This document outlines the original operating instructions for a Gillard cutting machine, specifically detailing the use of its Siemens TP700 Comfort Touch-screen operator control panel. The manual emphasizes safety, operational procedures, and maintenance features to ensure proper and efficient use of the equipment.
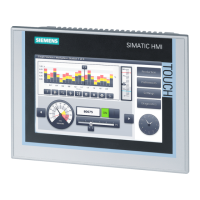
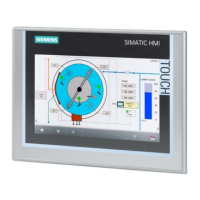
The machine's operation is primarily managed through the Siemens TP700 Comfort touch-screen, which serves as the Human Machine Interface (HMI). This interface is designed to be intuitive, allowing operators to control various aspects of the cutting process. Upon power-up, the HMI displays an initialization screen, and once all parameters are loaded, a "start" button appears, signaling readiness for operation. The HMI is divided into three main operational areas: Caterpillar, Cutter, and Batch, each with dedicated panels for specific settings.
Safety Features:
The machine incorporates three critical safety functions monitored by a Siemens S7-1214FC Safety PLC: the Main Machine Door, the Cutter Safety Function, and Emergency Stops. Activating an Emergency Stop or opening the main machine door will bring the machine to a controlled halt, removing all torque and energy from motors and actuators. If an Emergency Stop is triggered, a "CHECK E-STOP" screen appears. Once the emergency stop is released and the circuit is complete, a blue safety circuit reset button flashes, allowing the operator to reset the system and return to the main control screen. Similarly, opening the main door displays a "DOOR OPEN" screen, requiring the same reset procedure.
The Cutter Safety Function is an independent safety mechanism that allows the cutter block to slide away, enabling product to be drawn through the machine by the belts even if the cutter is disengaged. If any part of this function is activated, a pop-up on the home screen indicates an incomplete safety circuit. Once the circuit is complete, a blue reset button flashes, which, when pressed for approximately 1.5 seconds, resets the safety function and allows the cycle to continue.
In the event of a serious system fault, such as internal communication issues or safety-related malfunctions, a "MACHINE FAULT" screen will appear. This screen advises the operator to load the diagnostics screen and note the fault. Pressing the yellow warning symbol on this screen provides access to system diagnostic information, which is crucial for troubleshooting and contacting Gillard technical support.
Operational Features:
The Home Screen is the primary interface for day-to-day cutting operations. It is divided into three sections: Caterpillar, Cutter, and Batch. Pressing the green bottom bar opens the respective panels for detailed settings.
Caterpillar Panel:
This panel controls the transport belts.
- Start/Stop Caterpillar Button: A green button initiates the conveyor belts. When active, it turns red, and a graphic within the symbol rotates to indicate movement.
- Caterpillar Belt Speed (Blue Display): Allows adjustment of transport belt speeds in 0.1 meters per minute increments. Tapping the screen in this area brings up an input panel to enter new values.
- Caterpillar Belt Speed (White Display): Shows the actual speed of the caterpillar.
The Caterpillar panel offers three modes:
- Local Mode: Speed is set directly from the HMI in meters per minute.
- Remote Mode: Speed is controlled via analogue input terminals (0-10V), scaling linearly from minimum to maximum caterpillar speed. The HMI displays the actual speed and the voltage of the external control signal.
- Sonar Mode: Analogue input signals act as a trim value for the screen speed, maintaining a steady product flow. For example, if the screen speed is 10 m/m and a 20% Sonar Value is entered, a 0V input yields 8 m/m, and a 10V input yields 12 m/m. The HMI displays the set point speed, actual speed, Sonar trim percentage, and the percentage of the external control signal.
Cutter Panel:
This panel controls the machine's cutting mode.
- Cut Length (Blue Display): Sets the desired length of pieces to be cut in millimeters/inches.
- Length Scaler (Blue Display): A scaling factor to adjust the entered cut length to the actual length. While theoretically 100%, material properties, belts, and cut ratio can affect the final result, requiring adjustment. It is important to note that this should not be used to adjust the cut length itself, which is done on the main Home Screen.
- Blade Datum (Blue Display): Sets the position (0° to 360°) where the blade rests. Factory calibrated to 180° from the cut point.
- Blade Speed (Blue Display): Sets the blade speed as a percentage of its maximum capability, ensuring good cut quality.
The cutter panel supports various cutting modes: Auto Mode, Camera Mode, Sensor Mode, Timer Mode, and Stop & Cut.
- Length Mode: Cutting length is controlled by an electronic cam, allowing seamless adjustments from 0 to 2500 cuts per minute.
- Sensor Mode: The machine relies on an external signal to perform cuts.
- Timer Mode: The machine performs a cut after a designated period, set in milliseconds.
Batch Panel:
This panel manages batch-related settings.
- Batch Size (Blue Display): Sets the number of units per batch (maximum 999,999). If a batch completed beacon is fitted, it activates when the performed cuts equal the batch size.
- Performed Cuts (White Display): Shows the number of cuts performed. Double-clicking resets this value, or it resets automatically upon reaching the batch size.
- Batch Total: Counts the number of batches produced.
- Total Cuts: Displays the number of cuts since the last manual reset.
- Accumulative Length: Records the total length of product passed through the machine until reset, with a maximum of 2,147,483 meters.
The Tools screen provides access to all machine options and is password-protected for modifying settings, though all users can view them. Options not purchased with the machine appear with a black cross.
- Login Bar: To log in as an administrator, press the red lock button and enter the password (Admin: 2706).
- System Buttons:
- Control Panel: Returns to the Windows control panel.
- Calibrate HMI: Re-calibrates the HMI (recommended every 6 months).
- Language: Changes the display language.
- Working Times: Displays run times for the PLC, Cutter, and Caterpillar since the last manual reset.
- Communications: Includes Smart Server (for remote HMI control by Gillard engineers), Reset Communications (resets internal communications), and Start/Stop PLC (stops the machine program, rarely needed).
Options:
- Product Jam: Automatically detects and stops the cycle if the product jams, alerting the operator. The mode can be On or Off.
- Air Bush: Injects air into the machine's bushes to facilitate smoother product movement. Activated when belts are running.
- Broken Blade Sensor: Detects a broken blade, stops the cycle, and alerts the operator. The value entered determines how many blade revolutions occur before the cycle stops.
- Air Blast (option): An air blast output after each cut, typically used to blow away cut pieces from a conveyor. Parameters include Delay after cut (milliseconds between cut completion and air blast start), Duration (air blast duration in milliseconds), and Scrap Transition Delay (delay to reactivate air blast after transitioning from cutting bad to good product).
- Joint Sensor: Detects metallic joints in the product, indexing their position. The machine automatically avoids cutting these sections, preventing them from being part of a batch. When a joint reaches the blade, an audible beacon alerts the operator to remove the piece. Parameters include Blade to Sensor distance (mm) and Length after Joint (mm) for resuming normal cutting.
- Scrap Mode: Cuts a predetermined "Scrap Length" when an external signal indicates scrap product is arriving. The machine tracks the scrap material's position. Parameters include Blade to Sensor distance (mm) and Scrap Length (mm).
- Atomiser: Lubricates the blade as it passes through the bushes to prevent debris buildup. Can be On or Off.
- Heaters: Warms the product for better cut quality. Must be switched on after a power cycle. Parameters include Heater Enable Switch (On/Off) and Temperature Setpoint. The fan continues to run at set speed to cool the heating element.
- Batch Stop (option): Sounds an audible alarm when a batch is completed. The administrator can choose whether this stops the machine or allows the cutting cycle to continue.
- Batch Total Stop (option): Sounds an audible alarm when a total number of batches is completed. The administrator can choose whether this stops the machine or allows the cutting cycle to continue.
- Metric/Imperial Units: Switches between metric and imperial unit displays. Can only be changed when the machine is not running.
Maintenance Features:
The manual stresses the importance of regular HMI calibration (every 6 months). The "Working Times" display allows monitoring of run hours for the PLC, belts, and blade, which is useful for scheduling maintenance and tracking component lifetime. The "Reset Drive Faults" button on the Drive Screen helps clear errors, and if faults persist, contacting Gillard technical support with the error code is advised. The "Broken Blade Sensor" and "Product Jam" features also serve as maintenance alerts, prompting operators to address issues promptly to prevent further damage or operational disruptions.