33
GB
to prepare mayonnaise) you can use the mini food
pusher1 with a small opening in the bottom.
5. Place the lid3 with the food pushers1, 2 onto the
working container9. Turn the lid slightly in a clock-
wise direction until it is heard to lock into place.
6. Connect the mains plug10 to a wall socket.
7. Use the dial12 to select the desired speed setting.
8. When the process is completed, switch the dial12 to
0 and pull out the mains plug10.
9. Turn the lid3 slightly in an anticlockwise direction
and remove it.
10. Turn the working container9 slightly in an anticlock-
wise direction and remove it.
11. Remove the axle17 together with the whisking
disc7 upwards and remove the prepared food from
the working container9.
12. Clean all of the accessories that have been used im-
mediately if possible.
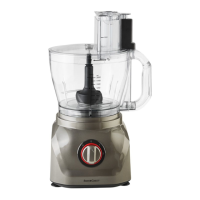
11. Using the French fries disc
Application area:
The French fries disc6 is suitable for cutting French fries
from raw potatoes.
WARNING! Risk of material damage!
~ Do not apply too much pressure to the French fries
disc6. Apply an even pressure so that the motor does
not become blocked.
NOTE: for best results, place large potatoes (if necessary
in halves) crossways in the large food chute and press
down with the maxi food pusher2.
Processing table:
WARNING! Risk of material damage!
~ Do not operate the device continuously with the French
fries disc6 in place for more than 2 minutes. After
this, the device must remain switched off until it has
cooled down to room temperature.
Required accessories:
- Working container9
-Axle17
- French fries disc6
-Lid3 with food pushers1, 2
And this is how it works:
(For assembly see Figure J)
1. Position the working container9 on the base unit13.
Turn the working container slightly in a clockwise di-
rection until it is heard to lock into place.
2. Place the axle17 into the working container9.
3. Place the French fries disc6 on the axle so that the
French fries blades are positioned upwards.
4. Place the lid3 with the food pushers1, 2 onto the
working container9. Turn the lid slightly in a clock-
wise direction until it is heard to lock into place.
5. Connect the mains plug10 to a wall socket.
6. Remove the maxi food pusher2 and fill the pre-
pared, raw potatoes into the food chute no higher
than the MAX mark.
7. Reinsert the maxi food pusher2.
8. Switch the dial12 to the 2 position and press the po-
tatoes downwards with the maxi food pusher2 with
a light, even pressure.
9. Stop (dial12 in the position 0) before all of the pota-
to pieces in the food chute are processed so that you
can fill in more potatoes.
10. Process all potatoes portion by portion. Empty the
working container9 from time to time if it is filled up
to the MAX mark.
11. When the process is completed, switch the dial12 to
0 and p
ull out the mains plug10.
12. Turn the lid3 slightly in an anticlockwise direction
and remove it.
13. Turn the working container9 slightly in an anticlock-
wise direction and remove it.
14. Hold the axle17 at the top end and lift it out togeth-
er with the French fries disc6.
15. Remove the cut French fries from the working contain-
er9.
16. Clean all of the accessories that have been used im-
mediately if possible.
Ingredients max. quantity
max.
processing time
Switch
Potatoes 500 g approx. 2 min.
2
__326488_Kuechenmaschine Multi_B8.book Seite 33 Dienstag, 6. August 2019 10:40 10
 Loading...