6 General Repair
6D Hood, Dash, & Grill Repair
6 - 54
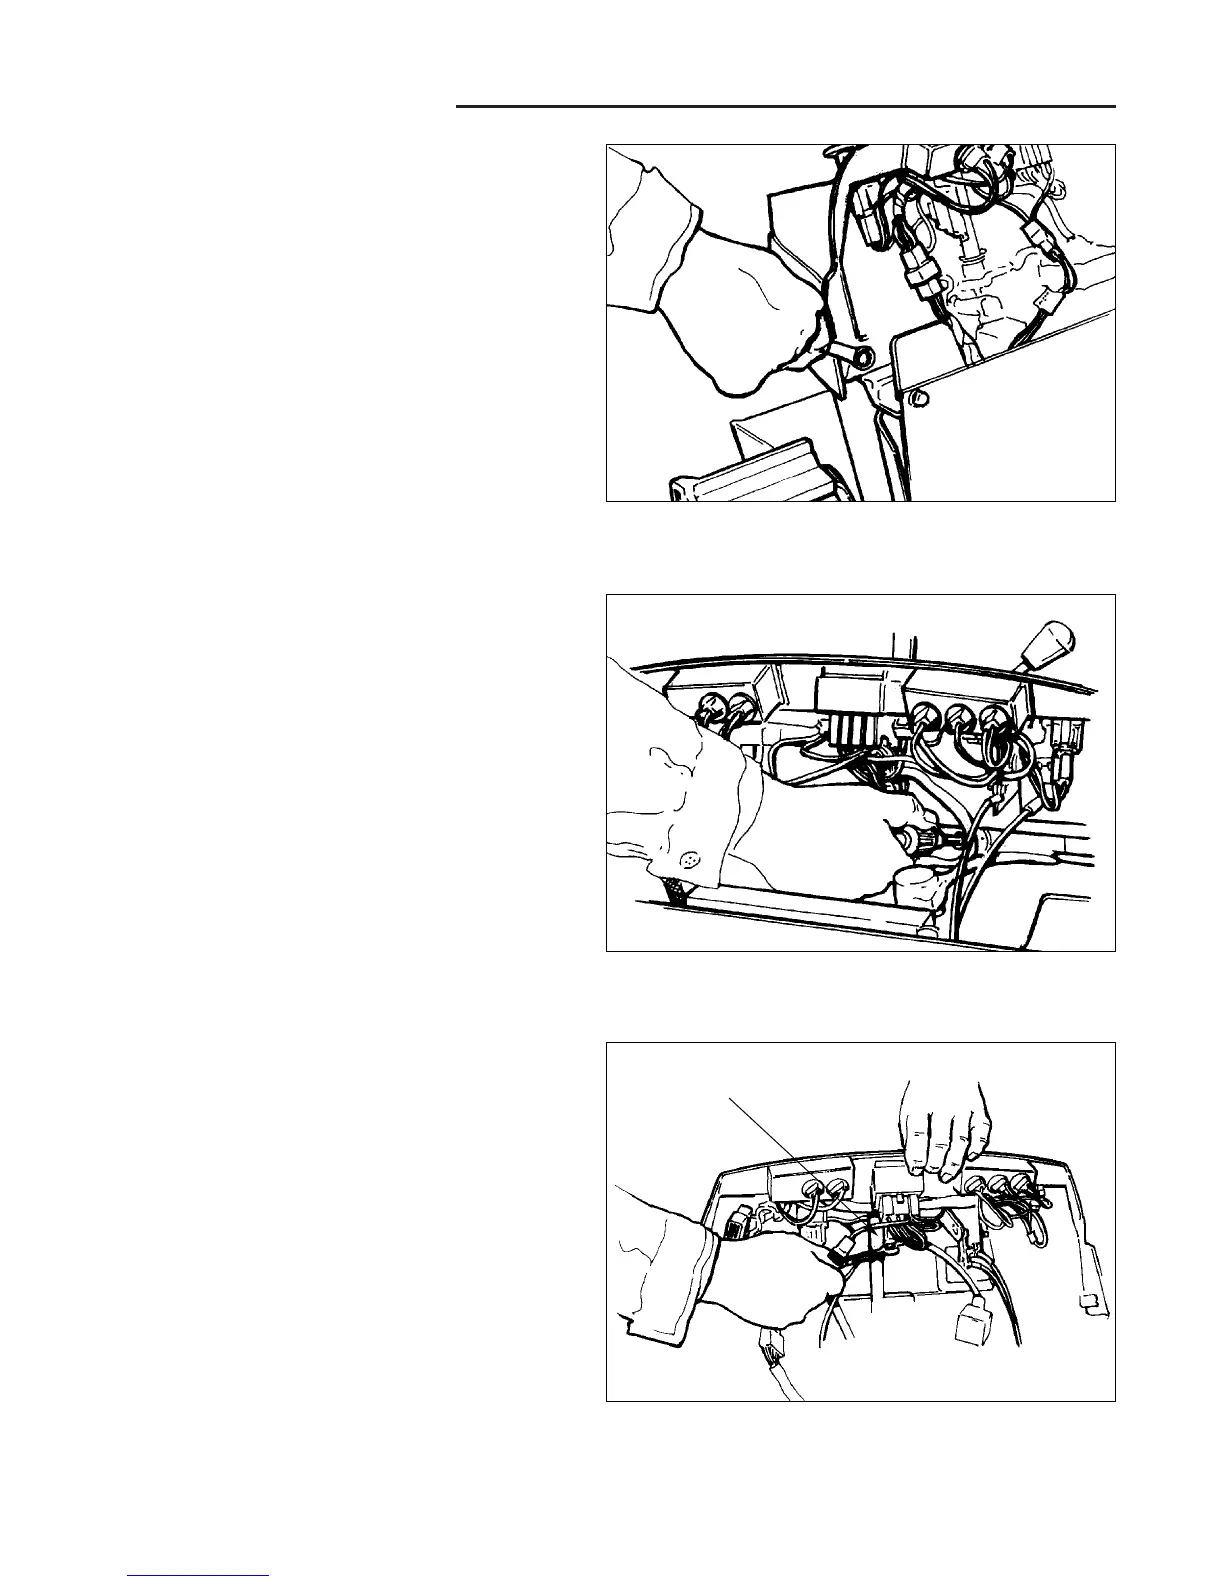
Figure D–8. Remove Front Dash Mounting Screws
8. Remove the whizlock capscrews from the lower front
corners of the dash using a 3/8” box wrench. These
screws fasten into captive palnuts on the dash, and
require no additional tools for hardware removal.
(Figure D–8)
Figure D–9. Remove Rear Dash Mounting Screws
9. Using a 3/8" nutdriver or 3/8" socket with a 6" exten-
sion bar, remove the two whizlock capscrews with
washers that secure the rear of the dash to the lower
dash. Use care to avoid dropping the washers as the
screws are removed. (This location also uses captive
palnuts to simplify disassembly.) (Figure D–9)
Figure D–10. Disconnect Starter Cable At Solenoid
10. Disconnect the starter cable from the solenoid using
a 1/2" box wrench. Temporarily reinstall the hex nut
and lockwasher on the threaded solenoid post to pre-
vent parts loss during service (Figure D–10).
Solenoid