EasyManuals Logo

Simrad Halo User Manual

Simrad Halo
46 pages
To Next Page IconTo Next Page
To Previous Page IconTo Previous Page
Page #18 background imageLoading...
Page #18 background image
18 |
Hardware mounting |Halo pulse compression radar installation manual
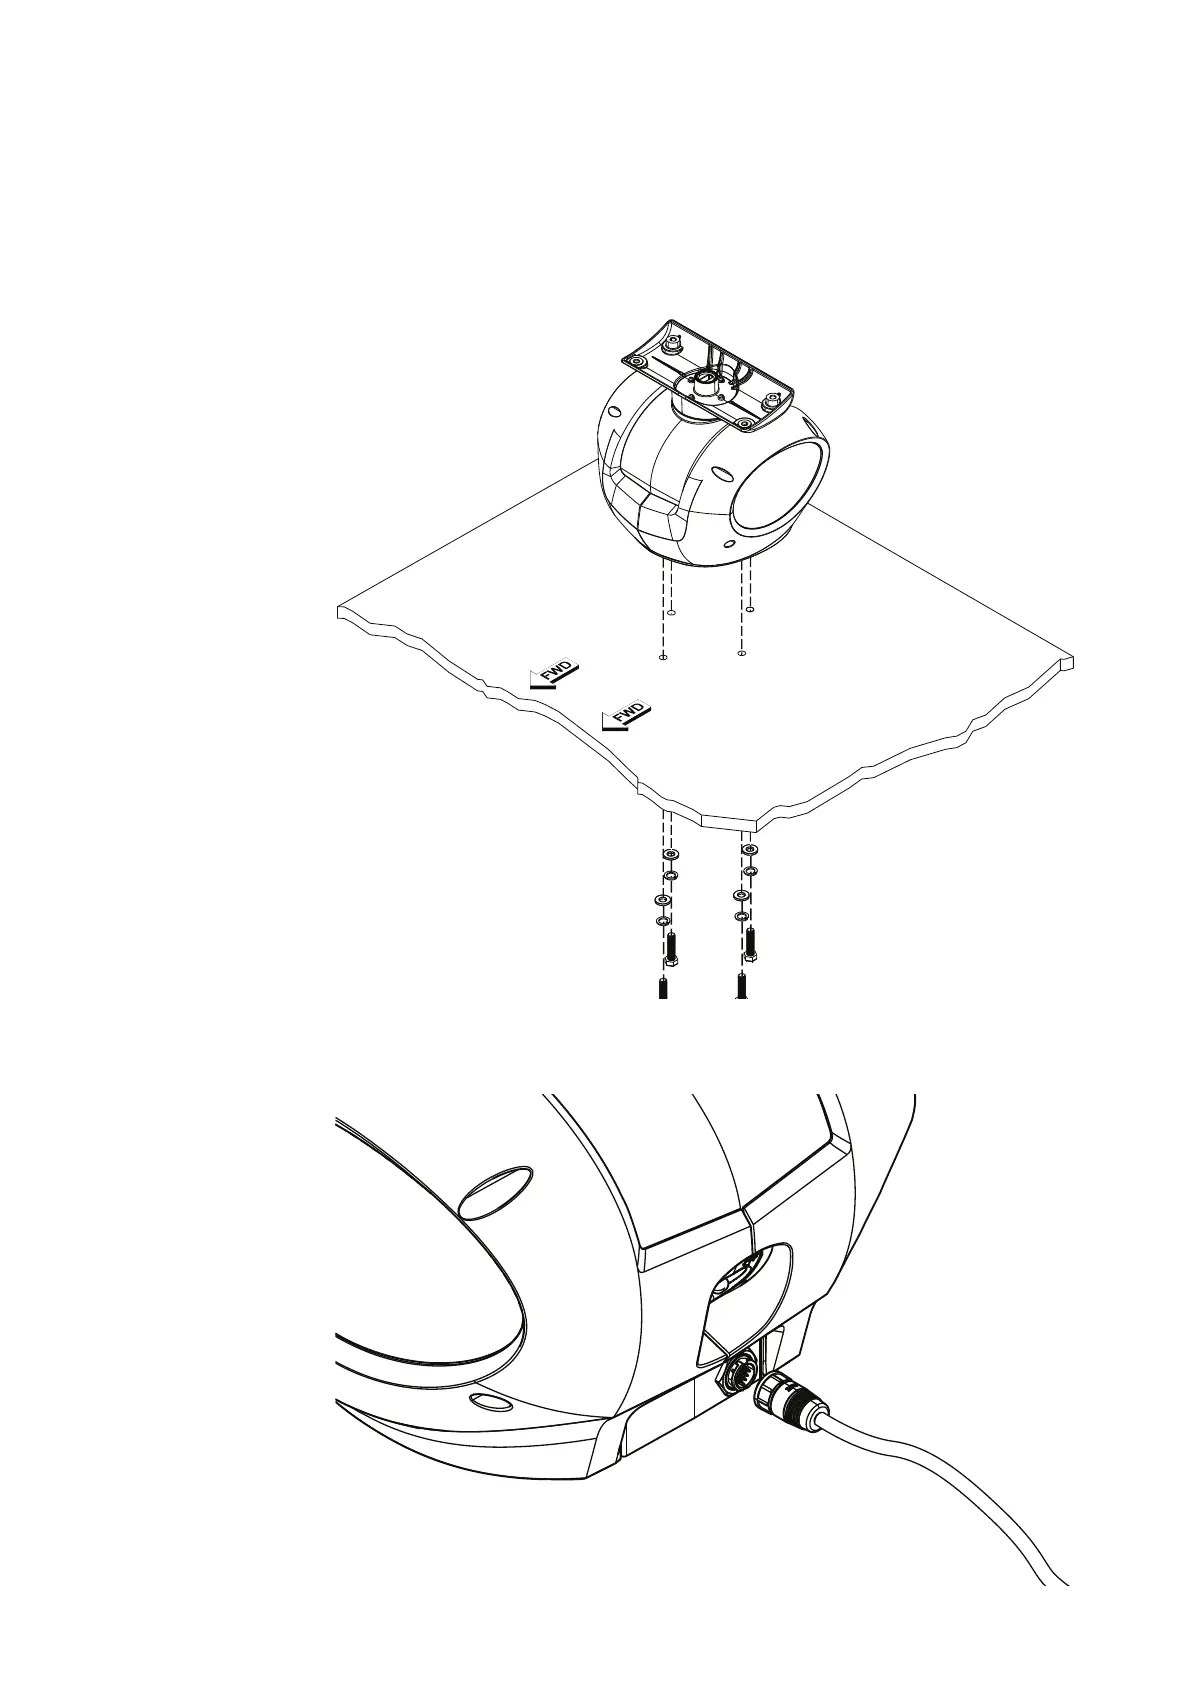
Surface mount: Rear cable connection
1. Position the scanner carefully over the bolt holes so that they are aligned.
2. Place a at washer and spring washer onto each bolt, as shown.
3. Insert bolts into the drilled holes and locate into the pedestals threaded mounting holes and
tighten securely.
¼ Note: The torque settings for the mounting bolts are 30 N.m – 40 N.m (22.1 ft·lbf – 39.5 ft·lbf).
4. Connect the 14 pin end of the interconnection cable. Take care to align the connector correctly
to avoid bending the pins. Secure the locking collar by rotating clockwise until it clicks.

Questions and Answers:

Question and Answer IconNeed help?

Do you have a question about the Simrad Halo and is the answer not in the manual?

Simrad Halo Specifications

General IconGeneral
NetworkingEthernet
IP RatingIPX6
RangeUp to 72 nm (depending on model)
Operating Frequency9.4 GHz (X-band)
FrequencyX-Band
Display CompatibilitySimrad multifunction displays
Antenna Length24" or 20"
Supply Voltage10-32 V DC

Related product manuals