53
Adjusting for a shorter darning area
The darning pattern can be sewn less that 3/4” (2 cm).
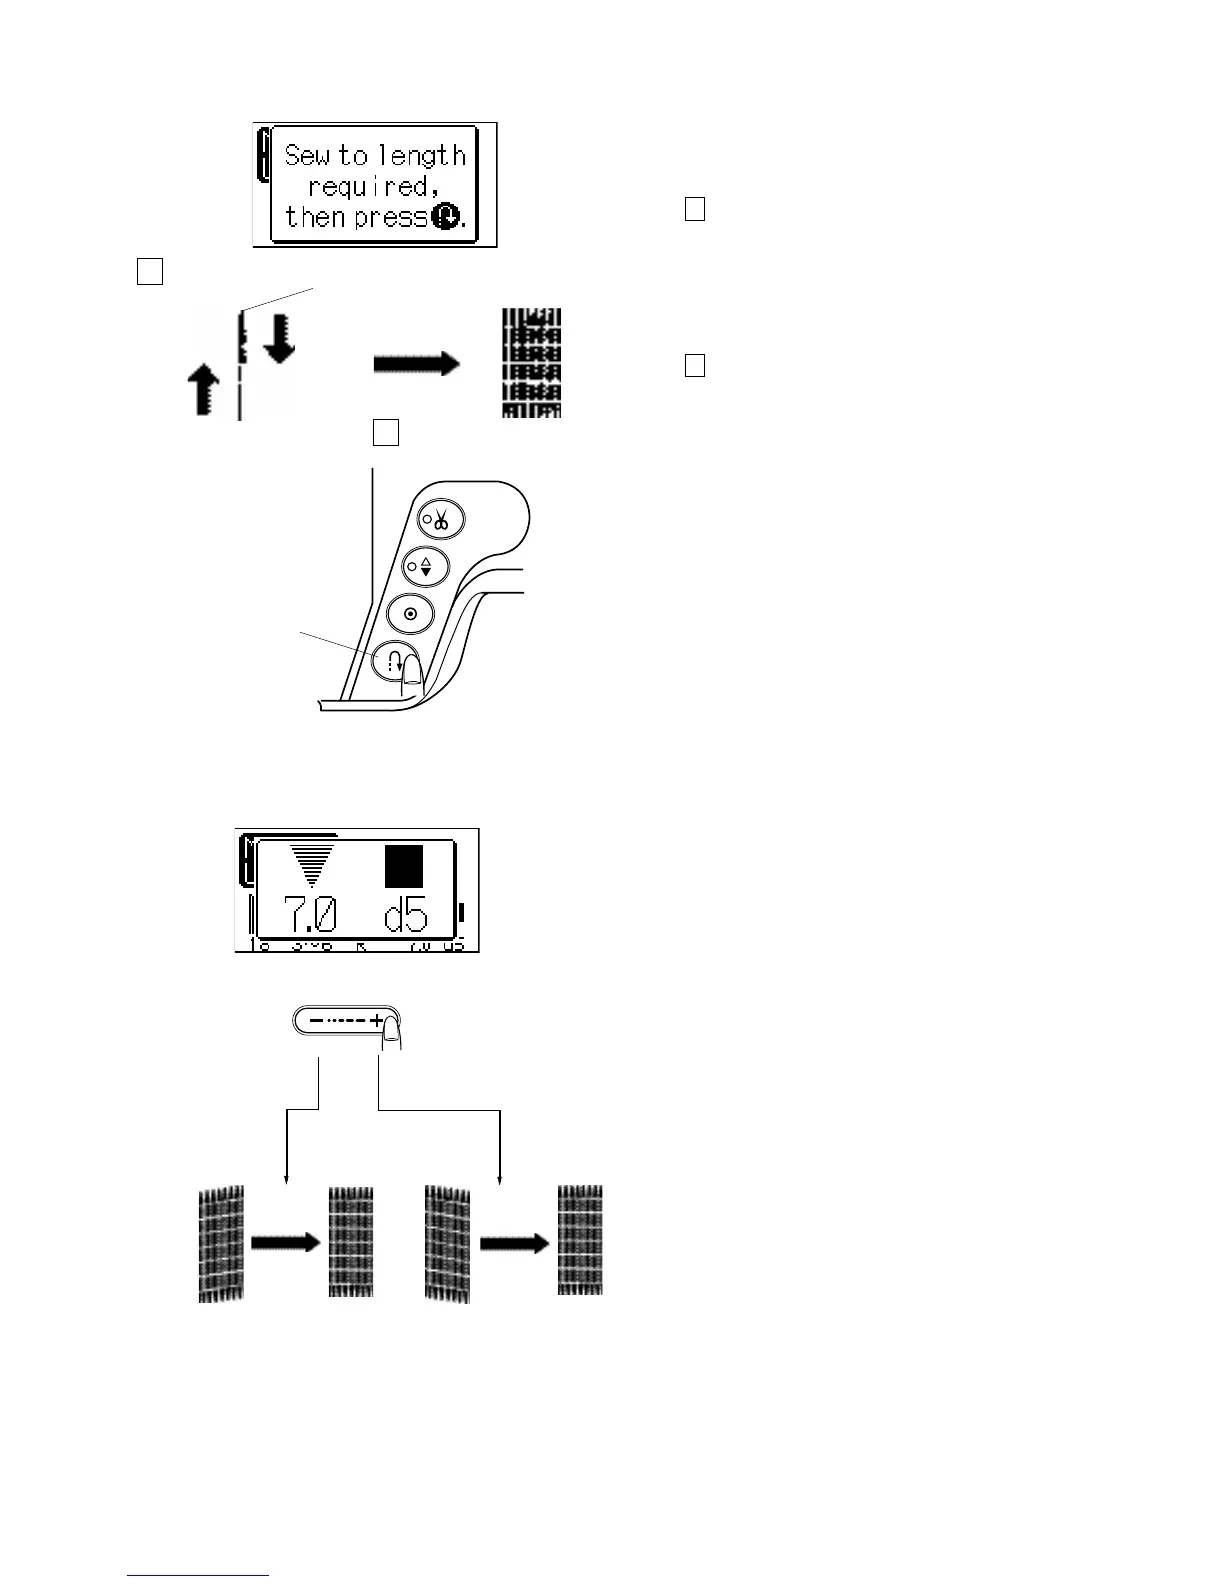
Step 1
Position foot over area to be prepared. When the proper
distance is met, push the reverse button to set the length
of the stitching.
1 Required length
2 Reverse button
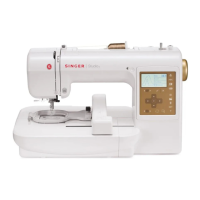
Step 2
Continue sewing until the machine stops. To sew a
darning shorter than 3/4” (2cm), first stop the machine
after sewing the required length, then press the reverse
button.
The required length has been determined.
Restart the machine and continue sewing until the
machine stops automatically.
1 Required length
2 Reverse button
To sew the same size darning
Simply restart the machine to sew another darning area
the same size.
To sew the darning area a different size
Press the memory button and start sewing from the
beginning.
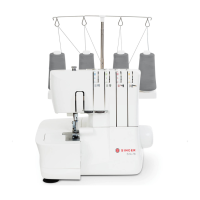
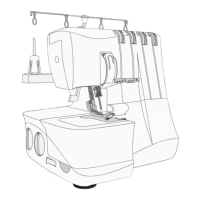
Uneven darning stitches
The stitching lines on the right side might not be even with
the stitching lines on the left side. The darning may vary
depending on the sewing condition, such as type of fabrics,
number of layers, etc. You can correct the unevenness with
the stitch length adjusting button.
Select the stitch length button and the window screen will
show 7.0 d5. If the left corner is lower than the right side,
press on “–” to correct it.
If the right corner is lower than the left side, press on “+” to
correct it.
The evenness can be adjusted by selecting a setting
between d1 and d9.
1
2
1
2