22
1.
2.
3.
disconnect the plug from the socket and
c
arefully clean the blade with denatured
alcohol to remove any grease build-up;
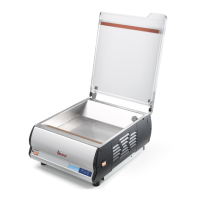
lift (a) the sharpener cap (1) and turn it 180°
(ref.b - Fig. n°45);
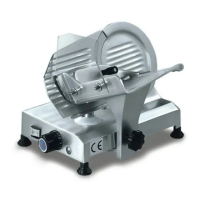
release the cap (c) so that it fits onto the
locator pins (ref.d - Fig. n°46);
4.
5.
check that the blade is in between the two
grinders;
c
onnect the plug and press the “ON”
pushbutton to start up the slicer.
5.
7.
8.
9.
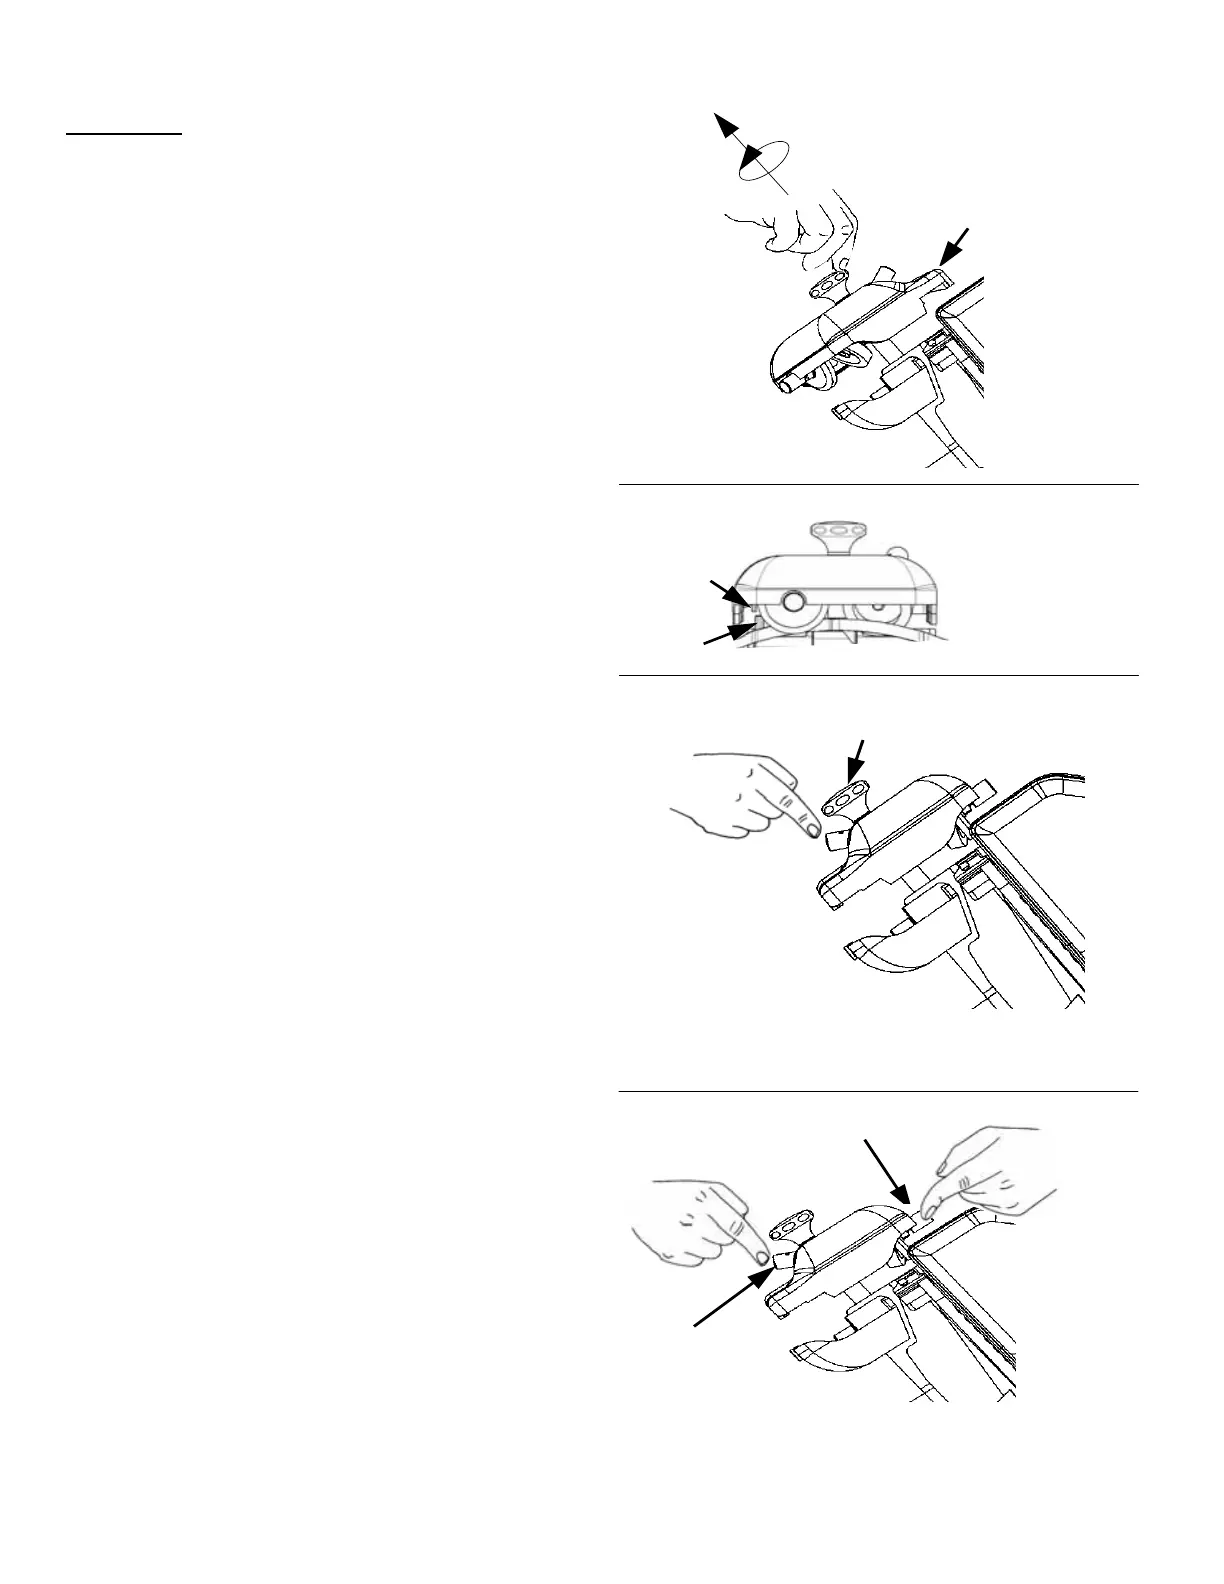
press pushbutton ref.2 - Fig.n°47 the blade
should come into contact with the two
grinders. Leave the blade to rotate for about
30/40 sec. so that a slight burr forms on the
blade edge;
press the 2 pushbuttons - 2 and 3-
simultaneously for
3/4 sec. to dress the blade
and then release (Fig. n°48);
after sharpening it is recommended to clean
gr
inders and blade (chap. 6.2.3);
Onc
e sharpening is completed, replace the
sharpening device in its original position
inverting the above procedure.
5.3 - SHARPENING THE BLADE
WARNING: Before proceeding with blade
s
harpening, evaluate RESIDUAL RISKS (chapter
4.2.2) concerning hazard of injury if the below
instructions are not respected.
The slicer blade should be sharpened periodically
the moment slicing precision and performance
diminishes. To sharpen slicer blade follow and
respect the below instructions:
Fig. n°45
Fig. n°46
Fig. n°47
c
d
Fig. n°48
1
b
a
2
3
2
 Loading...