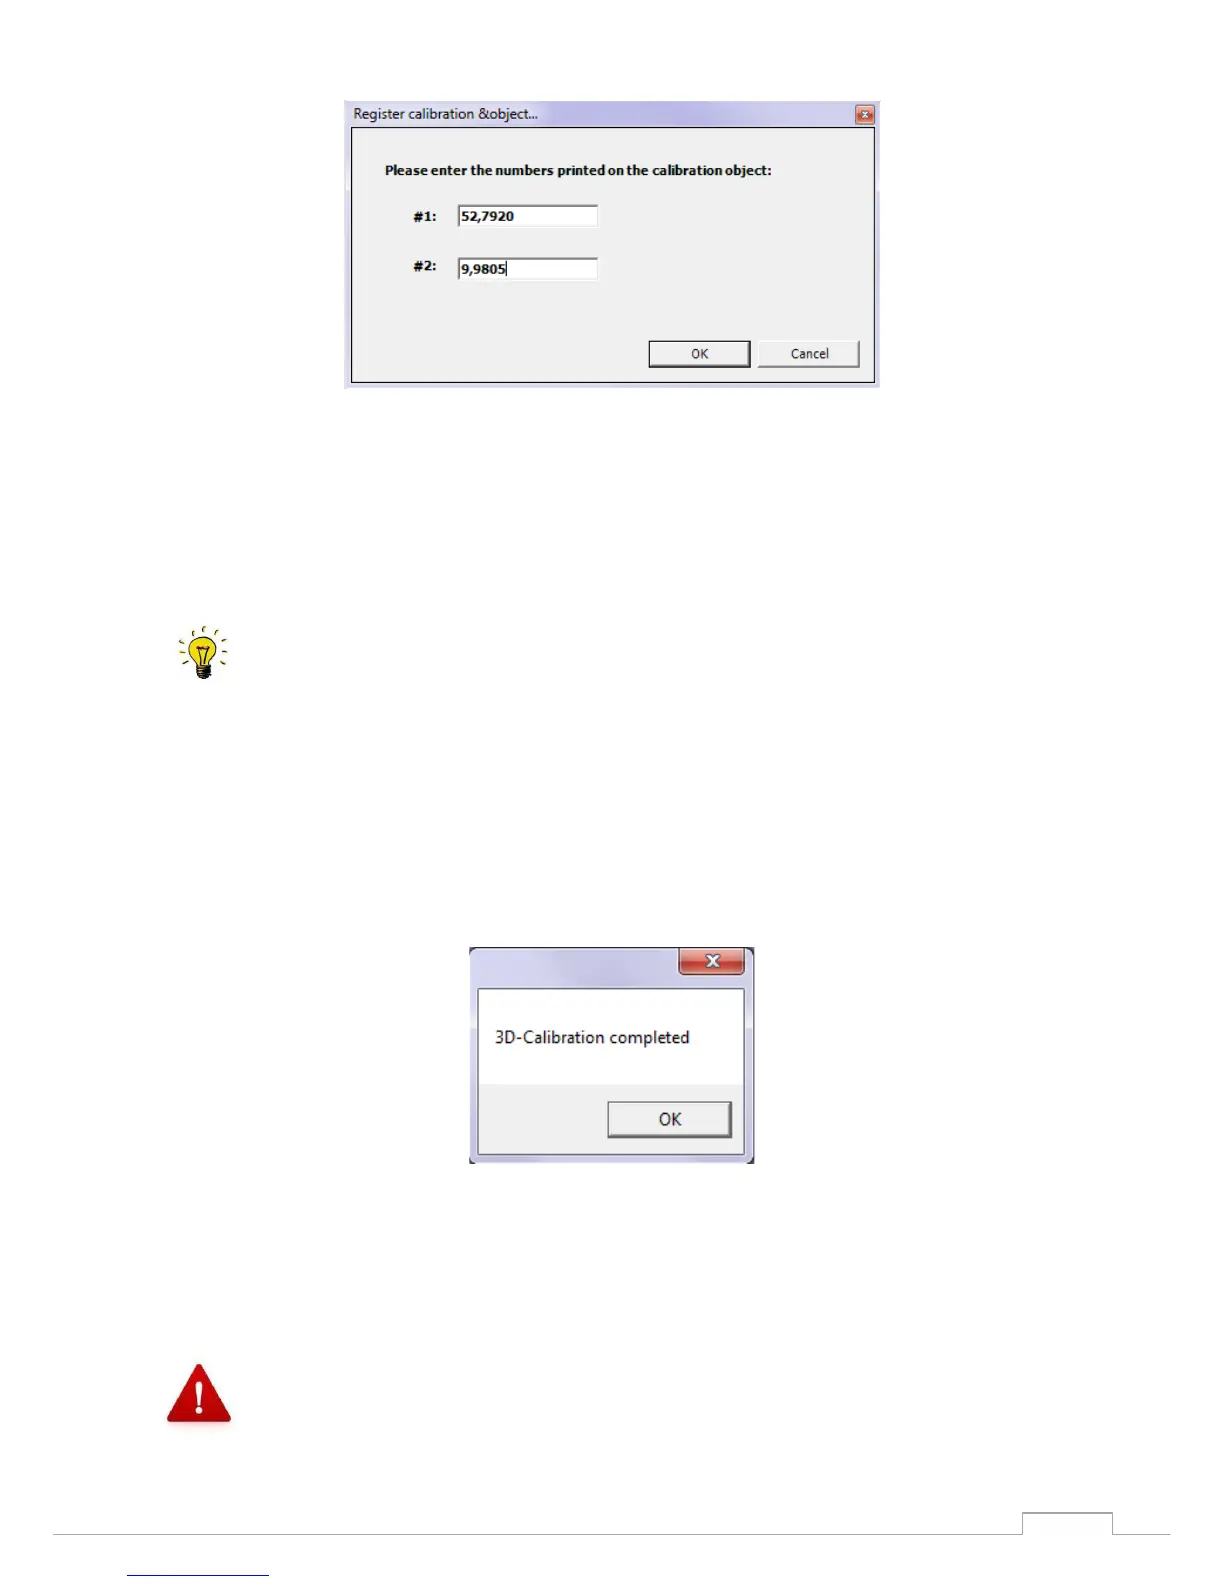
Figure 17: Calibration model registration
Individual values are indicated on the rear of the calibration model. Please enter these in fields #1 and
#2.
Confirm the procedure with "OK".
Calibration always requires three spacer plates.
You can start the 3D calibration only by selecting the start command under the item Options
Service 3D calibration Complete.
The system now performs a 3D calibration; this can take several minutes.
The following message will appear at the end of the calibration (Fig. 19).
Figure 18: Completing the calibration
The 3D calibration was successful. Confirm with "OK".
Repeat the calibration about every four weeks and each time the scanner is transported in
order to ensure the accuracy of the scan results.