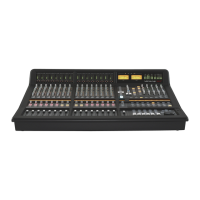
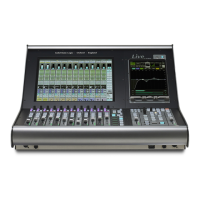
Console reassembly
In certain cases – except for smaller frames and some deliveries by road within the EU – consoles will be split for
shipment. Splits will be at 24-channel bay sections except at the Centre section which remains connected to the 24-channel
b
ay to its left. Corner sections are always removed before shipment. Unless commissioning by SSL has been arranged the
console will need to be reassembled on site.
A split point is constructed using two 3mm profiles held together by 9 off M3.5 screws (called ‘stitching’ screws). The
c
onsole beam is also split and is joined and strengthened by using two insert bars and a support plate held in place by eight
M10 bolts – See the diagram on page 16 for the mechanical assembly detail.
In addition to the mechanical split, three audio and one data cable will need to be re-connected.
To gain access to the stitching screws and the data connectors it will be necessary to raise the top trim and remove 2 or
3 channel strips from either side of the split. If the split is to the right of the Centre section then the track-ball panel will
need to be removed. The channel meter panel will also need to be tilted forward in order to reconnect its data lead.
Removing Channel Strips and Panels
The console MUST be switched off and all the mains input leads disconnected before any covers or panels are
removed.
Tools required to remove channel and Centre section panels are as follows:
• 2.5mm hex driver For visible front panel screws
• 1pt cross-head driver For rear panel screws and hidden screws
• Module puller tool For lifting the top edge of channel strips and cassettes
Where two adjacent channel bays are being joined it is recommended that three modules are removed from either side
of the split. This should be sufficient to gain access to the stitching screws and the bus ribbon connectors.
It should not be necessary to remove Centre section panels as the stitching screws should have been inserted from the
right-hand (ie. module) side of the split. The track-ball will need to be removed to gain access to the screws in the fader
area.
Refer to diagrams on facing page for instructions to remove panels and to page 16 for locations of the stitching screws.
Cable Connections
Once the frame has been mechanically joined (see following page) there are four cables that need to be re-connected.
• Three ribbon connectors are used to link the channel strip buscards between bays. These are located at the left-hand
edge of each channel bay. Once the bays are joined, the two 50-way and one 40-way connectors should be in the
correct location and will simply require pressing into their corresponding sockets (PL1A, PL2A and PL3A).
• One meter lead will also need to be re-connected behind the channel’s 24-strip wide meter panel. The instructions
are as follows:
1. Hinge up the front section of the channel bay top trim.
2. Remove six off M3 x 8mm cross head screws from the top of the meter panel.
3. Gently pull upwards on the meter panel at each edge until its lower edge is free – the panel does not need to be removed
completely and can just be tilted forward to gain access to the connector.
4 Locate the meter lead and its corresponding socket. This will be found on the meter drive card assembly in the middle of
the meter panel, the socket is at the bottom edge near the centre of the drive card, and is labelled PL3.
5. Route the cable through the penthouse section of the frame and connect to socket PL3 on the drive card.
Page 15
Duality SE Installation Guide
Section 4 System Installation