Figure 1-12, 1-13, 1-14, 1-15).
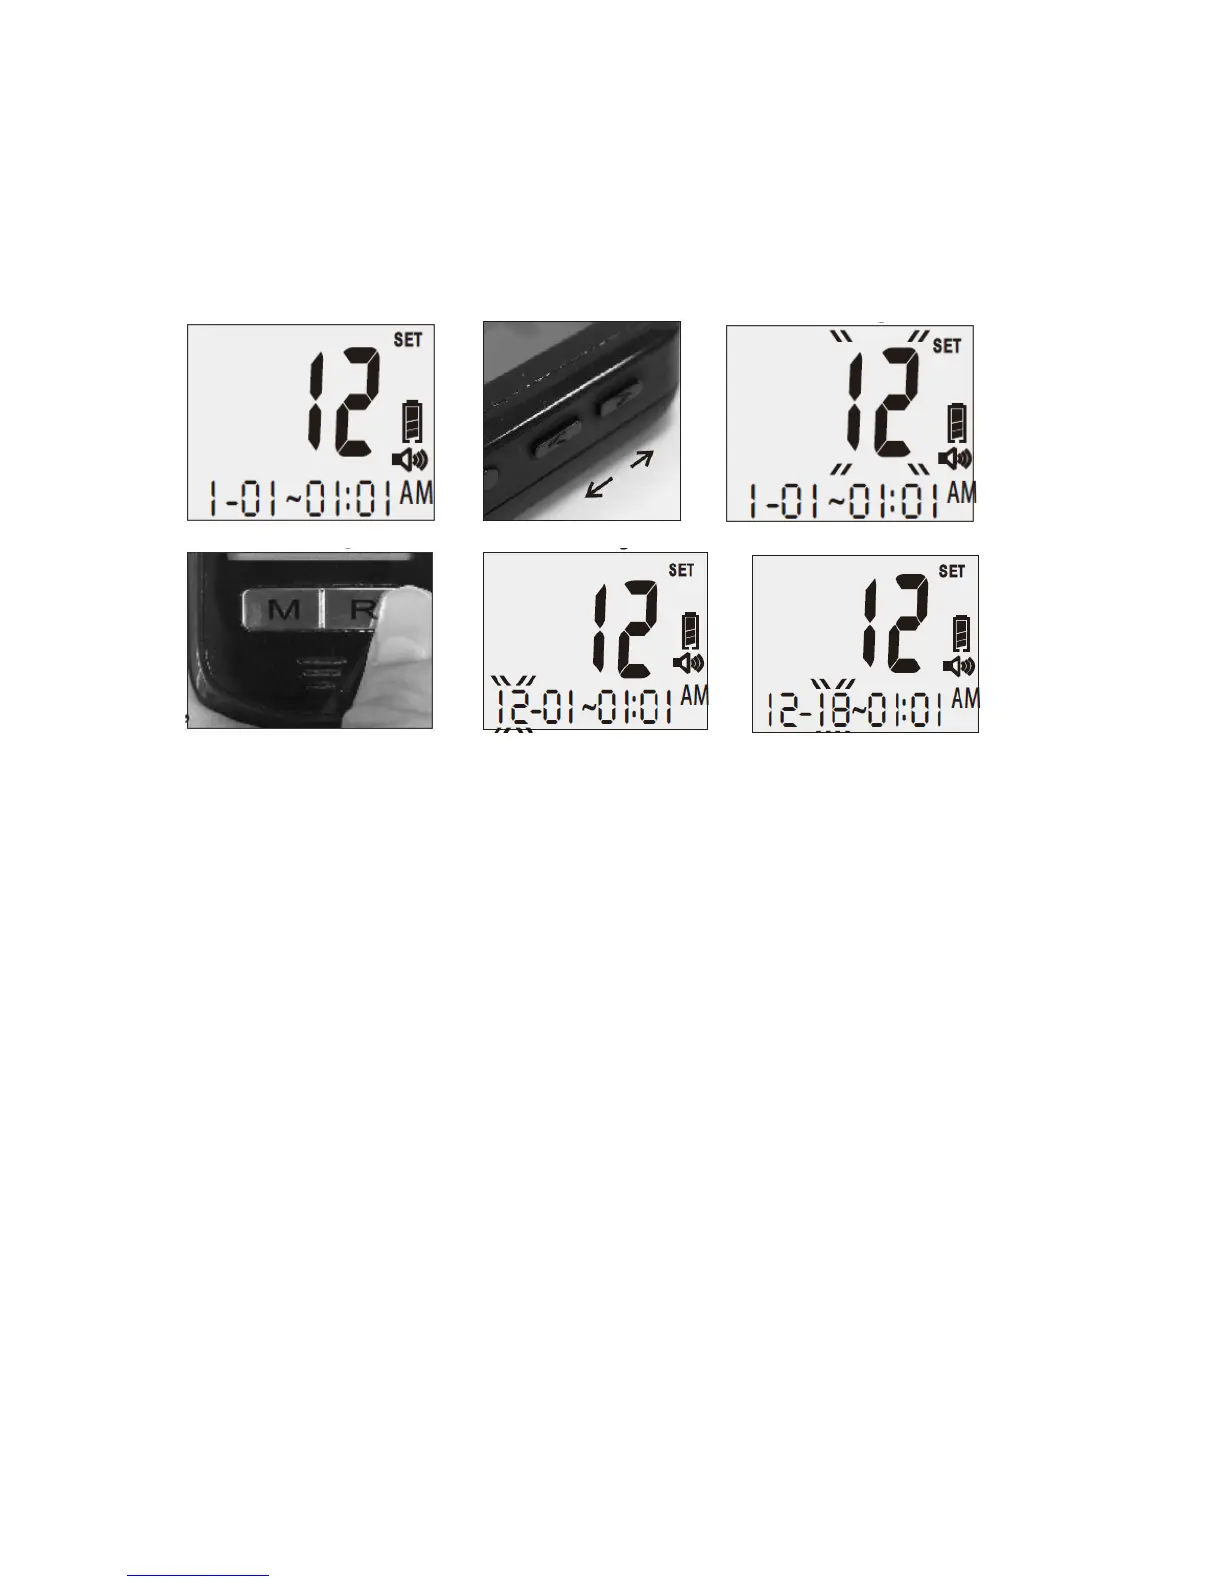
3. Set the Month- Press the “Up” or “Down” button on the right side of the meter until the
desired month appears. Each time you adjust the month, you will hear “The month is XXX.”
Press the “R” right function button to confirm the correct month and the meter will move to
the next setting. You will hear: “The day is XX. Please set the day” (see Figure 1-16).
1-11 1-12 1-13
1-14 1-15 1-16
4. Set the Date - Press the “Up” or “Down” button on the right side of the meter until the
desired day appears. Each time you adjust the day, you will hear “The day is the XX.” Press
the “R” right function button to confirm the correct day and the meter will move to the next
setting. You will hear: “The hour is XX a.m. (or p.m.). Please set the hour” (see Figure 1-17).
5. Set the Hour - Press the “Up” or “Down” button on the right side of the meter until the
desired hour appears. Each time you adjust the hour, you will hear: “The hour is XX a.m. (or
p.m.)” Press the “R” right function button to confirm the correct hour and the meter will
move to the next setting. You will hear: “The minute is XX. Please set the minute” (see
Figure 1-18).
6. Set the Minute - Press the “Up” or “Down” button until the desired minute appears. Each
time you adjust the minute, you will hear “The minute is XX.” Press the “R” right function
button to confirm the correct minute and the meter will move to the next setting. You will
hear: “Please set the alarm.”