Chapter 3: Testing Your Blood Sugar
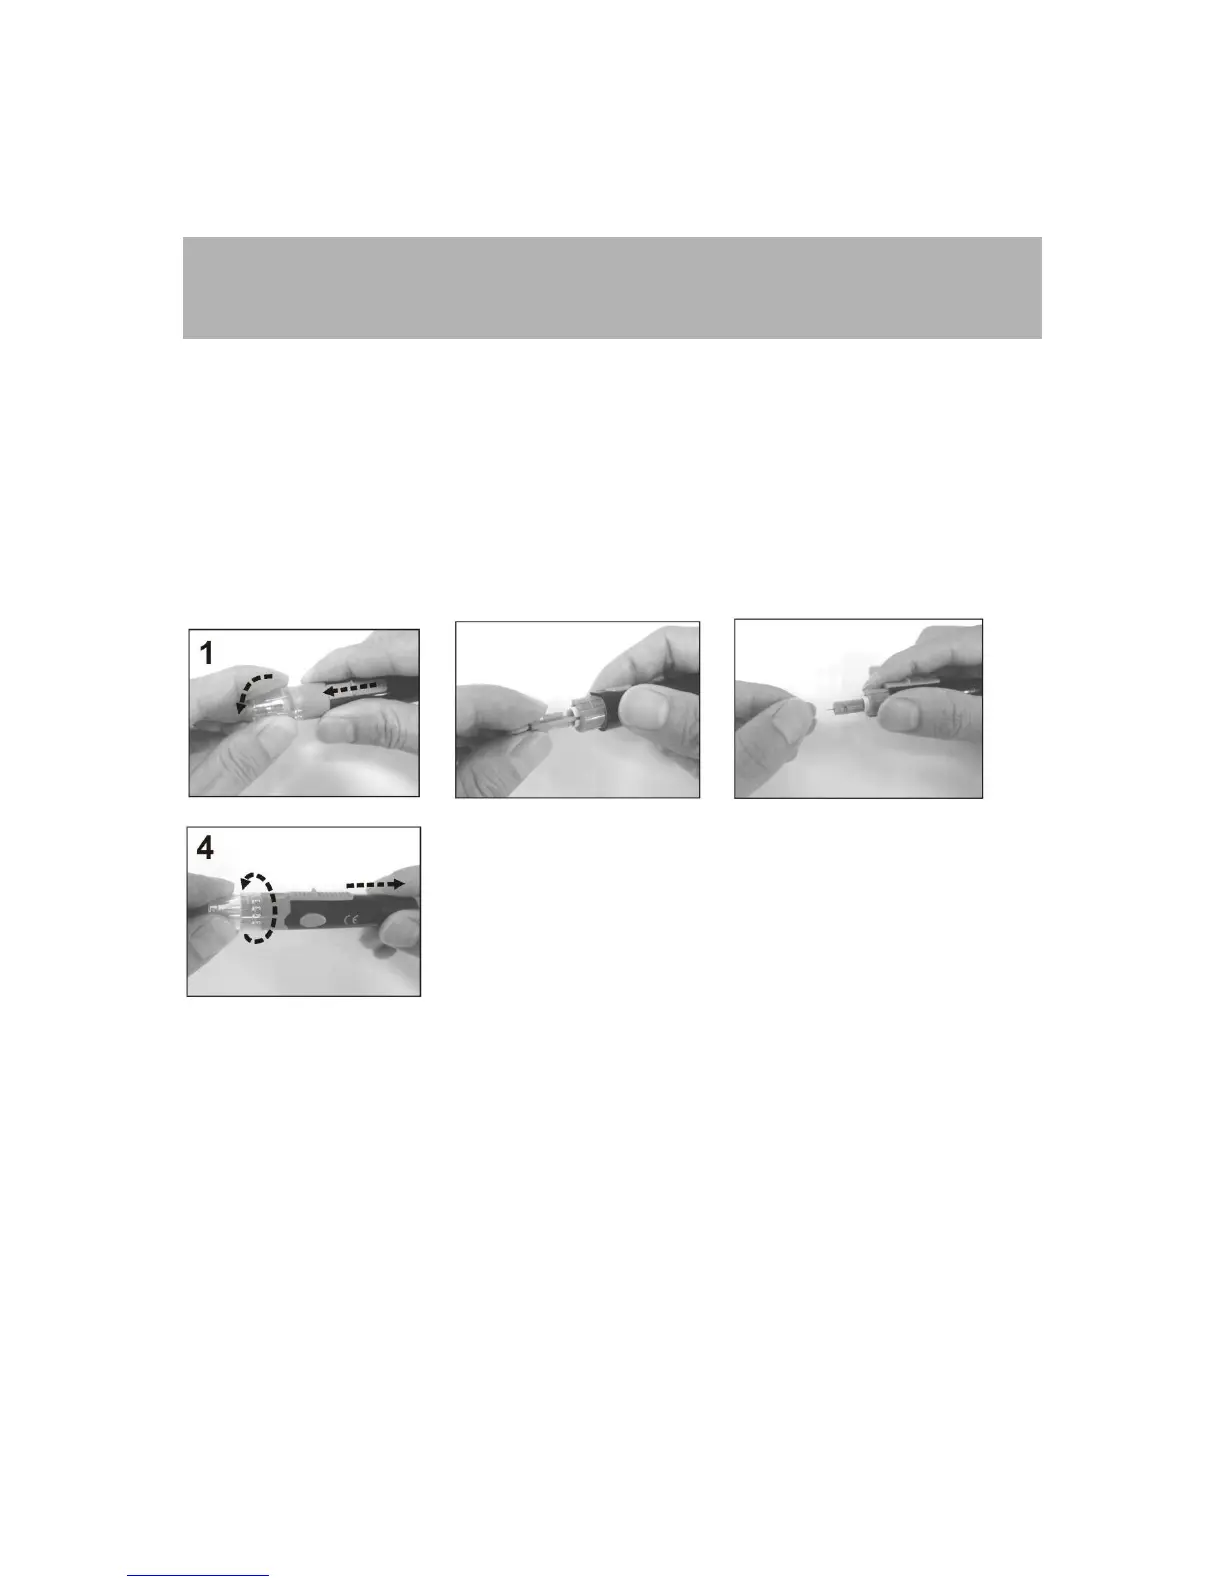
Preparing the Solus V2 Lancing Device
Note: To reduce the chance of infection:
Never share a lancet or a lancing device with anyone.
Always use a new, sterile lancet. Lancets are for single use only.
1. Unscrew the adjustable depth cap to remove the adjustable depth cap (see Figure 3-1).
2. Insert a new lancet firmly into the lancet holder (see Figure 3-2).
3. Twist off the protective cover of the lancet (see Figure 3-3).
4. Replace the adjustable depth cap onto the body of the device. Select lancing depth. If
necessary, set the lancing device for a deeper puncture (see Figure 3-4).
5. Slide the lancing device into locking position: gently pull the sliding gray barrel away from
the top of the lancing device until a soft click is heard.
3-1 3-2 3-3
3-4
Important: If you do not obtain enough blood on the strip, you will receive an error message.
You will also hear, “No sufficient blood.” This is critical for your safety.
Performing a Blood Glucose Test
1. If the meter and test strips are moved from one temperature to another, allow thirty (30)
minutes for them to adjust to the new temperature before performing a blood glucose
test.
2. Wash your hands with warm, soapy, water (see Figure 3-5).
3. Open the test strip bottle and take out one new test strip (see Figure 3-6). Recap the
bottle quickly and firmly.
4. Insert a test strip into the meter while the meter is in the “OFF” position. You will hear: