1-34
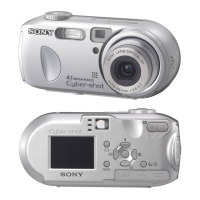
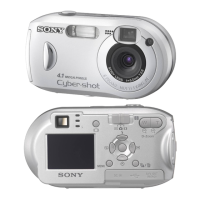
DSC-P31/P31M
72
Choosing images to
print
– Print mark
Mode dial setting:
You can designate certain images to be
printed.
This is convenient when you want to have
images printed in shops that follow DPOF
(Digital Print Order Format) specifications.
• Print marks cannot be attached to movies
(MPEG MOVIE) or images recorded using
Clip Motion.
• In E-MAIL mode, the Print mark will be
attached to the normal size image that was
recorded at the same time.
• Yo u can attach a print mark to images shot
using Multi Burst mode; all the images will be
printed on one sheet divided into 16 panels.
Single images
a Turn the mode dial to
.
b Display the image you want to
print using b/B.
c Press the MENU button.
The menu appears.
d Select “PRINT” using b/B,
then press the center z.
A (Print) mark will be attached to
this image.
To delete a Print mark
In Step 4, press the center z again. The
(Print) mark disappears.
Index (9 images) screen
a Turn the mode dial to and
press the W zoom button once
to switch to the Index (9
images) screen.
b Press the MENU button.
The menu appears.
c Select “PRINT” using b/B,
then press the center z.
The frame around the image selected
turns green.
• Yo u cannot select “ALL”.
d Select “SELECT” using b/B,
then press the center z.
The frame of the selected picture
changes to green.
• Yo u cannot select “ALL”.
e Select the images you want to
print using the control button,
then press the center z.
A (Print) mark is attached to the
image.
5
/
5
2048
SLIDE
OK
DELETE
PROTECT
PRINT
TO NEXT
MENU
•
SET
73
Still image editting
f To print other images, repeat
Step 5 for each of them.
g Press the MENU button.
The menu appears
h Select “OK” using B, then
press the center z.
The setting of the (Print) mark is
completed.
To delete a (Print) mark
To delete a (Print) mark, select an
image using the control button, and press
the center z.
To delete the Print marks
attached to all of your images
In Step 4, select “ALL”, then press the
center z. Next, select “OFF”, and press the
center z.
To cancel the Print mark
operation
In Step 4, select “CANCEL”, or select
“EXIT” in Step 8, then press the center z.
Index (3 images) screen
a Turn the mode dial to , press
the W zoom button twice, and
the Index (3 images) screen
appears.
b Display the image you want to
print in the center using b/B.
c Press the MENU button.
The menu appears.
d Select “PRINT” using v/V,
then press the center z.
The image in the center will have a
(Print) mark attached to it.
e To print other images, move
the image you want to print to
the center using b/B, and
repeat Step 4.
To delete a Print mark
In Step 4, press the center z again.
The (Print) mark will disappear.
•
OK
10:30
PM
2002 7 4100-0005
PROTECT
PRINT
DELETE