6-17
DVW-250/250P
6-4. Upper Drum Assembly Replacement
Installation
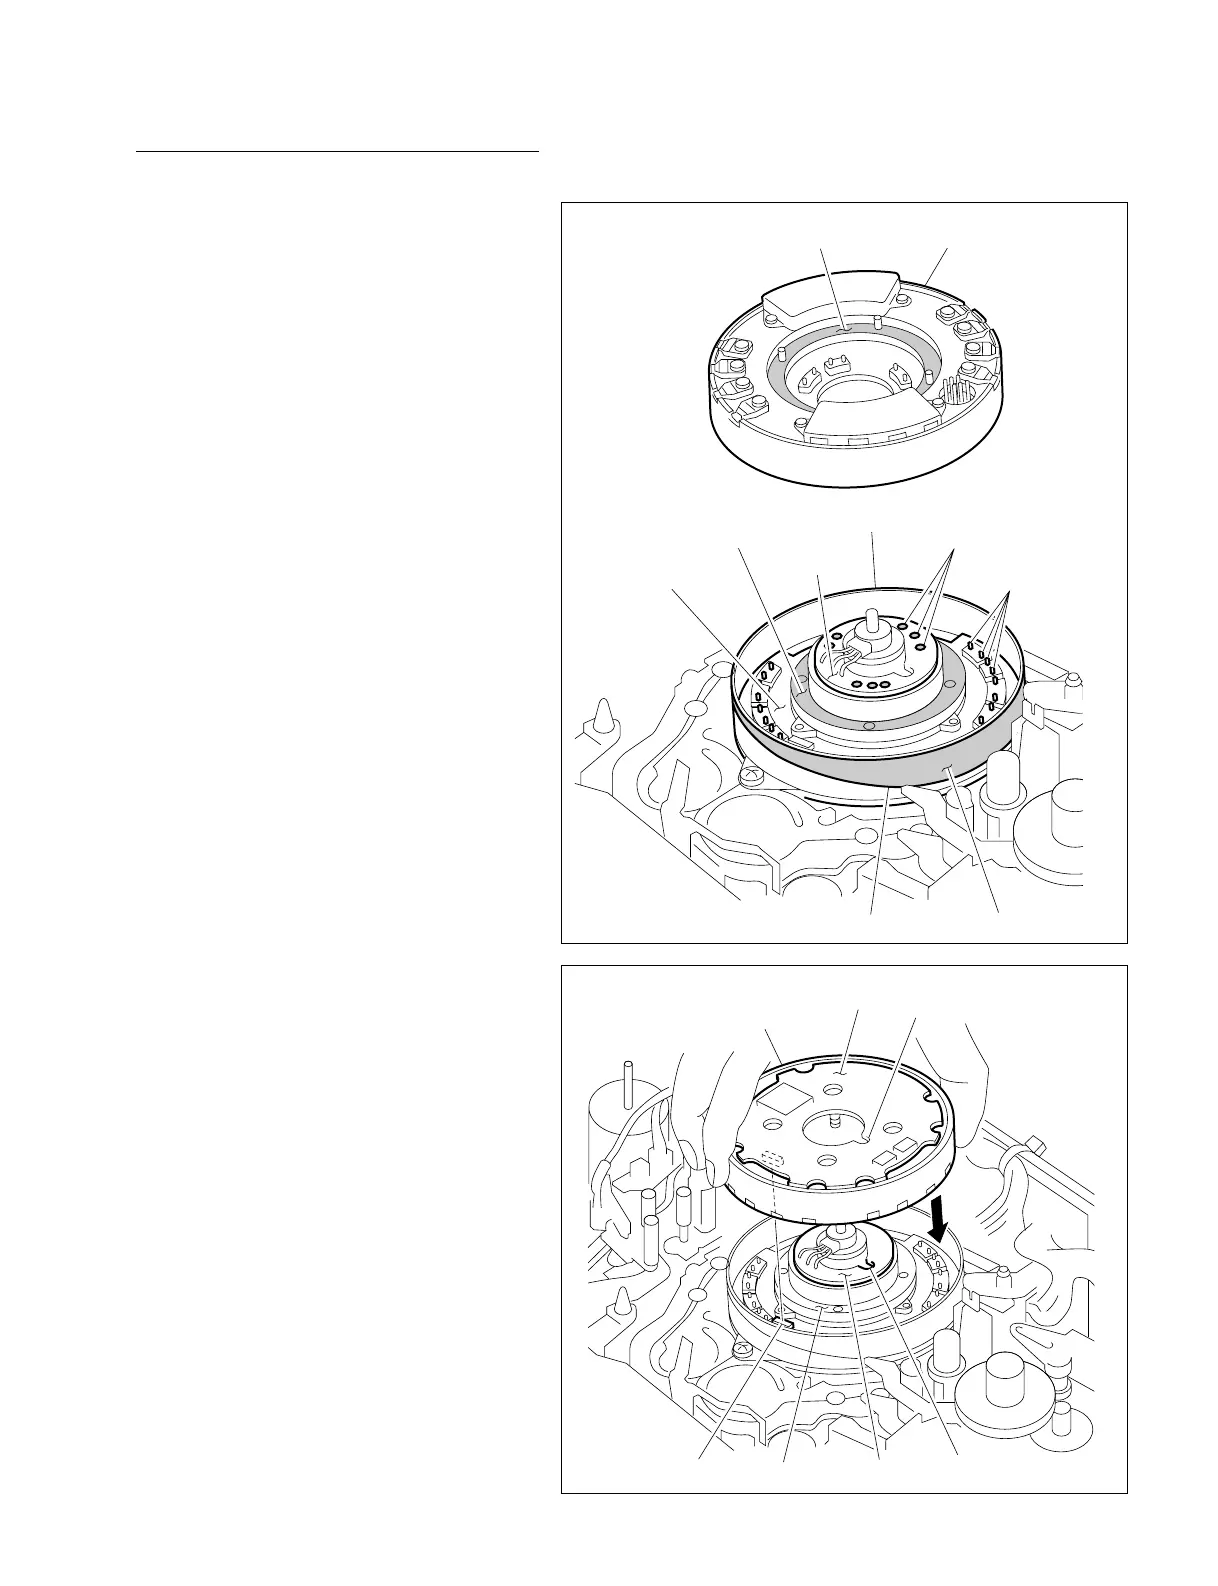
5. Cleaning of contact surfaces
(1) Clean the following places using a cleaning
cloth moistened with cleaning fluid.
• Flange of the lower drum (Shaded portion)
• Tape running surface and lead of the lower
drum
• Contact surface of a new upper drum
assembly (Shaded portion)
(2) Wipe the 8 contact points (16 pins) mounted
on the LDR-8 board of the flange and 12
circle patterns on the DR-261 board using a
dry cleaning cloth.
n
Never clean using a cleaning cloth moistened
with cleaning fluid.
6. Upper drum assembly installation
(1) Hold the no video head portions of a new
upper drum assembly. Align the notch of the
center hole on the UDR-9 board with the hole
on the DR-261 board.
(2) Move the upper drum assembly in the
direction of the flange without tilting it
slowly and connect a 6-pin connector plug to
the connector on the LDR-8 board of the
flange.
n
Take care not to touch the video heads
against the brush support or peripheral parts
when installing the upper drum assembly.
(3) Press the upper drum assembly in the direc-
tion of the flange until it securely attached.
Cleaning Upper drum
Flange
Lower drum
DR-261 board
LDR-8 board
Contact points
(16 pins)
12 circle patterns
Lead
Tape running surface
Upper drum
Notch
UDR-9 board
Connector
Flange
DR-261board
Hole


 To Next Page