6-9
DVW-250/250P
6-2. Brush Replacement
6-2. Brush Replacement
Overviews
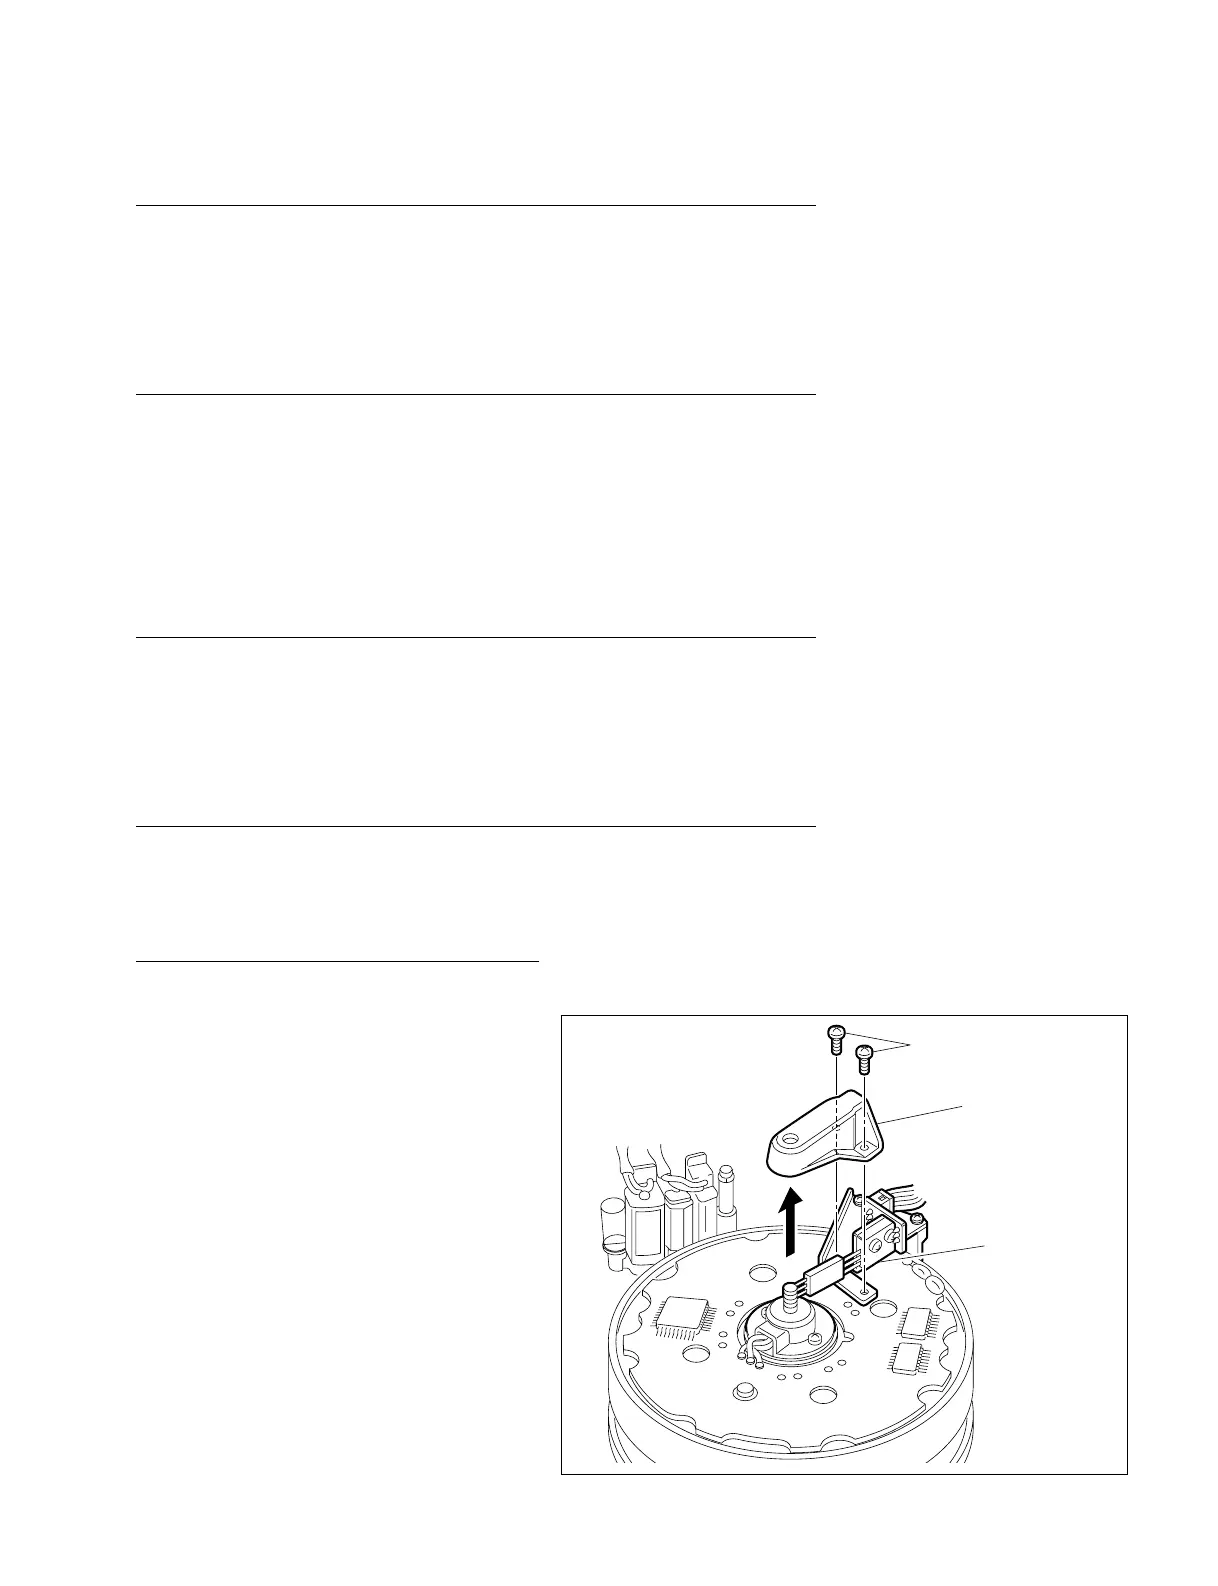
Brush cover removal
Brush assembly removal
Brush assembly installation
Brush cover installation
Cautions
If the brush worn out, replace the brush assembly. Once the brush assembly is
installed referring to the following procedures, the relative height and the contact
pressure against the slip ring will be automatically adjusted. Therefore, the adjust-
ment after replacement is not required.
Never clean on the surface of the brush using a cleaning piece moistened with
cleaning fluid.
Preparations
1. Turn off the power.
2. Remove the top panel. (Refer to “1-5. Removal/Installation of Cabinet”.)
n
The brush assembly can replace when the cassette compartment attaches to the unit.
Tools
• Torque screwdriver bit (for M2): J-6325-380-A
• Torque screwdriver (for 3 kg) : J-6325-400-A
Removal
1. Brush cover removal
(1) Remove the two screws and the brush cover.
Brush assembly
Screws(P2 × 2)
Brush cover


 To Next Page