6-5
DVW-250/250P
6-1. General Information for Mechanical Part Replacement
6-1-4. Other Cautions
(1) Screwdrivers and screw tightening torque
This unit uses small in size of screws. Be sure to use the relevant tools when
loosening or tightening these screws. Be sure to use the torque screwdriver
when tightening the screw, and tighten in the relevant torque reading.
Torque screwdriver bit (for M1.4) : J-6325-110-A
Torque screwdriver bit (for M2) : J-6325-380-A
Hexagon bit (across 1.5 mm) : J-6326-120-A
Hexagon bit (across 1.27 mm) : J-7031-460-A
Torque screwdriver (for 3 kg) : J-6325-400-A
Tightening torque
For M1.4(+) screw : 9 × 10
–2
N•m (0.9 kgf•cm)
For M2(+) screw : 19 × 10
–2
N•m (1.9 kgf•cm)
For hexagon screw : 19 × 10
–2
N•m (1.9 kgf•cm)
n
This unit uses the small in size of screws. When removing or attaching, the
screw may fall in the unit. To prevent this, it is recommended to magnetize the
screwdriver bit.
(2) Stop washers
Never re-use the pre-used stop washers. When attaching the part, be sure to use
a new stop washer.
Stop washer: 3-321-393-01
Stop washer: 3-669-465-01
Stop washer: 3-726-829-01
• Stop washer removal
(1) Remove the stop washer using a pair of tweezers or a small flatblade screw driver.
m
• Be careful not to fall the stop washer in the unit.
• Take care not to touch the tool against the other parts (especially the drum).
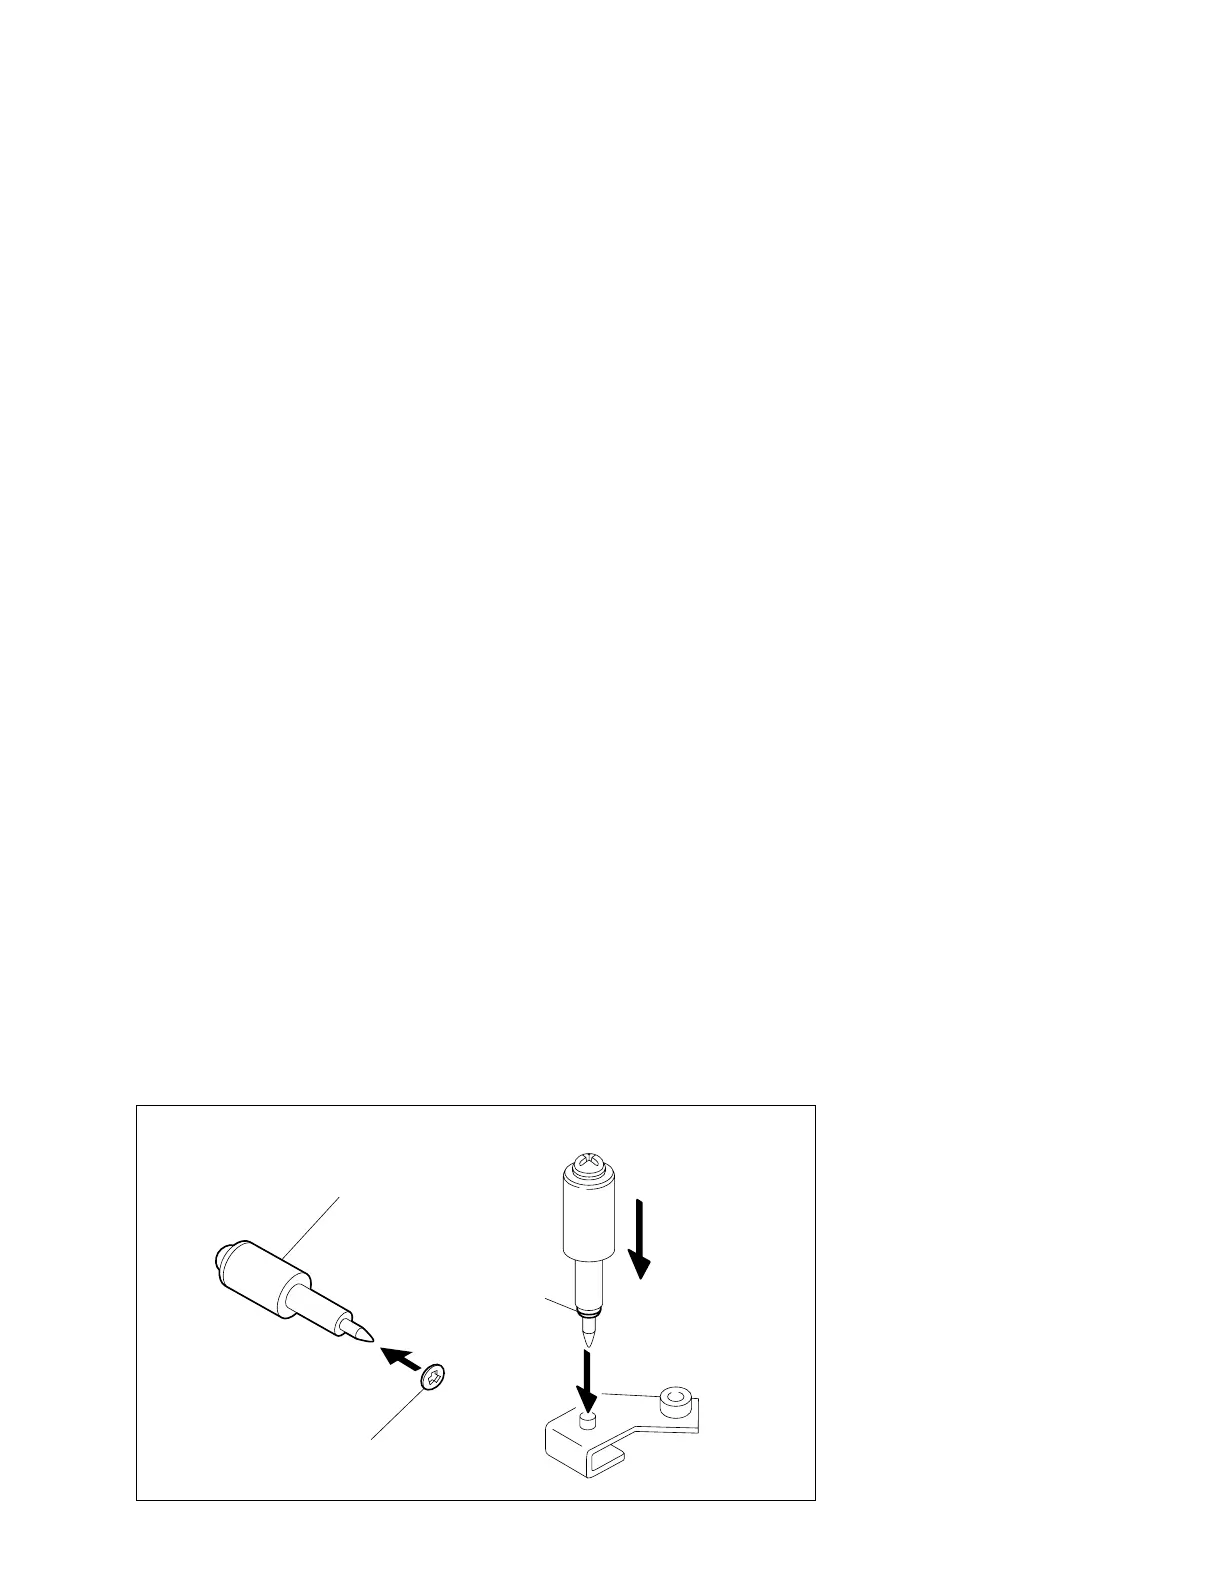
• Stop washer installation
When attaching, it is recommended to use the following tool.
Stop washer fastening tool: J-6323-530-A
(a) Put a stop washer to the top of a stop washer fastening tool.
(b) Put the top of the tool on the top of the shaft in an upright position.
(c) Press down the tool and attach the stop washer to the shaft.
Stop washer fastening tool
Stop washer
Stop washer


 To Next Page