6-23
DVW-250/250P
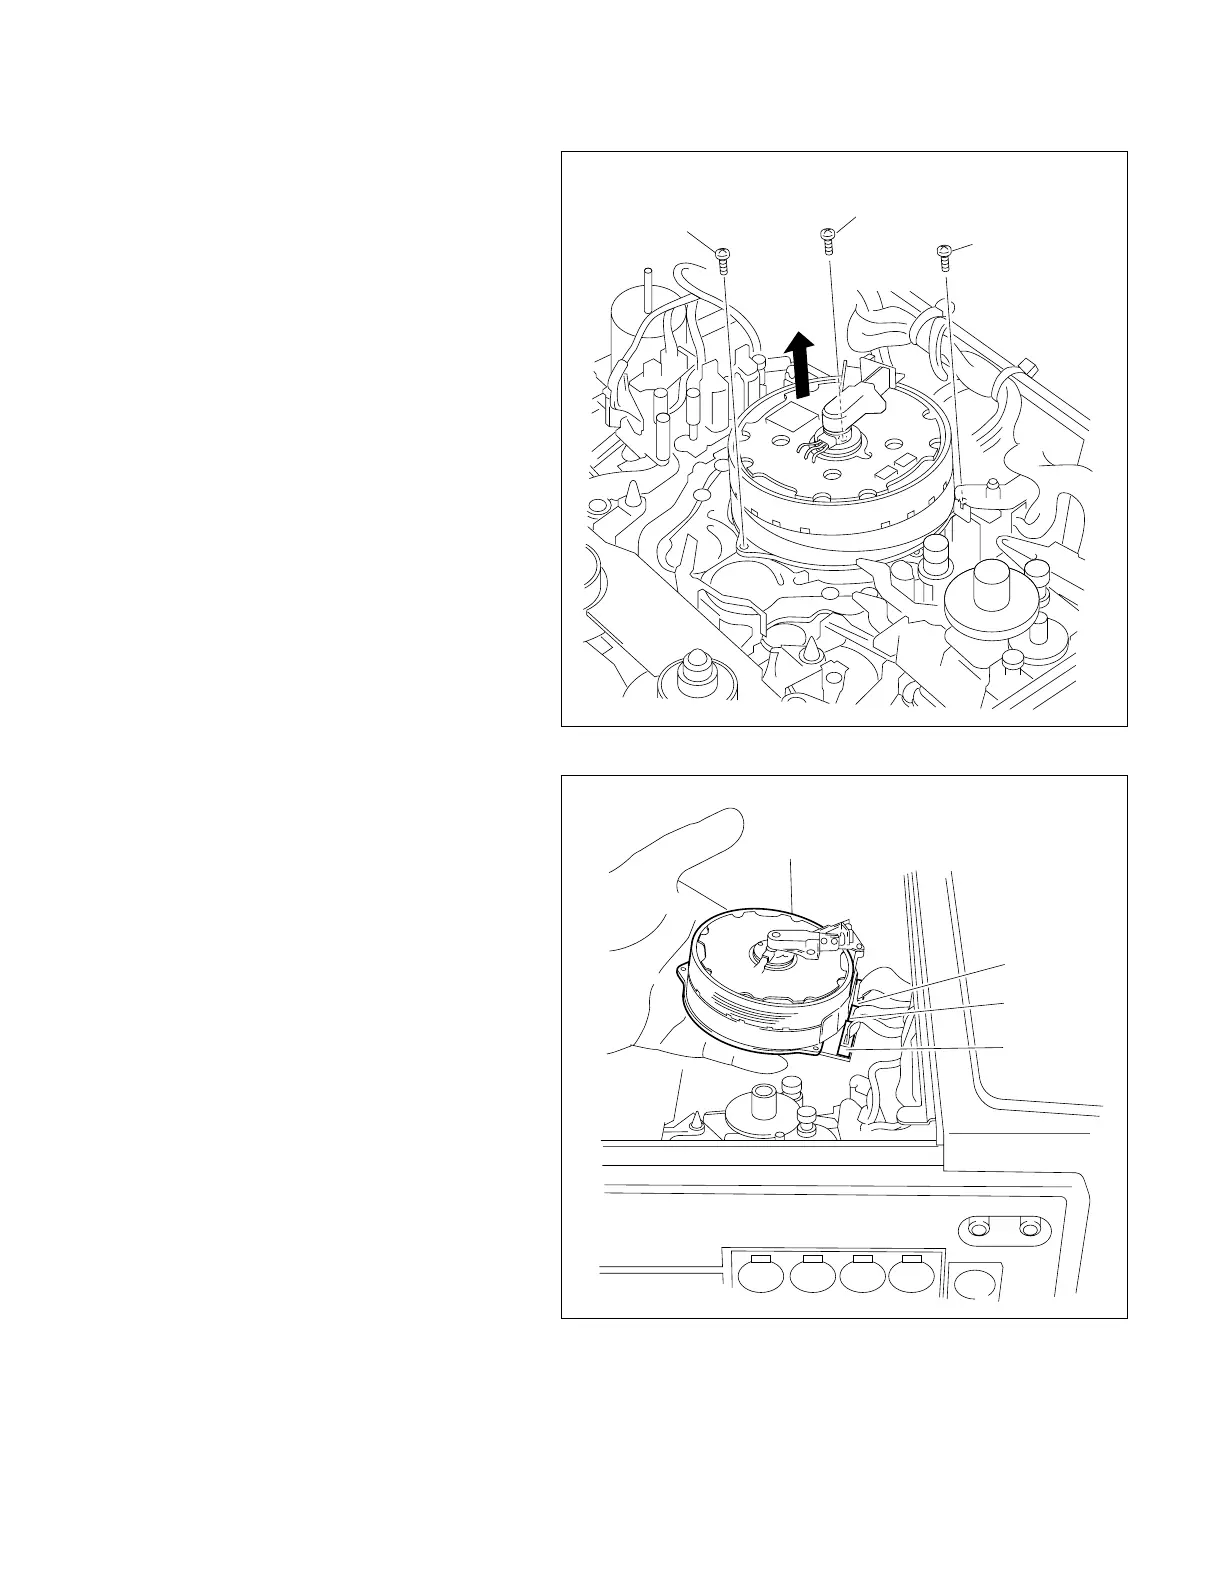
2. Drum assembly removal
(1) Remove the three screws which secure the
drum assembly.
(2) Lift just above the drum assembly and
disconnect the connector connected to the
brush board.
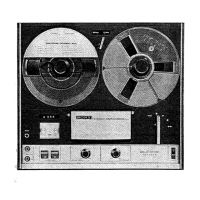
(3) Disconnect the three connectors (CN1, CN2,
and CN3) connected to the board at the
bottom of the drum.
The drum assembly can then be removed.
n
When removing the drum assembly be
careful not to damage the CTL head, CUE/
TC head, and peripheral tape guides.
Screw(PS2 × 5)
Screw(PS2 × 5)
Screw(PS2 × 5)
Drum assembly
CN2
CN3
CN1
6-5. Drum Assembly Replacement


 To Next Page