14
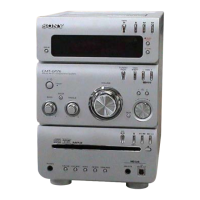
HCD-GP6V
[Cold Reset]
• The cold reset clears all data including preset data stored in
the RAM to initial conditions. Execute this mode when re-
turning the set to the customer.
Procedure:
1. Press the "/1 button to turn off the main power.
2. While depressing the x button, press the "/1 button.
3. The fluorescent indicator tube does not display any message
and the set is reset.
[Fluorescent Indicator Tube Test Mode]
• Fluorescent segments are tested when this test is activated.
Procedure:
1. Extract an AC plug.
2. While depressing the CD u button, insert an AC plug.
3. All segments of the fluorescent indicator tube turn on.
4. CD test mode is activated.
5. To exit from this mode, press the "/1 button or disconnect the
power cord.
[Version Display Mode]
•The model and the version are displayed.
Procedure:
1. Press the "/1 button to turn the set on.
2. To enter the test mode, press two buttons x and "/1 simulta-
neously for more than five seconds. The model and the ver-
sion are displayed.
[AMP Test]
•This mode is used to check the function of the amplifier.
Procedure:
1. Extract an AC plug.
2. While depressing the [MD] button, insert an AC plug to enter
the AMP test mode. The message “AMP TEST” is displayed.
3. The message “Volume MAX” is displayed, when pressing the
[VOLUME +] button. The message “Volume MIN” is displayed,
when pressing the [VOLUME --] button.
4. Each time pressing the [PLAY MODE/TUNING MODE] button,
the message “EQ MAX”, “EQ MIN” or “EQ FLAT” is dis-
played in this order.
5. To release from this mode, disconnect the AC plug and turn
the power off.
[AM Channel Step 9 kHz/10kHz Selection Mode]
• Either the 9 kHz step or 10 kHz step can be selected for the
AM channel step.
Procedure:
1. Set the function to AM.
2. While depressing the [TUNER/BAND] button, press the "/1
button.
3. The channel step is changed over.
[TC Test Mode]
Procedure:
1. Extract an AC plug.
2. While depressing the TAPE nN button, insert an AC plug.
3. The message “TC TEST” is displayed and TC test mode is
activated.
• Zero Return
1. Press the + > M or – .m button.
2. The tape is rewound to the counter zero position.
• Automatic record/playback test
1. Press the [REC START/REC PAUSE] button.
2. The message “MD” is displayed and AUX input is selected.
3. The tape is rewound to the counter zero position and record-
ing is started automatically.
4. When the x button is pressed, the tape is rewound to the
recording stated point and the set starts playback.
5. To exit from this mode, press the "/1 button or disconnect the
power cord.
SECTION 4
TEST MODE