2-10 (E)
HDCU3300/MM (J, E)
5. Remove the four screws and remove the ventilation
guide, DC fan and fan guard.
n
Hold the ventilation guide, DC fan and fan guard when
removing them. Otherwise they will drop when
unscrewed.
When replacing, be sure to use the specified part.
DC fan : 1-763-256-21
6. Install the DC fan by reversing the steps of removal.
n
Install the DC fan in the orientation shown in the
figure above.
2-1-7. Replacing the Right Side Fan
1. Remove the rear panel. (Refer to Section 2-1-4.)
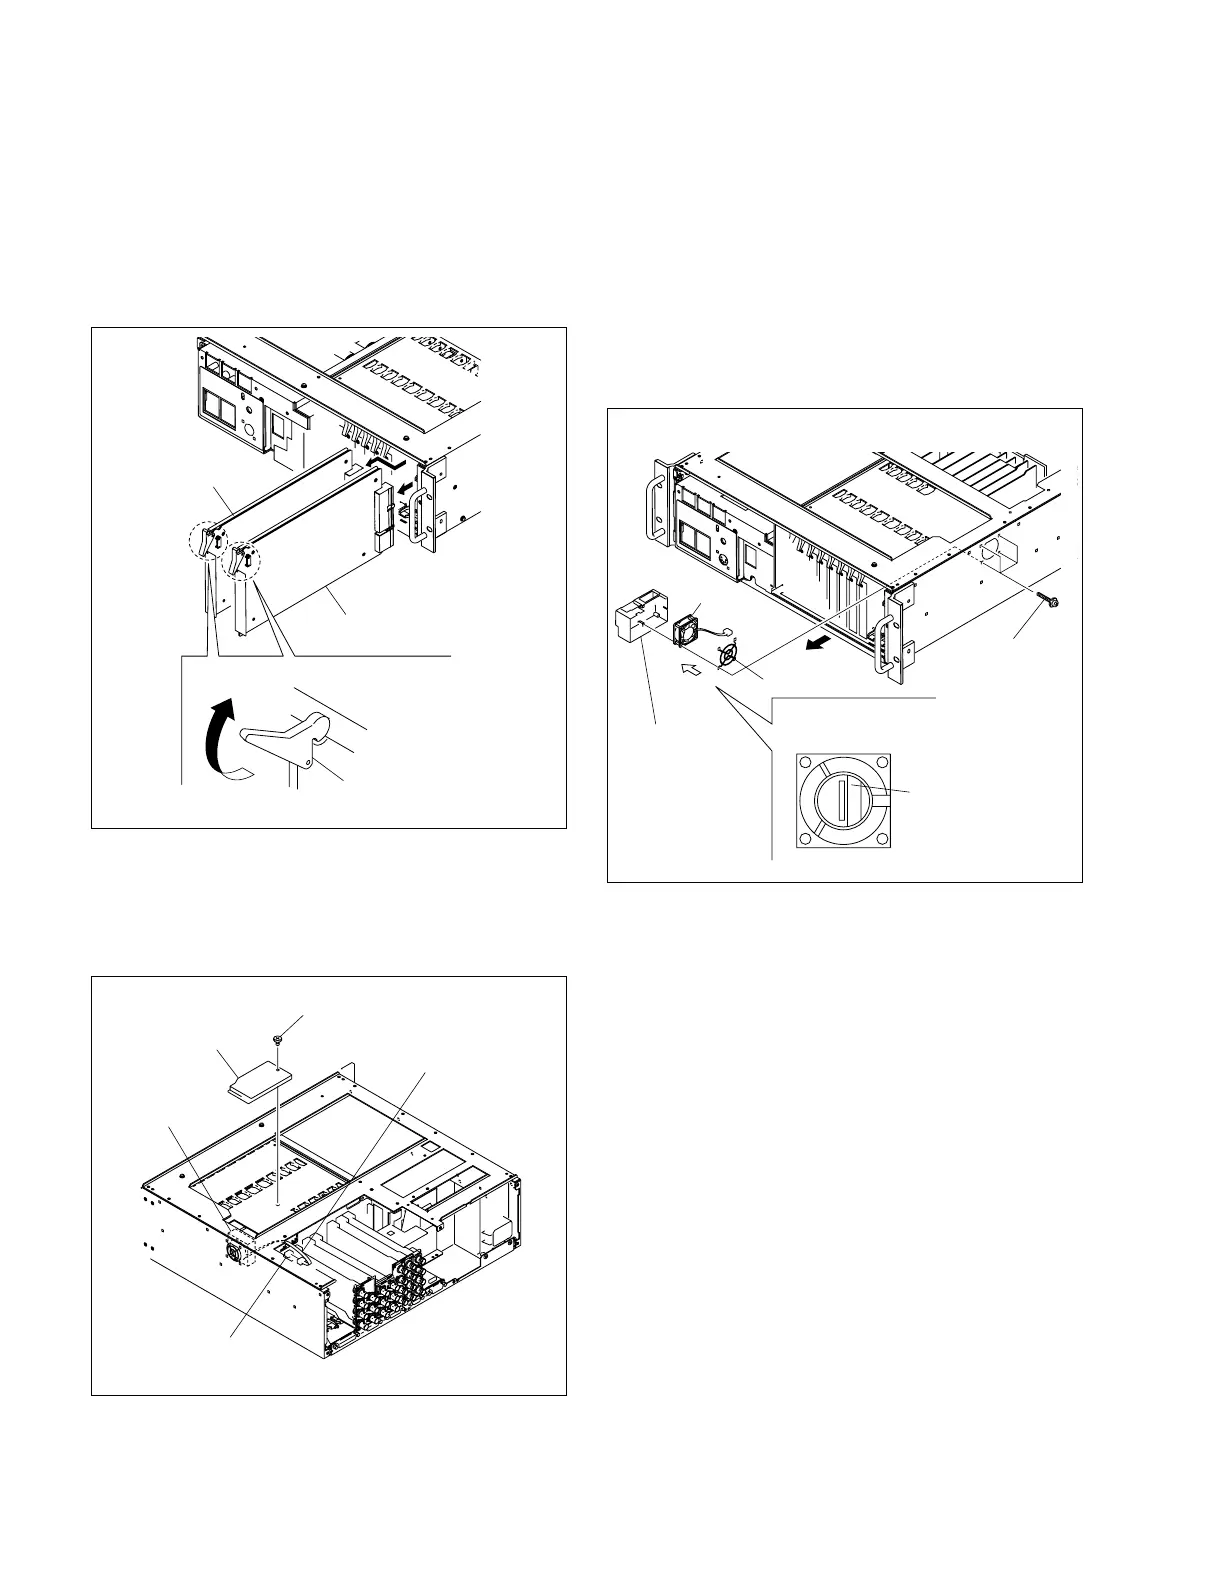
2. Pull the lever in the direction of the arrow and remove
the two plug-in boards (DRX-5 board and the option
board).
3. Remove the screw and remove the ventilation guide
(upper).
4. Disconnect the fan harness from the connector CN33
on the MB-1073 board.
Option board
DRX-5 board
Plug-in board
Lever
Ventilation guide
(upper)
DC Fan
CN33/
MB-1073 board
Fan harness
Screw
(B3 x 5)
Screws
(PSW3 x 20)
DC fan
Fan guide
The labeled side
faces the front
Diagram seen from the
direction of arrow A
Ventilation
guide
A