2-11 (E)
HDCU3300/MM (J, E)
2-1-8. Replacing the MB-1073 Board
1. Remove the rear panel.
(Refer to steps 1 to 8 of Section 2-1-4.)
2. Remove all the plug-in boards.
(Refer to step 2 of Section 2-1-7.)
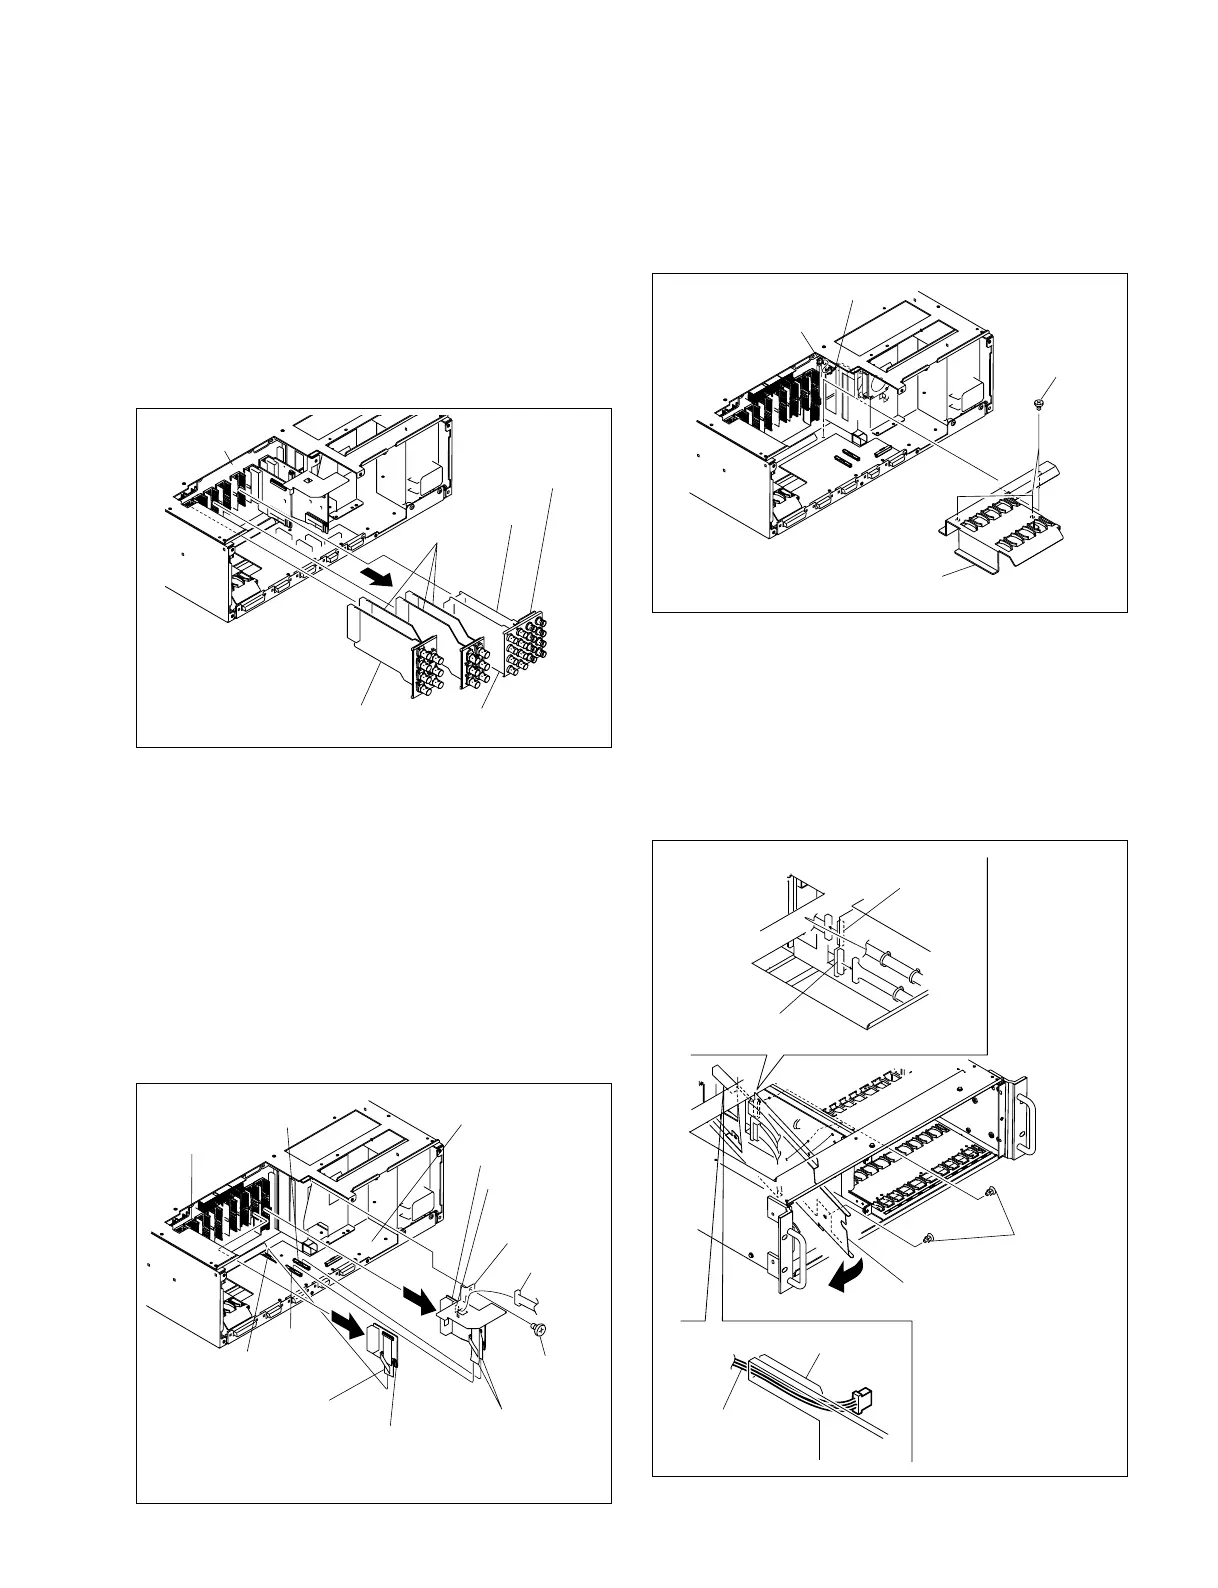
3. Pull out the HIF-25 board, three HIF-27 boards, SDI-
86G board, SDI-85 board and CN-2674G board in the
direction of the arrow.
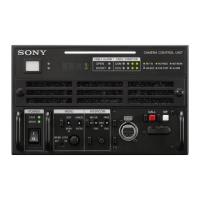
4. Remove the screw that fixes the VIF stopper.
5. Disconnect the two flexible card wires from connec-
tors CN8 and CN9 on the CNB-21G board and pull out
the VIF-34G board in the direction of the arrow.
6. Disconnect the flexible card wire from connector CN7
on the CNB-21G board, and pull out the ADO-10G
board in the direction of the arrow.
n
Life of flexible card wire will be significantly short-
ened if it is folded. Be very careful not to fold the
flexible card wire.
HIF-25 board
HIF-27 boards
MB-1073
board
SDI-85 board
SDI-86G board
CN-2674G
board
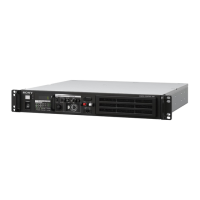
7. Remove the three screws and remove the rear board
fixing plate.
8. Disconnect the harness (DC fan: Rear) from the
connector CN34 on the MB-1073 board.
9. Remove the power supply unit.
(Refer to steps 1 to 5 of Section 2-1-1.)
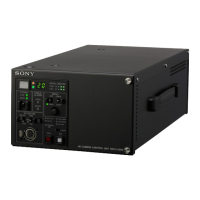
10. Remove the four rivets. While removing the harness
(DC fan: Rear), remove the cable cover in the direction
of the arrow.
11. Disconnect the harness from the connectors CN31 and
CN32 on the MB-1073 board.
Screw
(B3 x 5)
Flexible card
wire (50 core)
Flexible card
wires (50 core)
CN4
VIF-34G board
CNB-21G board
Harness B
VIF stopper
MB-1073
board
ADO-10G
board
CN7
CN8
CN9
Screws
(B3 x 5)
Rear board
fixing plate
Harness
CN34
(MB-1073 board)
CN31/
MB-1073 board
CN32/
MB-1073 board
Four nylon
rivets
Cable cover
Harness
(DC fan: Rear)
Cable cover



 To Next Page