EasyManua.ls Logo

Sony ICF-SW07 Service Manual

Sony ICF-SW07
63 pages
To Next Page IconTo Next Page
Page #1 background imageLoading...
Page #1 background image
Ver 1.1 2001.03
SERVICE MANUAL
FM STEREO/SW/MW/LW
PLL SYNTHESIZED RECEIVER
SPECIFICATIONS
US Model
Canadian Model
AEP Model
E Model
Tourist Model
ICF-SW07
AN-LP2
ICF-SW07
Antenna mdule
Antenna Controller
AN-LP2
9-926-933-12
2001C0200-1
© 2001.3
Sony Corporation
Audio Entertainment Group
General Engineering Dept.
w
w
w
.
x
i
a
o
y
u
1
6
3
.
c
o
m
Q
Q
3
7
6
3
1
5
1
5
0
9
9
2
8
9
4
2
9
8
T
E
L
1
3
9
4
2
2
9
6
5
1
3
9
9
2
8
9
4
2
9
8
0
5
1
5
1
3
6
7
3
Q
Q
TEL 13942296513 QQ 376315150 892498299
http://www.xiaoyu163.com
Question and Answer IconNeed help?

Do you have a question about the Sony ICF-SW07 and is the answer not in the manual?

Sony ICF-SW07 Specifications

General IconGeneral
BrandSony
ModelICF-SW07
CategoryStereo Receiver
LanguageEnglish

Summary

Service Note

Safety-Related Component Warning

Highlights critical components for safe operation and replacement instructions.

Disassembly Procedures

Electrical Adjustments

Electrical Parts List

Service Note: Replacing SW Station Call ROM

Exchanging the SW Station Call ROM

Step-by-step instructions for removing and inserting the SW Station Call ROM.

Cleaning SW Station Call ROM Contacts

Instructions on how to clean the ROM contact surface if the unit displays 'NO ROM'.

Using the AN-LP2 Active Antenna

Inserting Batteries

Step-by-step guide for inserting batteries into the battery compartment.

Power Sources: Operating on Batteries

Antenna Setup

Instructions for unfolding, connecting, and positioning the antenna module.

Replacing Batteries in the Main Unit

Operating on House Current

AC Power Adaptor Usage Notes

Important notes regarding the proper use and care of the AC power adaptor.

Operating on Car Battery

External Power Source Notes

Important notes regarding the use of external power sources and battery maintenance.

Setting the Clock

Setting the Local Time

Step-by-step guide to setting the local time, including using city names for time zones.

Setting the Clock (Continued): Finding World Time

Finding Time in Other World Areas

Steps to display WORLD time and switch between LOCAL and WORLD time.

Listening to the Radio: Direct Tuning

Direct Tuning Procedure

Step-by-step guide for direct frequency input for tuning stations.

Manual Tuning and Frequency Ranges

Manual Tuning Procedure

How to manually adjust frequencies using step buttons.

Scan Tuning and Reception Control

Scan Tuning Procedure

Step-by-step guide for initiating and controlling scan tuning.

Controlling Scan Stops with ATT

How to use the ATT switch and control to manage scan stops and reception sensitivity.

Preset Tuning and Erasing Stations

Preset Tuning Procedure

How to store and tune to preset broadcast stations.

Tuning to a Preset Station

Steps to recall and listen to a preset broadcast station.

Erasing a Preset Station

Instructions on how to remove a stored preset station.

SW Station Call Tuning

SW Station Call Tuning Procedure

Step-by-step guide for using SW Station Call tuning.

MY-Memory Tuning and ROM Updates

MY-Memory Tuning Procedure

How to store and tune up to 100 frequencies to the MY button.

Updating the SW Station Call ROM

Information on replacing the SW Station Call ROM for updated frequencies.

Tuning to MY-Memory Stations

Tuning to a MY-Memory Station

Step-by-step guide for recalling stations from MY-Memory.

Manually Recalling MY-Memory Frequencies

How to manually step through MY-Memory frequencies.

Erasing MY-Memory Presets

Receiving SSB and CW Transmissions

Optimum AM Reception: Synchronous Detection

Synchronous Detection Procedure

Steps to select and use synchronous detection modes (SYNC U/L) for AM reception.

Other Operations: Using the Supplied External Antenna

Inserting Batteries into Antenna Controller

Step-by-step guide for inserting batteries into the AN-LP2 antenna controller.

AN-LP2 Antenna Setup

Instructions for unfolding, connecting, and positioning the antenna module.

Editing Labels for Presets and Settings

Editing Labels Procedure

Step-by-step guide for entering custom alphanumeric labels.

Using the Timer: Standby Function

Waking Up to Radio or Buzzer

How to preset frequencies and times for waking up to radio or buzzer.

Changing Standby Time

Steps to preset a new standby time.

Canceling the Standby Function

How to deactivate the standby function.

Waking Up to the Buzzer

Sleep Timer: Falling Asleep to the Radio

Sleep Timer Procedure

Steps to set the sleep timer to automatically turn off the radio.

Using the Hold Function

Hold Function Operation

Steps to activate and deactivate the hold function.

Canceling the Hold Function

How to deactivate the hold function.

Turning Off the Beep

General Warnings and Precautions

Tips on Radio Waves

Understanding Synchronous Detection

Explains synchronous detection, its purpose in overcoming fading and interference.

Disassembly: Radio Section

Disassembly of Radio Section Components

Steps for removing the cabinet, main board, chassis, keyboard, and microcomputer board.

Disassembling the Lower Cabinet Assembly

Detailed steps for removing the lower cabinet assembly and related parts.

Disassembly: Antenna Controller Section

Disassembling the Chassis Assembly

Disassembling the Main Board

Disassembling the Key Board

Disassembling the Microcomputer Board

Disassembling Antenna Controller: Cabinet Front and Reel Assy

Disassembling Antenna Controller: Cabinet Rear, Reel, and Control Boards

Electrical Adjustments: AM Section

AM 2nd Local Adjustment Procedure

Steps to adjust the 2nd local oscillator for AM reception.

AM 1st IF Adjustment Procedure

Steps to adjust the 1st IF stage for AM reception.

SSB Zero Beat Adjustment

Procedure to adjust SSB zero beat for optimal reception.

SW Frequency Adjustment

SW Frequency Adjustment Procedure

Steps to align the set with RF signal generator frequencies and adjust tuning parts.

FM Section Adjustments

FM Frequency Coverage Adjustment

Steps to adjust FM frequency coverage using a digital voltmeter.

FM Tracking Adjustment

Steps to adjust FM tracking after frequency coverage adjustment.

FM Stereo Adjustment

SD Adjustment

FM 100MHz Adjustment

Microcomputer Section Adjustments

4MHz System Clock Adjustment

Steps to adjust the 4MHz system clock on the microcomputer board.

Block Diagrams

Schematic Diagram: Main Section

Schematic Diagram: Key Section

Schematic Diagram: Microcomputer Section

Schematic Diagram: Antenna Section

IC Block Diagrams

Electrical Parts List: Antenna Board Components

Electrical Parts List: Control and Key Board Components

Electrical Parts List: Main Board Capacitors (Part 1)

Electrical Parts List: Main Board Capacitors (Part 2)

Electrical Parts List: Microcomputer and Main Board Components

Electrical Parts List: Microcomputer and Reel Board Components

Electrical Parts List: Main Board Resistors (Part 1)

Electrical Parts List: Main Board Resistors (Part 2) and Microcomputer Components

Electrical Parts List: Microcomputer Section Components (Continued)

Electrical Parts List: Microcomputer, Reel, and ROM Components

Accessories and Packing Materials

Safety Critical Components

Highlights components critical for safety and their replacement.
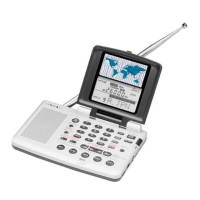
Related product manuals