— 34 —
39
Playing MDs
Changing Playback Speed
(Variable Speed Play)
You can adjust the play time by changing the speed of
play.
You can adjust the speed of a track in the normal range of
±12.5%. You can play late at up to 12.5% of normal speed
(in this case, a pitch is low) and fast at up to 12.5% of
normal speed (in this case, a pitch is high).
Note
MDLP-recorded tracks cannot be played faster than
normal speed. When you play an MD containing the
MDLP-recorded tracks, adjustment of the speed
automatically (0 to _12.5%) is made.
If you play an MD containing MDLP-recorded tracks when
fast speed is set, the speed becomes 0% automatically.
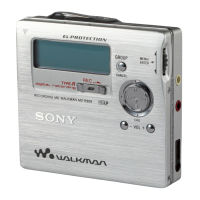
VARI SPEED
VARI SPEED +
VARI SPEED –
LEVEL/DISPLAY/CHAR
1
Press VARI SPEED during stop, play or pause.
“V.SPEED” lights up at the display window.
2
Press VARI SPEED
+
or
_
to select desired speed.
You can adjust the speed of VARI SPEED when the
display window is normal (“Using the Display
Window” on page 12).
For other displays, you can turn on and off VARI
SPEED, but cannot adjust the speed. You can adjust it
when normal display is returned by pressing
DISPLAY/CHAR and % of the speed to be changed
appears.
The speed changes in the unit of 0.5%.
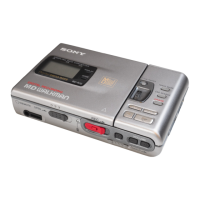
2 4m09s
Tr
10 %DREAM
.
5
% of changed speed Display of track name
Track number Play time converted for
the changed speed
The time display at the display window is also
displayed during conversion for the changed speed.
To stop Variable Speed Play
Press VARI SPEED to turn off “V.SPEED” at the display
window. The display window also returns to normal
display.
40
Editing Recorded
MDs
This chapter explains the various editing
methods that are available.
Before you start editing
RAM editing and DISC editing
Two edit modes are available.
DISC editing : The results of editing are recorded to the
disc’s TOC.
RAM editing : The results of editing are not recorded, but
are only temporarily edited for output.
RAM editing allows for the editing of
record-protected discs or premastered discs.
Editing operation methods are common.
Notes
• To protect music copyright, premastered MD that has
been RAM edited cannot be digitally recorded.
• RAM editing is a temporary edit only, so the contents of
editing cannot be written to disc. When the disc is
removed, the contents of editing is not saved.
• Recording and S.F EDIT cannot be made in RAM edit
mode.
To select RAM editing
Insert a disc while pressing x (STOP). “RAM” lights up in
the display.
To select DISC editing
Remove the disc once. The “RAM” indication on the
display will disappear, and the mode is returned to DISC
editing.
41
Editing Recorded MDs
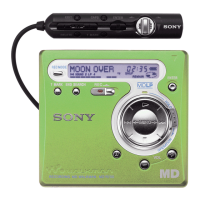
Using buttons and control for editing
operations
The buttons and control of the recorder can be used as
described below to erase, divide, move or combine tracks.
Note
When a name is given to a track or disc, the functions of
the buttons and control described below will change. For
more details, see the section “Naming track or MD” (page
46).
MENU / NO
YES
AMS /
MENU/NO: When pressed, “Edit Menu” appears on the
display and editing operations can be selected. If the
button is pressed during editing, editing is canceled.
AMS: The desired editing operation and track number are
selected by turning the AMS; confirmation is made by
pressing it. It is also used to erase part of a track, or to
specify the division of a track.
YES: This can be used instead of pressing AMS.
m/M: Press to specity the unit (minute, second, or
frame) which playback is advanced when the AMS
control is turned.
You can also use these buttons to locate the end point of
the portion to be erased.
For more information on the functions of each button, refer
the page on the editing operations.
About indication which appears during
editing
When “Protected” appears in the display.
The MD’s record-protect slot is open, and editing cannot
be made. Slide the record-protect tab to close the slot. For
more details, see the section “To prevent accidental erasure
of the recorded material” on page 19.
About indications which appear after
editing
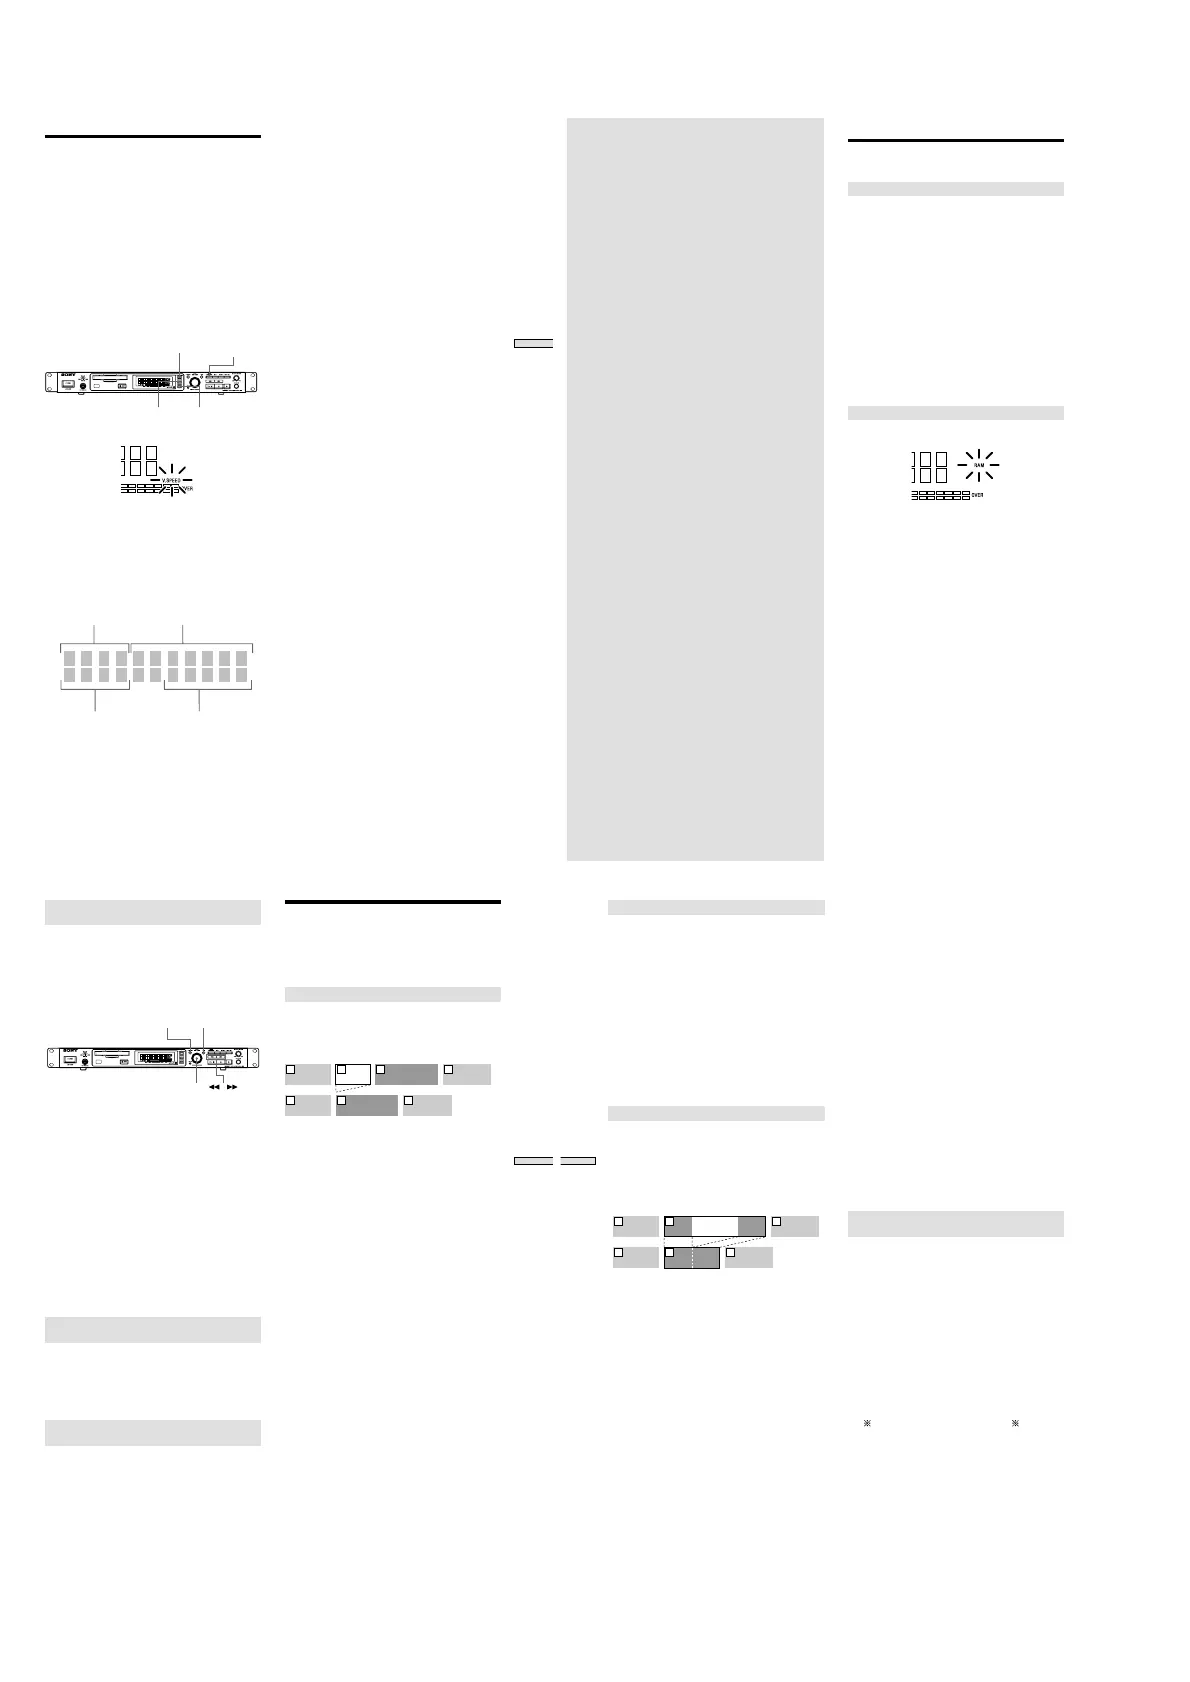
When “TOC” lights up in the display
The material that has been edited has not yet been
recorded to the MD. Remove the MD, or turn off and then
turn on power to the recorder; the edited material will be
written to disc.
When “TOC Writing” flashes in the display
The edited material is being recorded to the MD. Do not
disconnect the power supply and do not move the MD—
the sound material may not be recorded properly.
Erasing Tracks (ERASE)
By specifying the number of a track to be erased, or the
section to be deleted. All tracks, or any number of tracks,
can also be erased.
Erasing a single track (ERASE)
The track number is selected and the track is erased.
Example: The second track (track name “BBB”) is
to be erased:
AAA BBB CCC DDD
1 2 3 4
AAA CCC DDD
1 2 3
When a track is erased, the track numbers are
automatically reassigned. For example, when track two is
erased, the previous track number three and all others
after it move up one track number.
1
Press MENU/NO while the recorder is stopped,
playing, or paused.
“Edit Menu” appears in the display.
2
Turn AMS (or press ./> repeatedly) until
“TrErase?” appears in the display; press AMS or YES.
The track number is displayed and playback of the
track begins.
3
Turn AMS until the track number of the track to be
erased is displayed (or press ./> repeatedly).
4
Press AMS or YES.
“Complete!” appears for a few seconds and then
disappears. The track selected in step 3. is erased, and
playback of the next track begins.
To cancel the operation
Press MENU/NO or x.
z When “ERASE???” is displayed during procedure 4. above:
The track has been record-protected on another MD
recorder. If you still want to erase this track, press AMS
or YES again while the “ERASE???” indication appears.
z Erasing more than two tracks
So that the track numbers do not change during the
middle of operations, the tracks are erased from the
furthest back first.
42
Editing Recorded MDs
Erasing all tracks on an MD (ALL ERASE)
All tracks on the MD and the all name are erased.
1 Press MENU/NO while the recorder is stopped,
playing, or paused.
“Edit Menu” appears in the display.
2 Turn AMS (or press ./> repeatedly) until “All
Erase?” appears, then press AMS or YES.
“All Erase??” appears in the display.
3 Press AMS or YES.
“Complete!” appears for a few seconds and all the
track names and disc name are erased.
To cancel the operation
Press MENU/NO or x.
Erasing a portion of a track (A-B Erase)
You can easily erase a portion of a track by specifying the
starting and ending points of the erasure. This is
convenient for erasing the unwanted portions of
recordings of satellite or FM broadcasts.
Example: Erasing portion “B2” of the second
track
AAA BBB
B1 B3B2
CCC
1 2 3
AAA
B1 B3
CCC
1 2 3
BBB
1 Press MENU/NO while the recorder is stopped,
playing, or paused.
“Edit Menu” appears in the display.
2 Turn AMS (or press ./> repeatedly) until “A-B
Erase?” appears in the display; press AMS or YES.
3 Turn AMS (or press ./> repeatedly) until the
number of the track containing the portion to be
erased appears, then press AMS or YES.
“-Rehearsal-“ and “Point A ok?” alternate in the
display and the recorder repeatedly plays the portion
of the track from the point where AMS or YES was
pressed.
4 While monitoring the sound, turn AMS (or press
./> repeatedly) to locate the starting point of
the portion to be erased (point A).
The position is moved one frame* (f) at a time (one
frame = 1/86 sec.).
* Monaural tracks or tracks recorded in LP2 stereo
move two frames at a time; LP4 stereo tracks move
four frames at a time.
To quickly choose point A
Press m/M in step 4 repeatedly to select frame,
second or minute. The selected unit flashes in the
display.
5 Repeat step 4 until point A plays properly
6 Press AMS or YES to enter point A
“Point B set” appears, and playback from point A
begins.
7 Continue playing the track or press M to locate
the ending point of the portion to be erased (point
B), then press AMS or YES.
“A-B Ers” and “Point B ok?” alternate in the display
and a few seconds of the track before point A and after
point B play back repeatedly.
8 Repeat step 4 until B has been correctly located
9 Press AMS or YES to enter point B
“Complete!” appears for a few seconds, and the
portion between A and B is erased.
To cancel the operation
Press MENU/NO or x.
Note
When “Impossible” is displayed, the portion of the track
cannot be erased.
After repeated editing of a track, it may become impossible
to erase a portion of the track any further. This is a
technical limitation of the MD system, and is not a
mechanical error.
Erasing consecutive tracks (Multitrack
Erase)
Consecutive tracks can be specified to be deleted at one
time.
1 Press MENU/NO while the recorder is stopped,
playing, or paused.
“Edit Menu” appears in the display.
2 Turn AMS (or press ./> repeatedly) until “M-Tr
Erase?” appears in the display; press AMS or YES.
3 Turn AMS (or press ./> repeatedly) until the
number of the first track to be erased appears, then
press AMS or YES.
4 Turn AMS (or press ./> repeatedly) until the
number of the last track to be erased appears, then
press AMS or YES.
“M-Tr Ers OK?” appears with the numbers of the first
(
) and last (#) tracks also appearing as “ - #→Ers”.
5 Press AMS or YES
“Complete!” appears for a few seconds, and the tracks
selected in steps 3 and 4 are erased.
To cancel the operation
Press MENU/NO or x.
 Loading...