1-26
106
Changing menu options
Changing menu options
Yo u can change the tape length, auto play
and auto repeat settings. Normally the
default settings are used. Change these
settings if necessary.
1
Press SET UP when the DVD player is in stop
mode.
2
Press V/v to select (VIDEO) and press
ENTER.
3
Press V/v to select the option to change.
SET UP
V/v/B/b
ENTER
H PLAY
Language
Channel Setup
Auto Power Off
RF Output Channel
Clock Set/Adjust
:English
[ Off ]
[3CH]
RETURN
OPTION SETUP
SET UP
ENTER
vV
Tape Length
Auto Play
RETURN
VIDEO FUNCTION SETUP
SET UP
vV bB
[ T120 ]
[ On ]
Auto Repeat
[ Off ]
Tape Length
Auto Play
RETURN
VIDEO FUNCTION SETUP
SET UP
vV bB
[ T120 ]
[ On ]
Auto Repeat
[ Off ]
107
Changing menu options
VCR Additional Operations
Menu choices
The default settings are indicated in bold print.
4
Press B/b to change the setting.
5
Press SET UP to exit the menu.
Menu option Set this option to
Tap e Length • T-120 when using a T-120 or shorter length tape.
•T-160 when using a T-160 length tape.
•T-180 when using a T-180 or longer length tape.
Auto Play • On to start playback automatically, when you insert a tape with
its safety tab removed.
•Off to turn off Auto play. You need to press H PLAY to start
playback, even if you insert a tape with its safety tab removed.
Auto Repeat • On to play back a tape repeatedly. The VCR rewinds a tape to
the beginning and restarts playback automatically.
• Off to turn off Auto repeat.
108
Editing with another VCR
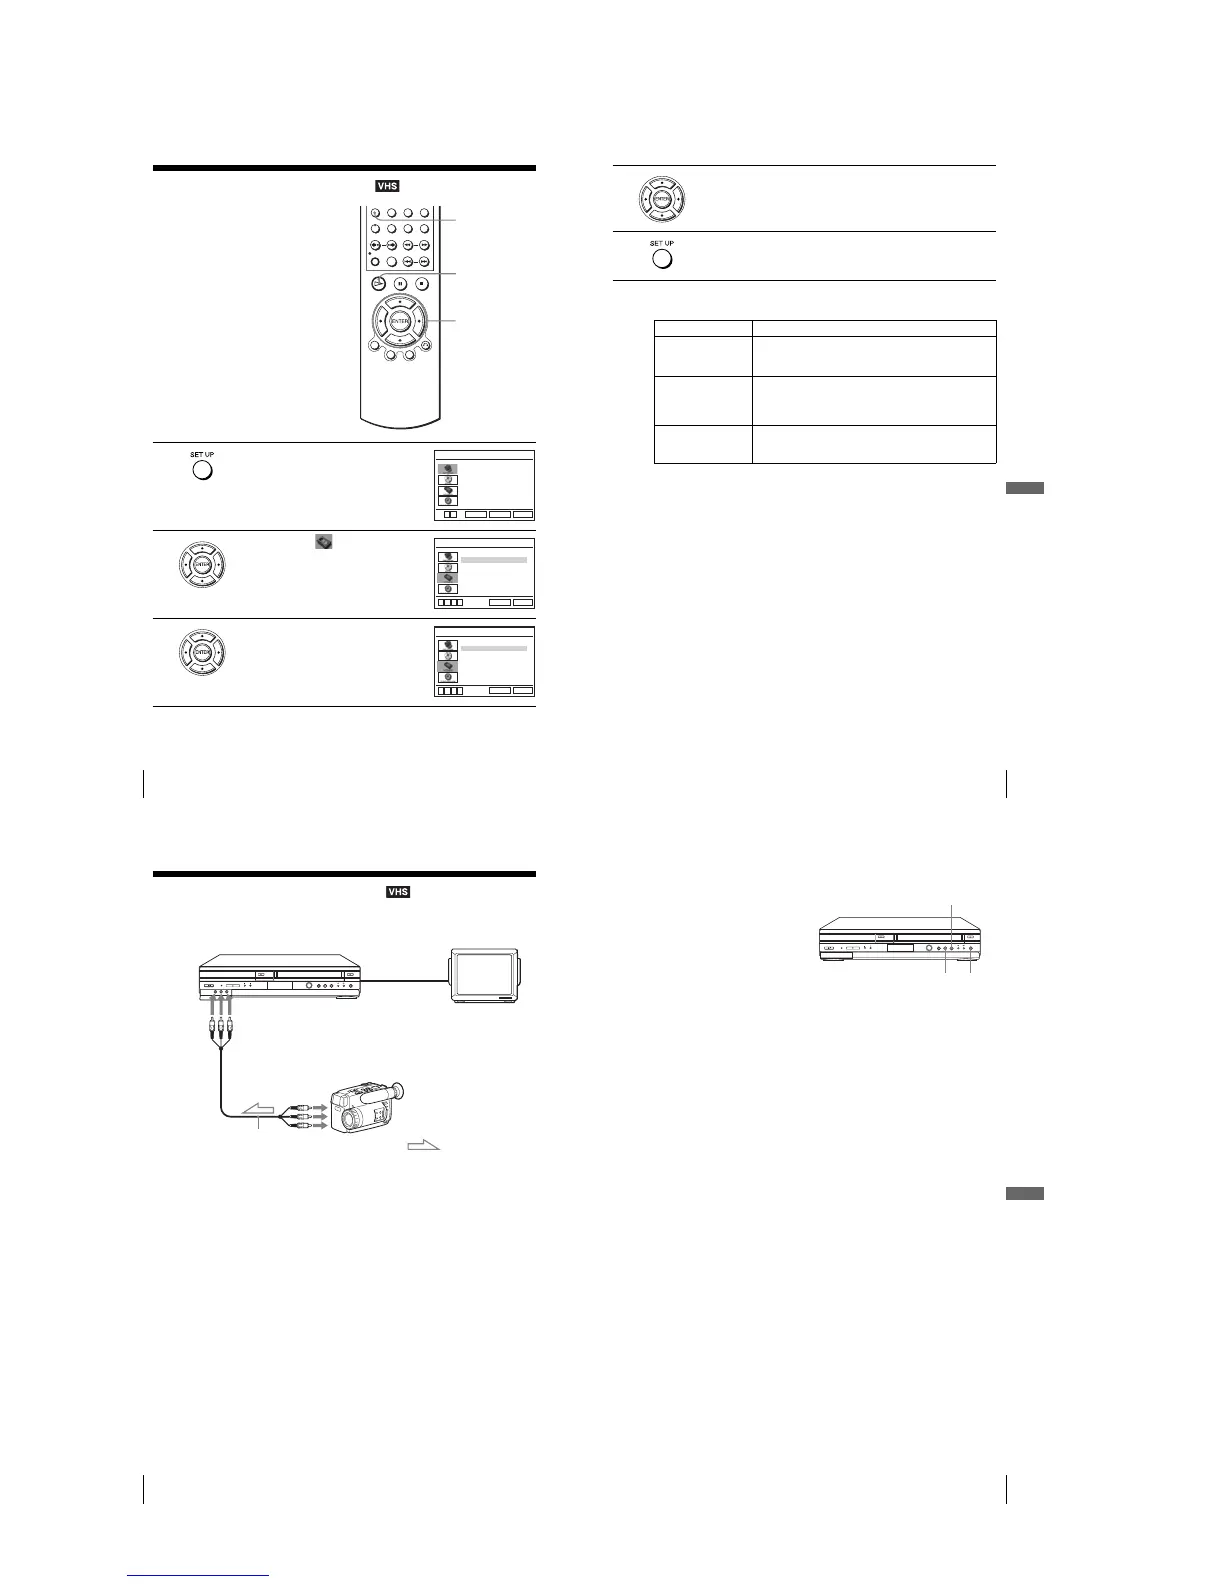
Editing with another VCR
How to connect to record on this VCR
Notes
•Make sure you connect the plugs to jacks of the same color.
• If the other VCR is a monaural type and connected to this VCR’s LINE-2 IN jacks, connect
the audio plug to the AUDIO L (white) jack. The sound is recorded on both right and left
channels. If you connect to the AUDIO R (red) jack, the sound is recorded only on the right
channel.
• If you connected this VCR to both the LINE IN and LINE OUT jacks of the other VCR,
select the input correctly to prevent a humming noise.
•You can use the LINE IN 1 jacks for editing. If the other VCR is a monaural type the sound
is recorded only on the channel whose jack is connected to the audio plug. To record on both
right and left channels, connect the audio plugs to the AUDIO L/R jacks using an audio/video
cord (not supplied).
This VCR (Recorder)
Other VCR (Player)
LINE OUT
: Signal flow
LINE-2 IN
TV
Audio/video cord
(not supplied)
109
Editing with another VCR
VCR Additional Operations
Operation (when recording on this VCR)
To stop editing
Press the x (stop) buttons on both VCRs.
Tip
•To cut out unwanted scenes while editing, press X on this VCR when an unwanted scene
begins. When it ends, press X again to resume recording.
Before you start editing
•Turn on the VCR and the TV and set
it to the video channel.
•Press INPUT SELECT to display
“L1” or “L2” in the display window.
•Press SP/EP to select the tape speed,
SP or EP.
1
Insert a source tape with its safety tab removed into the other (playback) VCR.
Search for the point to start playback and set it to playback pause.
2
Insert a tape into this (recording) VCR. Search for the point to start recording
and press X.
3
Press z REC on this VCR to set it to recording pause.
4
To start editing, press the X (pause) buttons on both VCRs at the same time.
z REC
X
x