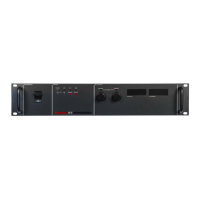
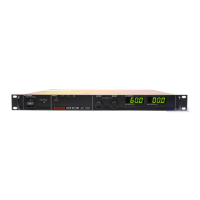
THEORY OF OPERATION SORENSEN DCS SERIES MANUAL
3-6
Auxiliary Supply and 6.2V Reference Circuit
Transformer T4, rectifier CR42 and capacitors C9 and C10 provide the raw dc supply voltages from which the
+12V and +5V auxiliary supplies are derived by three terminal regulators U10 and U11 respectively. Two
additional regulators (U12 and U13) provide the 12V feed to drive FETs Q7-Q12, Q18 and Q19 on the primary of
T2, and the 12V feed to PWM U6. Diodes CR40 and CR41 with capacitors C7 and C11 provide the negative input
to three terminal regulator U9 which supplies the -5V auxiliary output. Resistor R2 and Zener diode CR1 are used
to derive a stable 6.2V reference from the +12V auxiliary supply for use on the front panel meters (via pin 5 of
connector J1) and the A2 PCB. Transistor Q5, diode CR32, resistors R60-62 and Zener diode CR20 form a low
voltage lock out which disables the power supply output by shutting down the PWM should the auxiliary raw
supply fall below the threshold set by CR20.
Voltage and Current Control Current Sources
Op amps U2-1 and U2-2, transistors Q1 and Q2, and related components are used to provide 1mA current sources
for the front panel voltage and current controls. These current sources are also used for remote resistive
programming of the output voltage and current limit.
Over Voltage Protection Circuit
Op amp U3-1, transistor Q4 and related components provide a 1mA current source which is fed to the front panel
OVP adjusting pot via the external jumper connecting pins 3 and 16 of connector J3, switch SW1-8 and pin 17 of
connector J1. This current source and the OVP adjusting pot provide a 0-5V reference at pin 6 of U3-2, the OVP
control op amp. The power supply output voltage is monitored at pin 5 of U3-2 through the resistor divider formed
by R80, R89 and R148. When the output voltage increases such that the voltage at pin 5 becomes higher than that
at pin 6 the output of U3-2 goes high activating MOSFET Q17 (via drive FET Q2A) which clamps the power
supply output off through resistor R93. Diode CR25 latches U3-2 on while diodes CR23 and CR24 gate the high
signal to the shutdown pin of the PWM. The OVP indicator on the front panel is biased on via pin 15 of connector
J1 when the OVP is activated. The OVP may be reset by cycling the power switch off and then back on to release
the latch provided by CR25 or by momentarily activating the remote shutdown circuit which causes pin 6 to be
pulled high through diode CR10.
During remote voltage programming of the OVP trip level the internal 1mA current source is disconnected by
removing the jumper connecting pin 3 and 16 of connector J3 and the reference voltage at pin 6 of U3-2 is
provided directly by the external voltage source. Switch SW1-4 is used to select the programming range; 0-5V
(with the switch closed) or 0-10V (with the switch open). For current programming the internal 1mA current
source is replaced with a 0-1mA external source to provide the required 0-5V reference signal. For resistive
programming switch SW1-8 is opened to disconnect the front panel adjusting potentiometer and the internal 1mA
current source is connected to the external 0-5k ohm potentiometer to provide the 0-5V reference.
Remote ON/OFF Circuit
A TTL high signal applied between pins 14 (positive) and 2 (negative) of connector J3 activates opto coupler U1
which turns on transistor switch Q3 by pulling its base low. This applies 12V through diode CR11 to the
shutdown pin of the PWM thereby shutting down the power supply output. A 12-250Vac or 12-130Vdc signal
applied between pins 1 (positive) and 2 (negative) of connector J3 will also activate U1 and disable the power
supply output. Diode CR14 rectifies ac inputs while resistors R37 and R38 limit the current through the opto
coupler. Diode CR13 provides protection against reverse polarity TTL signals.
www.valuetronics.com