Never force the installaon of any parts. All parts t correctly without force.
If parts don’t seem to t, remove all parts and repeat assembly.
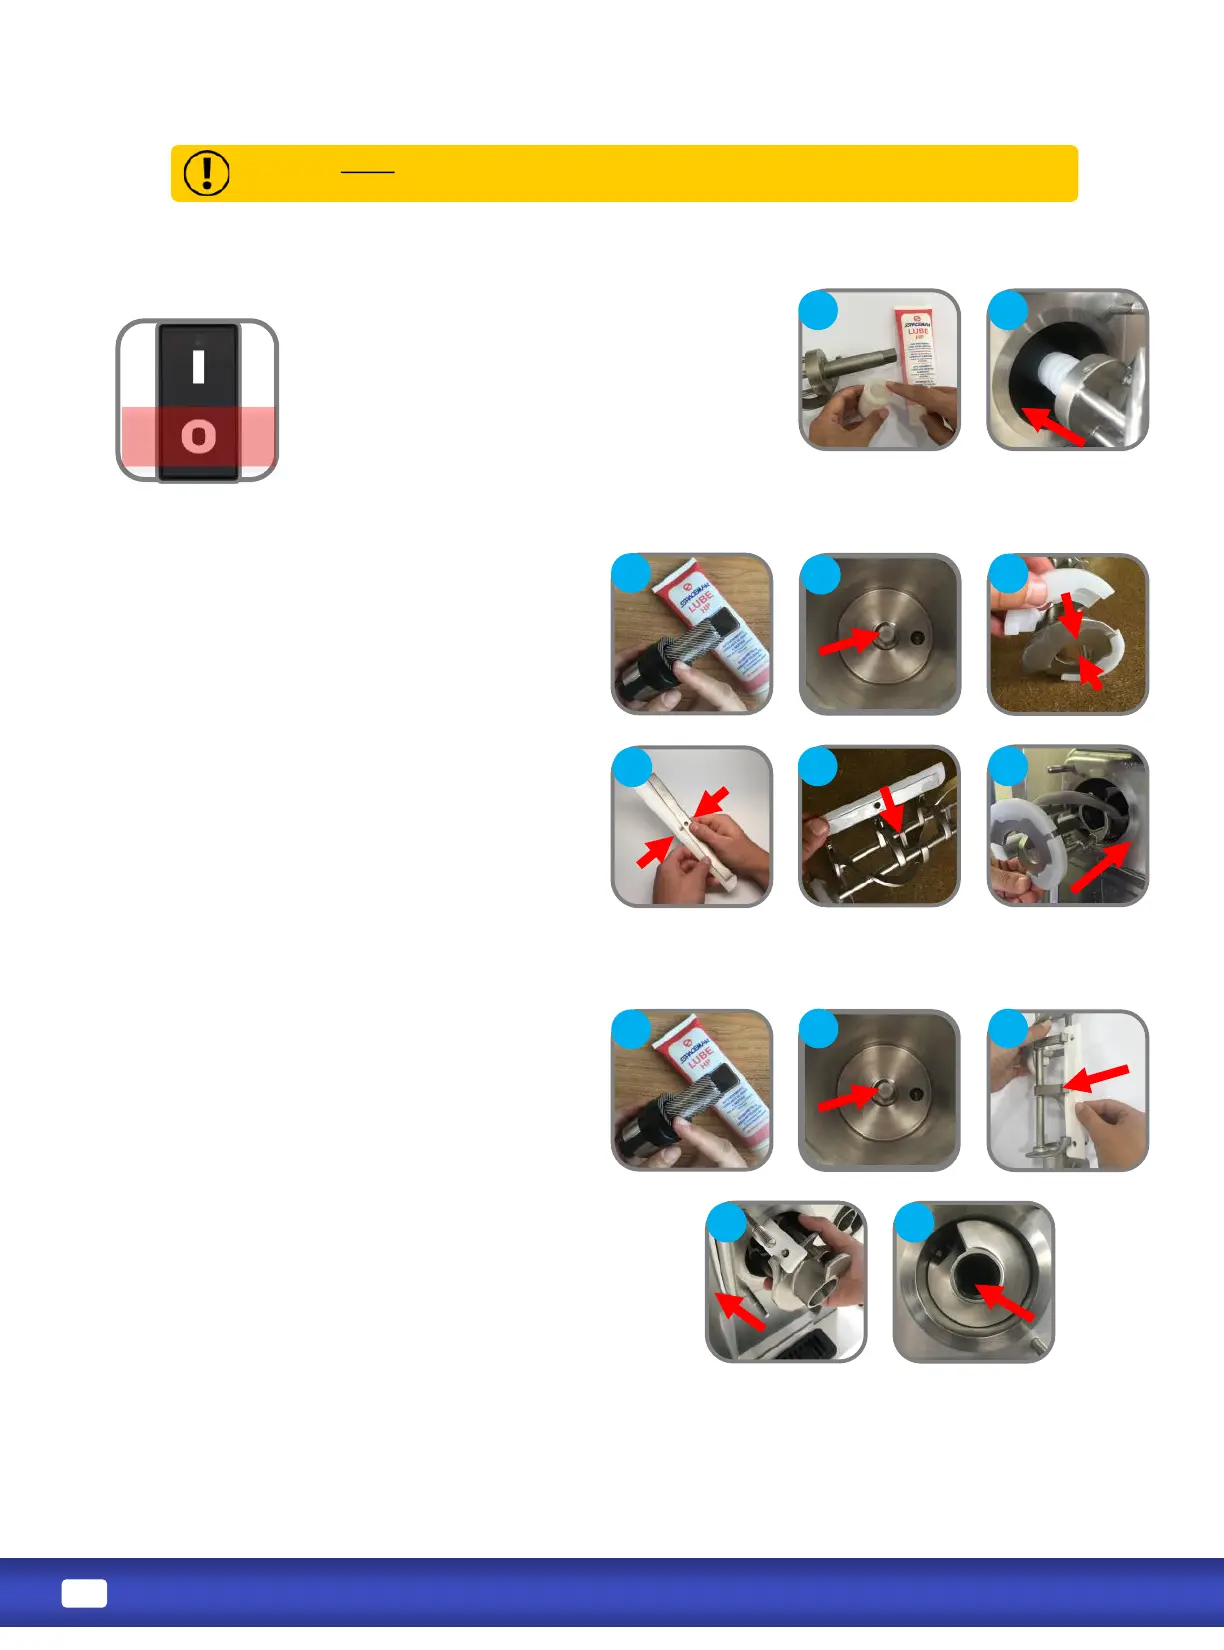
a. Install drive sha seal; lubricate drive sha and
end of seal (Shaded Area).
b. Insert drive shas into rear shell bearings at the
back of the cylinders, and turn them unl the key
engages rmly into the socket (when inserted
correctly, the drive sha will no longer turn 360°).
c. Aach beater shoes onto beaters; when properly
placed, neither shoe overhangs beater edge.
d. Install scraper blade clips onto scraper blades.
e. Fit scraper blades onto beaters.
f. Insert beater assemblies into cylinders, making
sure beater shoes stay in place; turn assemblies
unl they engage the drive sha keys and no
longer turn 360°.
a. Install drive sha seal; lubricate drive sha and
end of seal (Shaded Area).
b. Insert drive shas into rear shell bearings at the
back of the cylinders, and turn them unl the key
engages rmly into the socket (when inserted
correctly, the drive sha will no longer turn 360°).
c. Fit scraper blades onto beaters.
d. Insert beater assemblies into cylinders, making
sure beater shoes stay in place; turn assemblies
unl they engage the drive sha keys and no
longer turn 360°.
a. Lubricate the seal on both ends; then place
seal on the beater.
b. Insert beater assemblies into cylinders,
making sure beater shoes stay in place; turn
assemblies unl they engage the drive sha
keys and no longer turn 360°.