H.264 Network Digital Video Recorder User Manual
Page 20
2)Scan Calls
In Picture 3.10, click Page Shift button, then enter PTZ control menu as shown in Picture 3.12. Please
input the number of scan in the value blank , then click Scan button,PTZ begins to work on the scan line .
Click Stop button to stop.
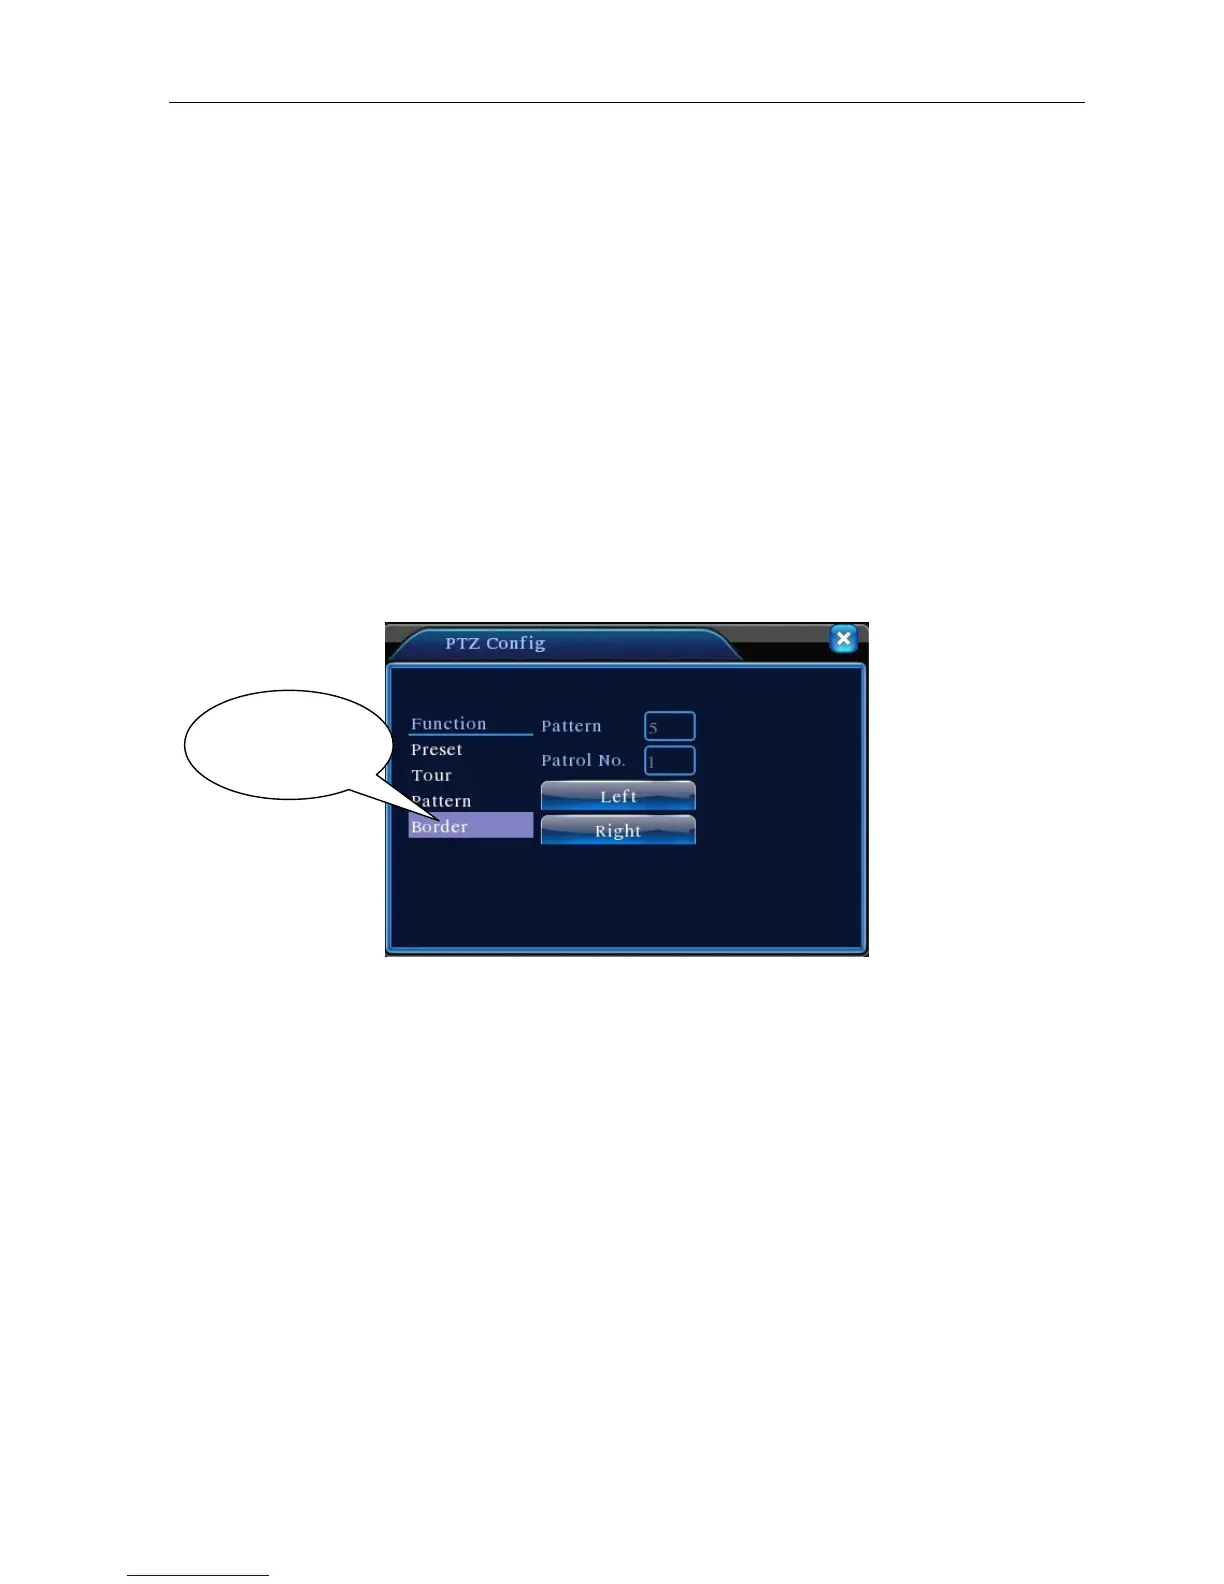
4.Boundary Scan
1)Boundary Scan setup
Step1:In Picture 3.10, click Direction button to turn the PTZ to preset direction, then click Setup button
enter Picture 3.15, select the left boundary, return to Picture 3.10;
Step2:Please click direction arrows to adjust PTZ direction, click Setup button enter Picture3.15, then
select the right boundary ,return to Picture 3.10;
Step3: Complete setup, that is the position of left and right boundary
Picture 3.15 Boundary Scan Setup
2)Boundary Scan Calls
In Picture 3.10, click Page Shift button, then enter PTZ control menu as shown in Picture 3.12. Please
input the number of scan in the value blank , then click Scan button,PTZ begins to work on the scan line .
Click Stop button to stop.
5. Horizontal Rotating
Click Horizontally Rotating button, PTZ begins to rotate horizontally (relative to the original position of the
camera). Click the Stop button to stop.
6.Rotate
Click on horizontal Rotating button, PTZ turn around.
7.Reset
PTZ restart, all the data clears to 0.。
Line scan button
border