INDEX Page. 34 of 92
2) To Set ANTENNAS:
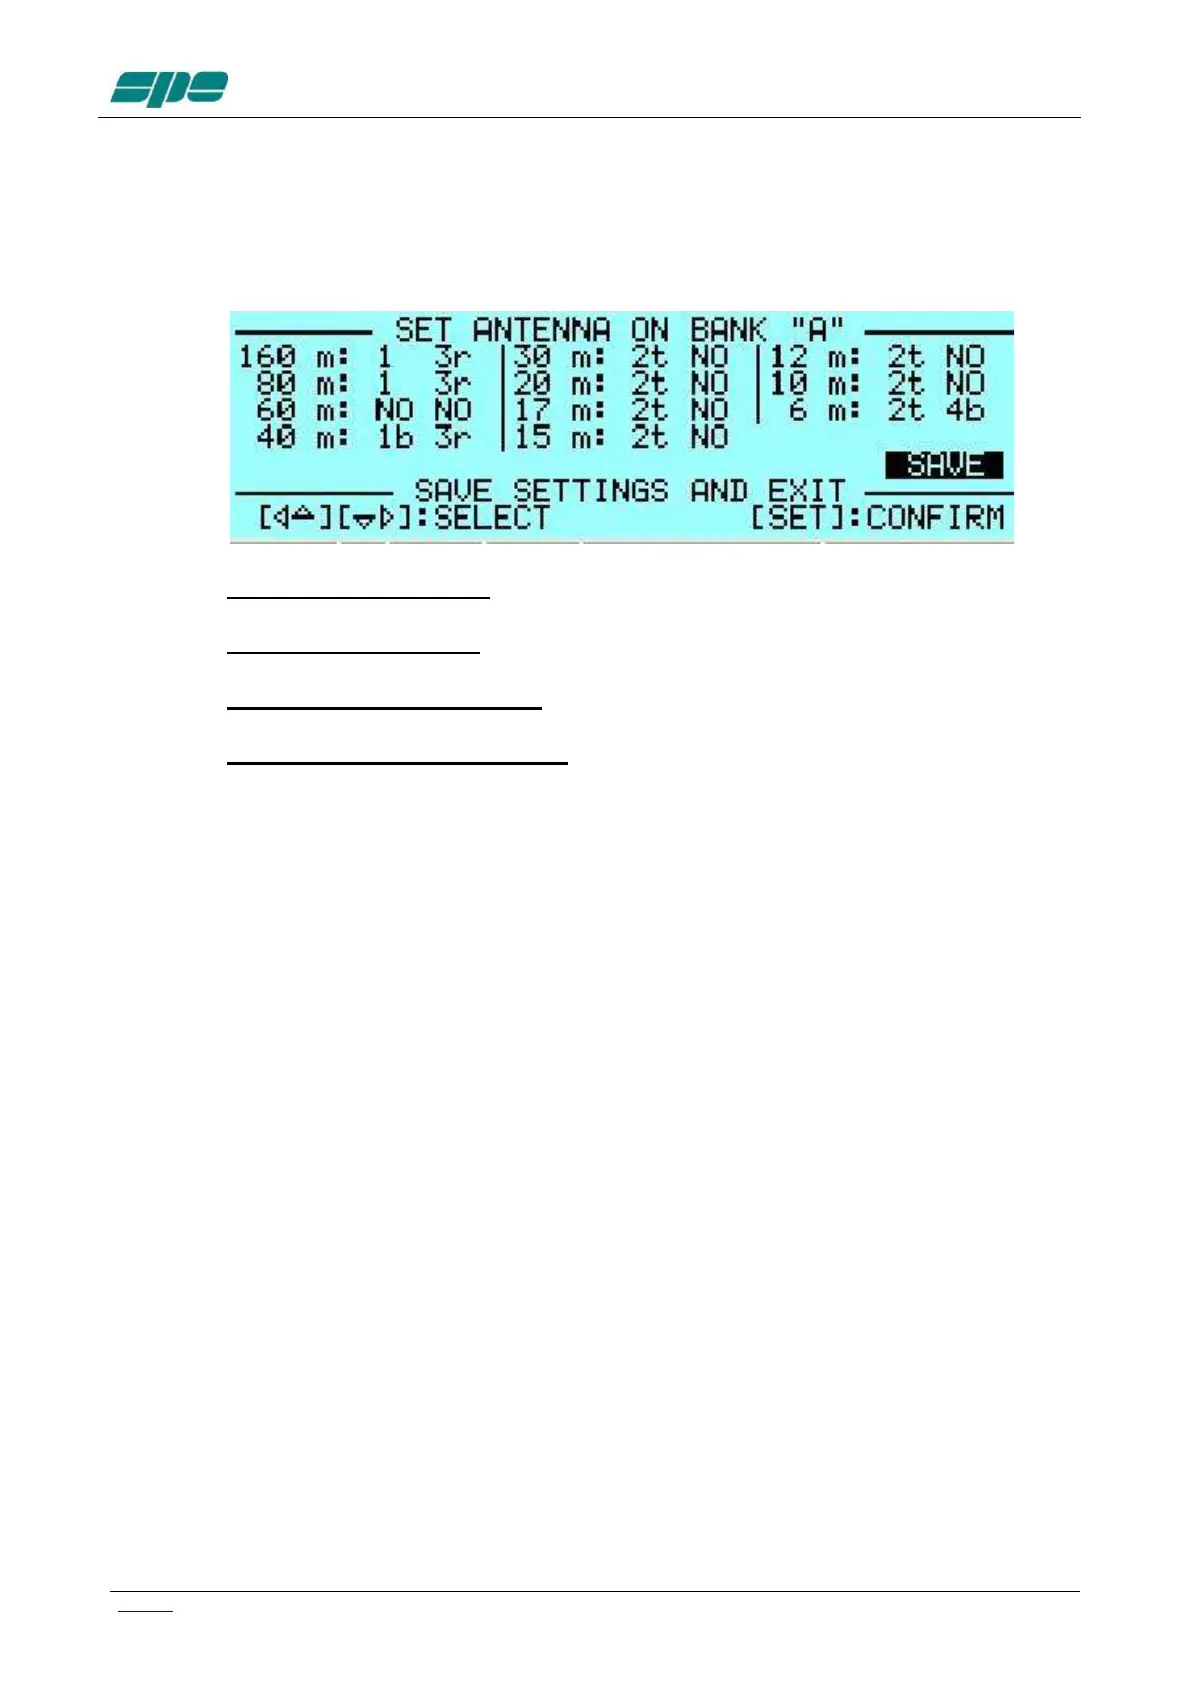
Press [SET] and open the “ANTENNA“ menu page.
Assign an appropriate antenna output number for the desired band.
If you don’t have an antenna for that band, select “NO“.
To bypass the Tuner on a certain band and/or a certain antenna, just
press the [TUNE] key, you will see a "b" next to the antenna number.
To remove the bypass, just press [TUNE] again.
To select a tunable antenna, refer to the “TUN ANT” item on the menu.
Next to the number of the tunable antenna in use will appear a “t”.
To select a receiving antenna, refer to the “RX ANT” item on the menu.
An “r” will appear next to the number of the receiving antenna in use.
When all the antennas are programmed, press [SAVE] to exit and the screen
will go back to STANDBY.
3) To Set CAT:
Press [SET] and open the “CAT“ menu page
Select the transceiver brand and proceed with programming according to the
type of connection between the amplifier and the transceiver (read
the “CONNECTIONS” chapter of this manual).
At the end of programming, exit and go back into STANDBY.
To verify the correctness of your programming, press the [CAT] key, and all the
data stored will appear on the display.
To verify proper “CAT” operation, press [SET], step to “MANUAL TUNE” and push SET.
When moving your transceiver’s VFO you should see the same frequency on the display.
If “CAT” is set to "NONE", only the internal frequency meter will work, so to check the
frequency transmit in RTTY or FM mode.
ATTENTION: to avoid possible inconveniences, limit the use of the "NONE" to only those
instances where the classic CAT connection is not feasible (see page 11).
If “BAND DATA“ is used, check that the amplifier follows band changes of the transceiver,
then transmit in RTTY or FM in order to verify the frequency.
Exit and return to STANDBY
If it does not do so, verify that your programming (or your connection) has been correctly
made.


 To Next Page