8
5.3.5 Scan Mode
Press and hold button 4attheStandardDisplayforthreesecondstochangetheunitintoscan
mode.
Quicklypressandreleasebutton4totogglebetweenthepre-selectedscansizes5,15,45,90,
180degreesand0;regardlessiftheunitisinautomaticormanualmode.
Whenworkinginhorizontalautomaticmode,pressandholdbutton5/8toincrease/decreasethe
linesizein5degreesincrements.Pressandholdbutton 6/7movesthescanlinetotheright/leftdirection.
Whenusedinautomaticverticalmode,pressingandholdingbutton5/8movesthescanlinecounterclockwise/
clockwise.Whensetupvertical,pressingandholdingbutton6/7movesthescanlineintotheright/leftdirection
regardless if in automatic or manual mode.
Note:Pressandholdbutton4 for three seconds to change the unit back to rotation mode (default) mode.
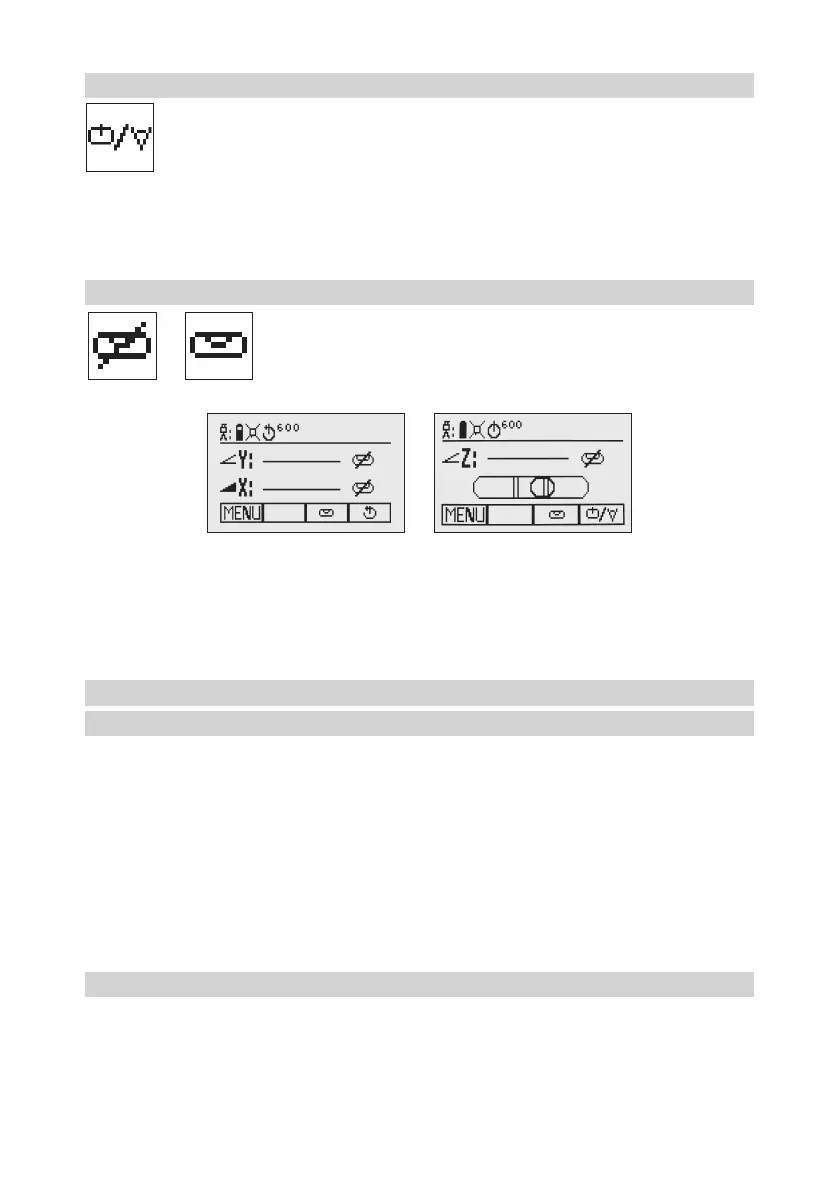
5.3.6 Manual Mode
Pressing and releasing button 3attheStandardDisplayactivates/deactivates
the manual mode regardless if set up horizontal or vertical.
Manualmodeisindicatedbyhorizontallinesnexttotheaxessymbols(Pic12).
Anadditional bubble helps to adjust the laser on the cross axis when set up
vertical (Pic 13).
Inmanualmode(horizontal),theY-axiscanbeslopedbypressingtheUp-(5)andDown-Arrow-(8) buttons on
thelaser‘skeypadortheremotecontrol.Additionally,theX-axiscanbeslopedbypressingtheLeft-(6) and
Right-(7)Arrow-buttonsonthelaserorremotecontrol.
Inmanualverticalmode,theupanddownarrowbuttonsadjusttheZ-axisslope,andtheleftandrightarrow
buttonsalignthelaserbeamtotheright/leftside.
To resume automatic self-leveling mode, press the manual button again.
6 SPECIAL MENU FEATURES
6.1 Menu Functions (Radio controlled)
Press and release button 1attheStandardDisplaytoentertheMENU.
The menu offers always only the features which can be selected depending on the setup (horizontal
or vertical).
The icon of the selected function will be highlighted.
A down arrow at the the right site indicates that the user can scroll down through the menu using the
button 8 (down arrow).
Aftergoingtothenextmenurow,anup/downarrowatthetherightsiteindicatesthattheusercanscrollup/
down through the menu (4 different screens) using the buttons 5/8(up/downarrows).
Pressing and releasing button 3 changes the unit always back to the standard or previous display.
Press and release the buttons 6/7 until the desired icon at the selected menu row is highlighted.
Press and release button 4toopenthesubmenuORstarttheselectedfunction.
6.2 Menu Functions (IR controlled)
IftheRC603Nispairedwithatransmitterandtheradioconnectionisnotavailable,e.g.,throughapipe,the
IRconnectionoffersreducedfunctionssuchasSpotAlign,SpotMatchandPairing.
Pic 12 Horizontal manual
Pic 13 Vertical manual

 Loading...