17
8 Settings
PressandreleasetheMENUbuttonattheStandardDisplayandselectSettings(Pic59).
Press and release button 4toopentheSettingMenu;selectthedesiredfunctionthenpressbutton
4toopentheselectedsubmenufunctionORstarttheselectedfunction.
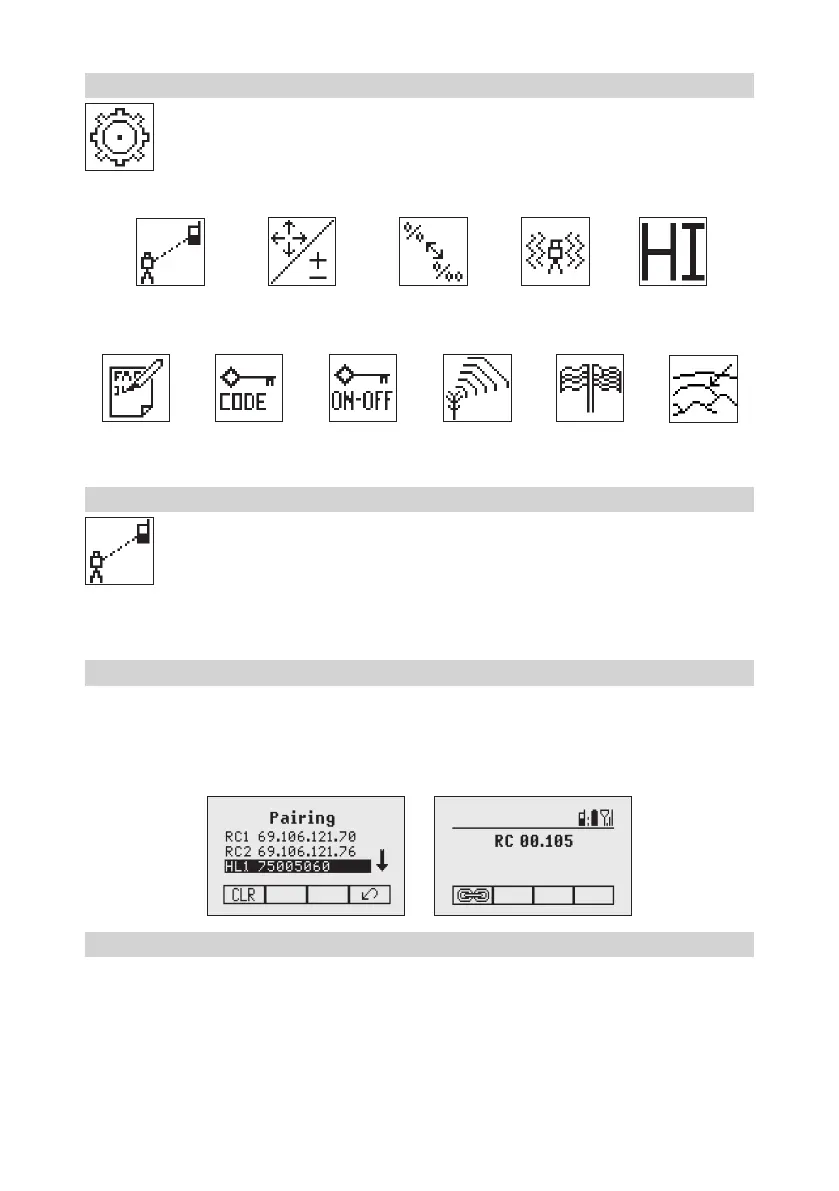
TheSettingMenuoffersthefollowingfunctions:
Pairing
Grade Entry Grade Display Sensitivity
HI-Alert
User Name Set Password Password On/Off RF-Channel
Select
Language
Position Info
8.1 Pairing
Pairing is needed to couple different devices with the laser. The laser is able to communicate with
several numbers of other radio network participants and pairing is the process to link these to each
other.Buyingthelaseralldevicesshouldbepairedbutforsomereasonsthismaynotbetrue
or the pairing has been lost. So you can pair the devices as described in the following sections.
Note:Makesurethatpairingmodeisselectedonlyatonelaserwhichiswithintheradiorangeoftheremote
duringapairingrequest.Otherwisepairingprocedurecanbeconfused.
8.2 Pairing the laser with remote control
Startwiththelaser.WheninmenuSettings(Pic59),pressandreleasebutton4toopenthepairingmenu
(Pic71).Thedisplayshowsthecurrentlypairedunits(uptotworemotes).MakesureatleastoneRCslotis
freefortheremotetobepaired.IfnofreeRCslotisavailable,chooseoneofthemanddeleteitusingbutton
1(CLR).Pressbutton2tostartthepairingprocess.Continuewiththeremotechoosingthesymbolpairing
(Pic71);thepairingstartsautomatically.Aftersuccessfulpairing,thelaserdisplayshowstheIDoftheremote
in the pairing list.
8.3 Pairing the laser with receiver HL760
To pair the laser and the receiver select Settings and press and release button 4 to open the Pairing menu (Pic
71).Thedisplayshowsthecurrentlypairedunits(upto2receivers).Ifalready2receivershavebeenpaired,
one or both of them have to be deleted using button 1(CLR).
Pic59
Settings
Pic71Pairing

 Loading...