9
PressandreleasetheMENUbuttonattheStandardDisplay.
Pressing and releasing button 3 changes the unit always back to the standard or previous display.
Press and release the buttons 5 to 8 until the desired icon is highlighted.
Press and release button 4toopenthesubmenuORstarttheselectedfunction.
Note: Pairing function is needed to pair an already paired remote with a new transmitter.
The new transmitter has to be set to the pairing dialog for this operation. Otherwise the pairing can not be
successful processed.
The pairing information of the previous pairing is still stored in the previous paired transmitter and should be
deleted in the pairing dialog of this transmitter
Note:Ifa remote ispaired withatransmitter theIRsignals oftheremote (incaseof aninterruptedradio
connection) will transmitted in a private mode so that only the paired transmitter can received these IR
commands.
6.3 Automatic PlaneLok Mode
The PlaneLok mode can be activated in horizontal and vertical
automatic and manual mode.
InPlaneLokmodewhensetuphorizontal,thebeamwillbelocked
toaxedelevationpoint(upto150m(490ft)locatedononeaxis
at each side of the laser.
Forkeepingverticalalignmentsxedtoadirectionpoint,PlaneLok
canbeusedinbothdirectionsontheY-axisand/orontheX-axis.
Note:IneveryPlaneLokmodethelasercontinuestoservotothe
receiver’ssignals.Anylossofsignaloveranextendedperiodoftime(1minute)causesthelasertogointo
theHI-alertcondition(beamturnsoff,rotorstopsandawarningmessageoccursattheLCD.PlaneLokmode
canbereactivatedaftertheerrormessagehasbeendeletedwithbutton4.ExitingofPlaneLokmodecanbe
donebypressingbutton3(ESC)oranyHL760button.
HorizontalSetUp:
1. Set up the laser over the reference point.
2.AttachtheHL760receivertoagraderod.PlacethereceiveratthesecondpointandadjustittotheOn-
grade position. The receiver should be permanently mounted at this location and at the desired elevation.
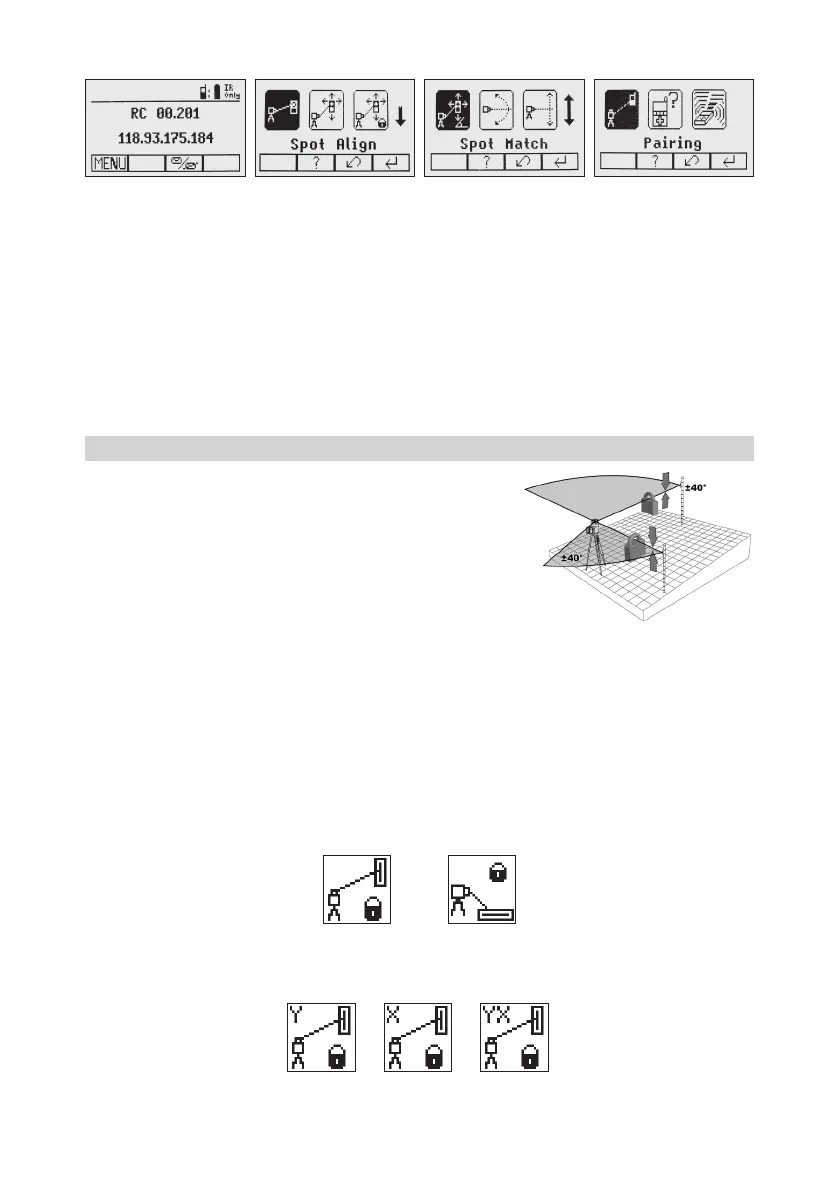
3.Usethesightingguidesonthetopofthelasertoalignthelasertothereceiver.Turnthelaseronthetripod
untilitisroughlyalignedtothereceiver’sposition(thealignmentrangeforbothaxesis+/-40°).
4.PressandreleasetheMENUbuttonattheStandardDisplayandselectPlaneLok(Pic14).
Pic 14 PlaneLok
horizontal
Pic15PlaneLok
vertical
5.Whensetuphorizontally,pressandreleasebutton4toopenthePlaneLoksubmenu;selectthedesired
PlaneLokaxisY(Pic16)orX(Pic17)orYandX-axis(Pic18)thenpressbutton4 to start PlaneLok.
Pic16PlaneLok
Y-Axis
Pic17PlaneLok
X-Axis
Pic18PlaneLokY-
andX-Axis

 Loading...