Page 48 of 98
118157-001 Rev C
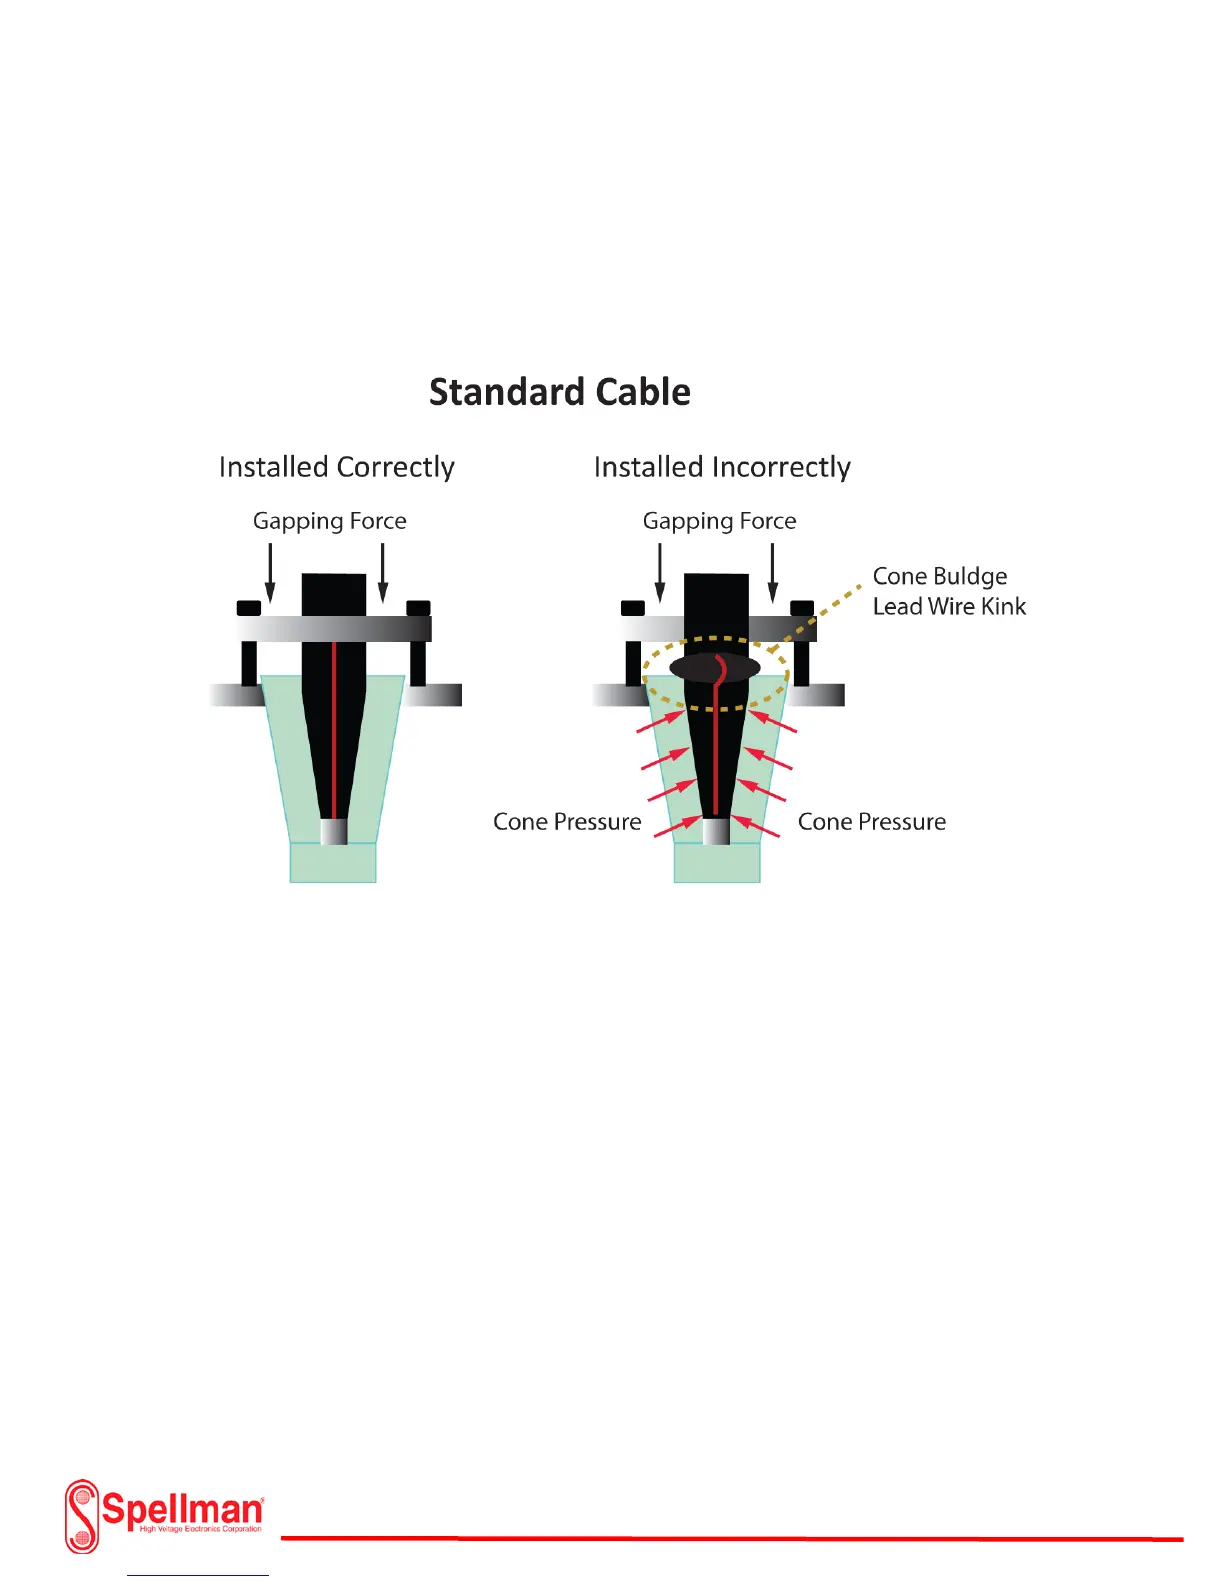
Standard High Voltage Cable Installation Problems:
High voltage arcing and failures can result from improperly gapped standard cables. Too much force on
a cable will cause the cone to bulge and deform creating voids within the receptacle. Another issue
involves stressing the filament and common connections resulting in breakdown. Never try to reuse a
kinked or bulging cable. Over application of silicone grease will also create voids and high voltage arcing.
Spring Loaded High Voltage Cable Installation:
Clean the spring-loaded cables and high voltage receptacles prior to insertion. Refer to the cleaning
procedures in the non-spring loaded section of this manual.
Wear nitrile gloves and obtain an X-ray tube cable flange. Wipe the flange with a lint free cloth and place
over a clean spring-loaded high voltage cable plug. (One cable flange will fit the X-ray tube and the other
will fit the XRV Generator). Rotate the flange counter clockwise on to the cable threads until it stops. Do
not cross thread the assembly. Insert the clean dry connector into the high voltage cable receptacle of
the X-ray tube with a small amount of force. Make sure the contact head of the cable filly inserts while
checking the gap. Refer to the “High Voltage Cable Gapping Distances” table for the correct gap
measurement. Use a gapping tool if available. When the desired gap has been set, rotate the cable
flange slightly so that the holes line up with the receptacle holes. Tighten the grub screws on the cable
flange so that it restricts it from rotating. Remove the cable plug and apply 2 thin beads on opposite
sides of the rubber cone. Distribute a thin coat of silicone evenly on the entire cone. Finish the
distribution by spreading in a circular fashion around the circumference of the cone. Do not apply any
silicone to the metal tip. If the silicone gets on the metal tip, use a clean dry lint free cloth to remove it.