Maintenance Waukesha Cherry-Burrell
®
Brand W70 Series Mix Proof Valves
Page 30 95-03087 10/2023
Radial Seat Ring
Replacement (for W72RS
Lower Stem)
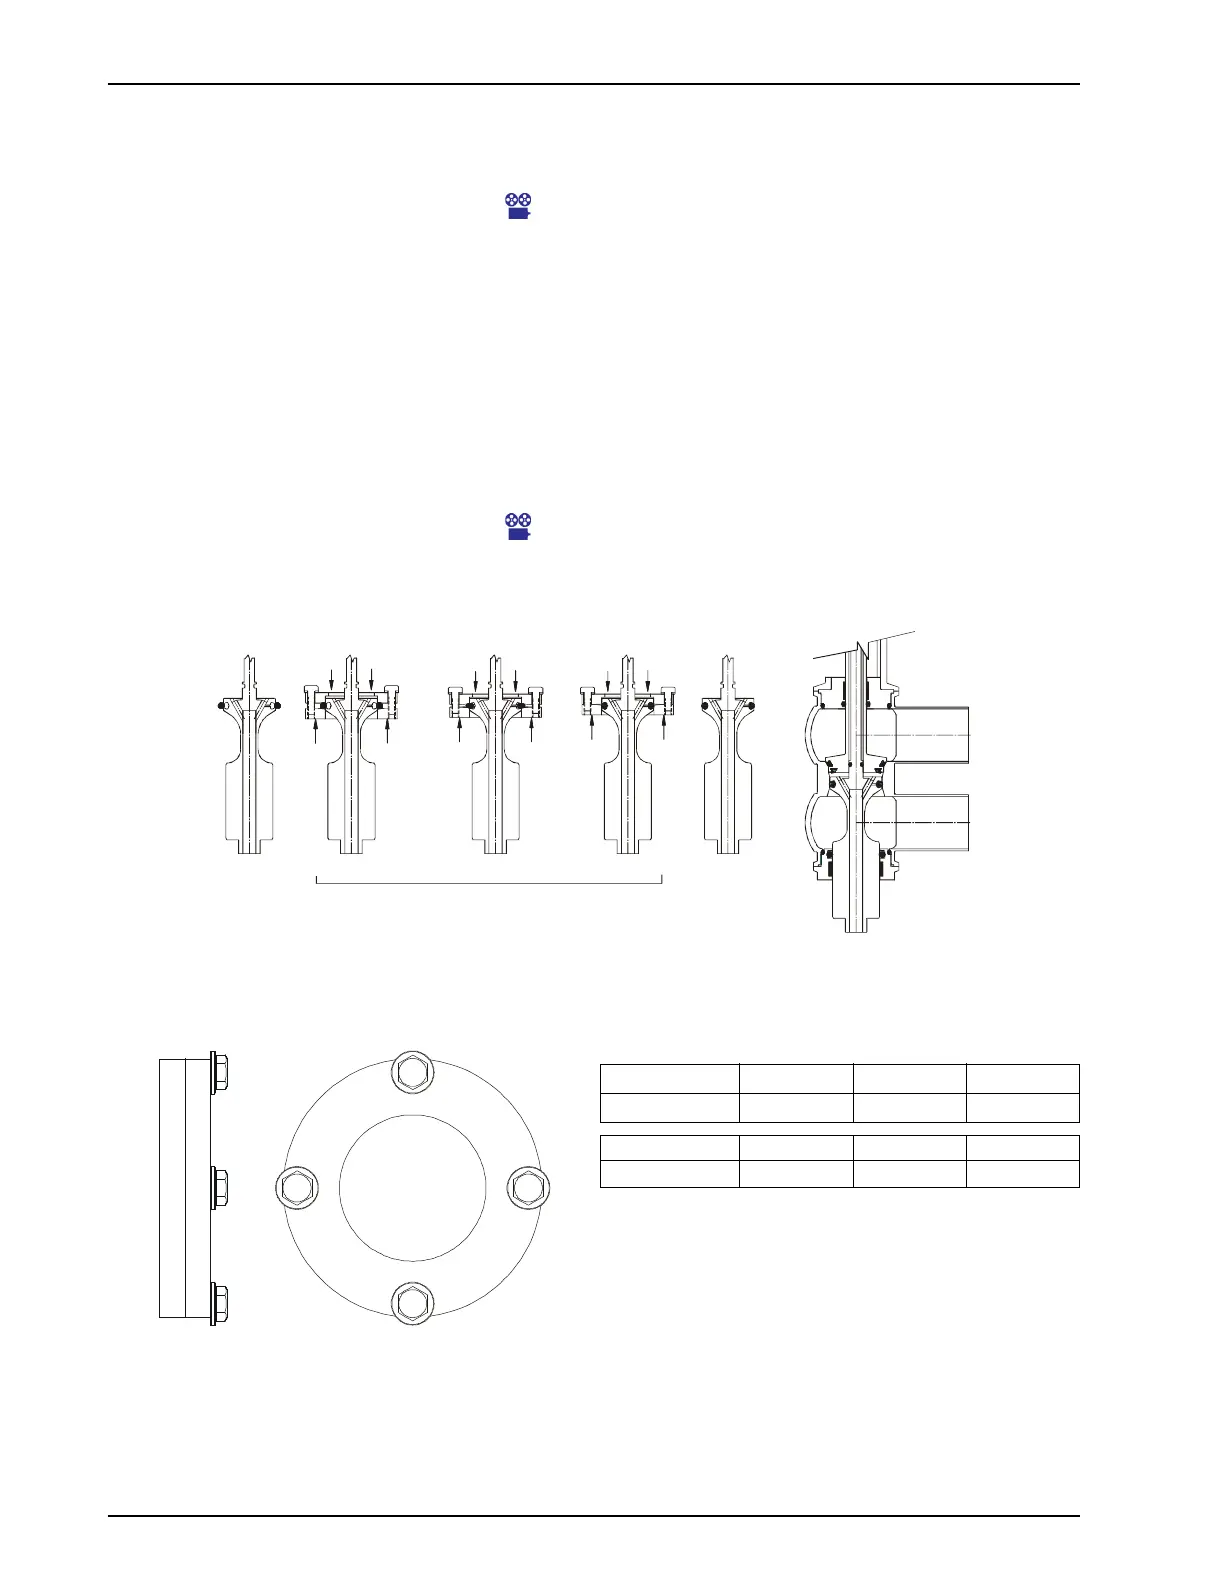
1. Remove the lower stem radial seal by carefully prying up and
cutting the O-ring. Do not scratch or nick the metal seating
surface.
Maintenance Video 11: Radial Seal Removal
2. Clean the radial seal groove after removal.
3. Ensure that the vent port in the back of the groove is clean
and unblocked.
4. Lubricate the O-ring seal and expand it over the stem groove.
5. Place the assembly tool over the stem, ensuring proper tool
orientation. Extrude the O-ring seal into the groove by evenly
tightening the cap screws on the installation tool.
6. Remove the tool. The dovetail groove permanently retains
the O-ring seal.
Maintenance Video 12: Radial Seat Ring Replacement
For a list of installation tools, see Figure 28 below and
“Installation Tools” on page 90.
Figure 27 - Radial Seal Installation
Valve Size 1-1/2" 2" 2-1/2"
Part No. 120048+ 120049+ 120051+
Valve Size 3" 4" 6"
Part No. 120053+ 120055+ 120057+
* W72RSP Valves only require the 4" tool.
Figure 28 - Radial Seal Insertion Collar Tool (for W72RS and W72RSP Valves)
 Loading...