23
_________________________________________________________________________________
OmniaTap xs
basic
; Version August 2023
Subject to technical changes
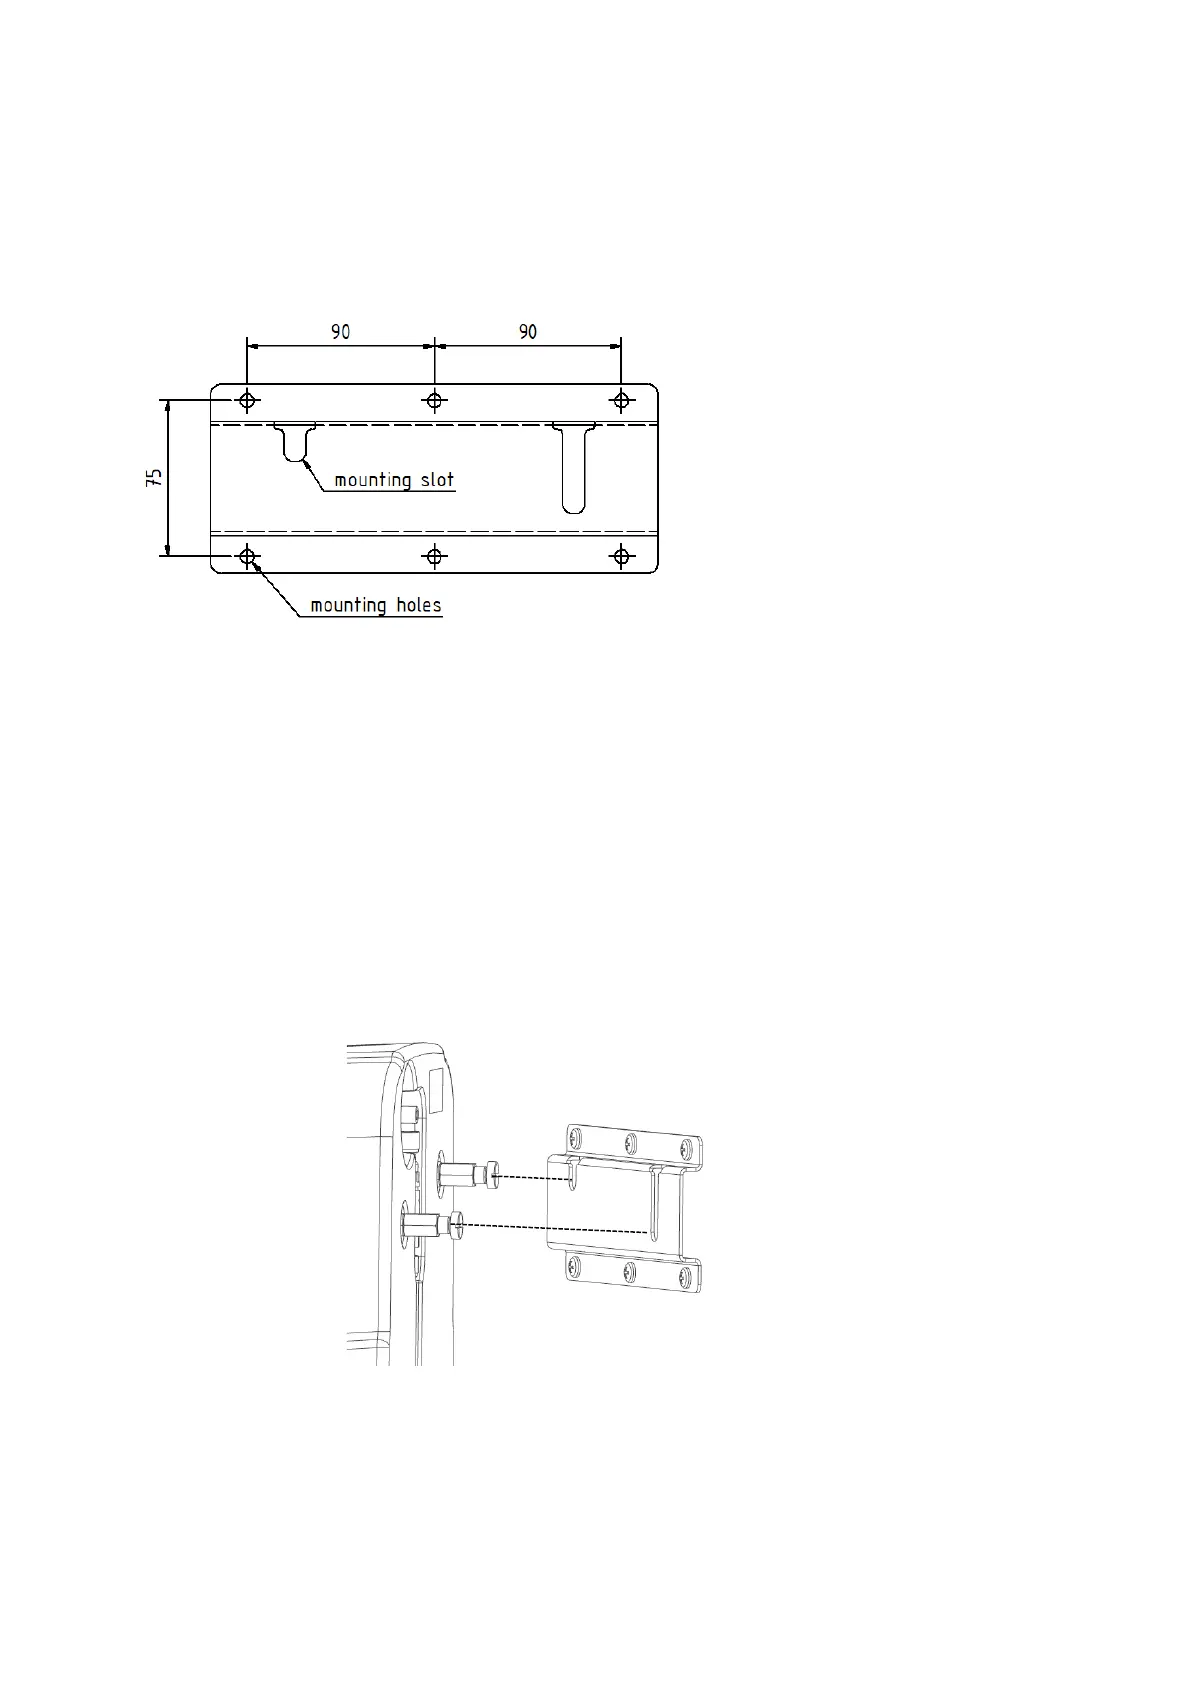
The next step is to attach the wall holder rail to the wall.
This requires 6 holes with a diameter of 8mm and a depth of at least 60mm. Drill the holes according
to the pattern shown in the "Wall Mount Rail" figure below. Pay attention to a horizontal alignment.
Then insert the dowels into the drilled holes and fasten the wall mounting rail to the wall with the
screws so that the two mounting holes are facing upwards. Please note that the fastening material
supplied with the wall holder is intended for installation in concrete and solid stone walls. If the wall
holder is to be attached to a wall made of a different material, the fastening material must be replaced
with a suitable one.
Now you can hang the OmniaTap xs system in the wall mounting rail. To do this, lift the system by
grasping the specified holding points (see "Transport and packaging"). When lifting the system, secure
yourself against falling with the help of a second person. Now hang the two locating bolts of the system
in the locating openings of the wall mounting rail. Make sure that the system is additionally supported
on the wall by the two stop buffers.